BEHIND THE SCENES
Major changes on this page as of December 2021. I originally used this page as kind of a page for things that didn't have a better page to be on. I'm revising it as kind of a 'how I do it' page for my style of modeling my railroad now that I've been doing it for a few years. For a reference point of that, I got back into model railroading in 2017 and hadn't done any before that since the 1970's as a teenager.
Materials I use
Paints
Almost everything I use is water based. I use latex house paint for covering large areas to seal plaster cloth, and for adding the first layer of ground cover. I use craft acrylics for adding ground cover to small areas, such as around structures and making roads, painting river and pond bottoms and whatnot. I also use them for coloring rock, painting structures and figures and just about anything else. The only things I use enamel model paints on are some plastic kits like vehicles or some details on structures and bridges and whatnot.
Scenery materials
For making the scenery bases, I use 3/16" plywood, cardboard, plaster cloth, 1/2" pink or blue insulation foam board, celluclay, wood glue, and a hot glue gun.
Structures
I would say from looking at what I've built so far, about 1/3 are cheap off the shelf kits, 1/3 craftsman kits, and 1/3 scratch built. I go through a lot of Evergreen plastics, cardboard, various brands of shingles, Grandt line components, etc. etc.
Lighting
I add lighting to most of my structures. I use only Woodland Scenics' Just Plug lighting system for all of my lighting. It's easy and fool proof and I ain't no electrician.
Techniques I use
I think it was legendary model railroader Dave Frary that once said something along the lines of 'it doesn't matter what you make it out of, because what you see is the paint'. So I'll talk a little bit about what's under my paint. I've you've been looking at the rest of this website you've probably got an idea of that already, but here goes.
Scenery Bases
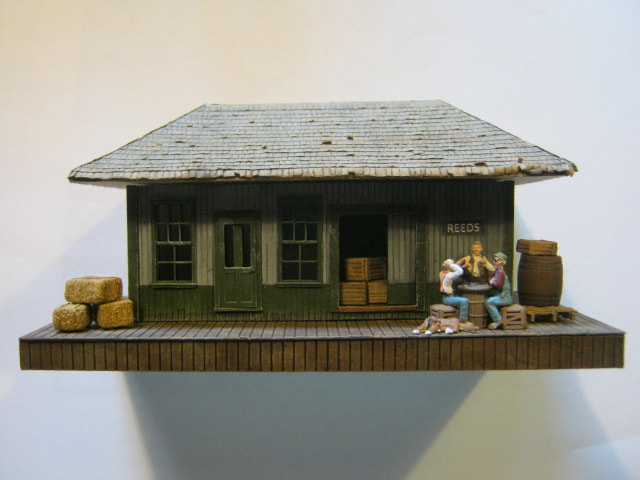
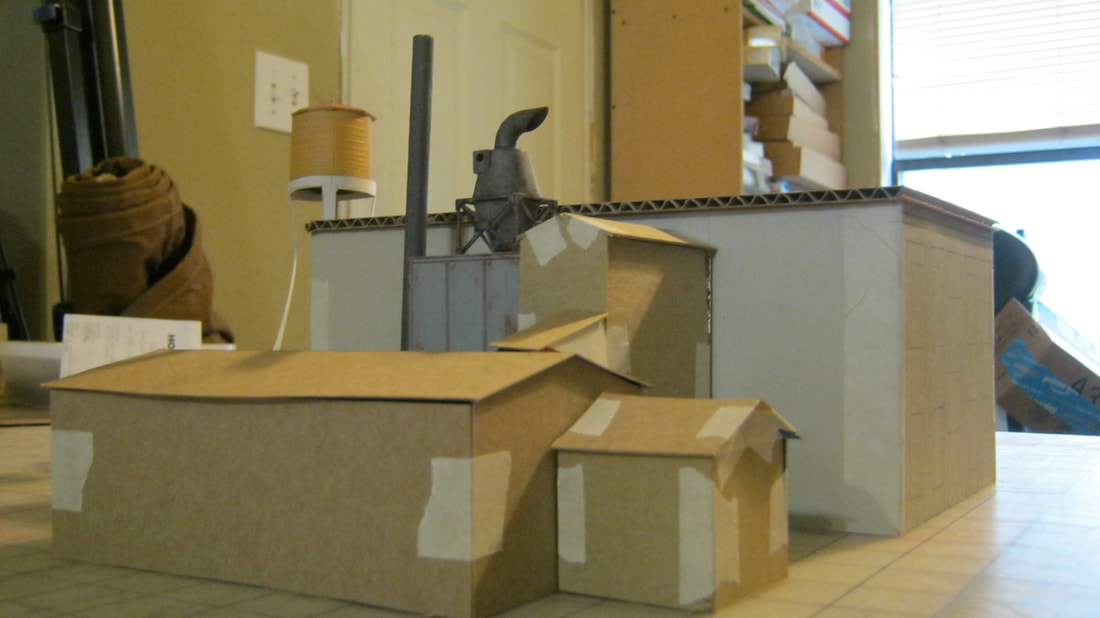
Below left and right is the start of the first module I built getting back into the hobby. This was an idea that turned out to be bad. I include it because it may help someone from making the same mistake. I wanted to try out water techniques modeling Orbeton Stream which the railroad runs along past Reeds Station, which is the cardboard mockup in the left photo.
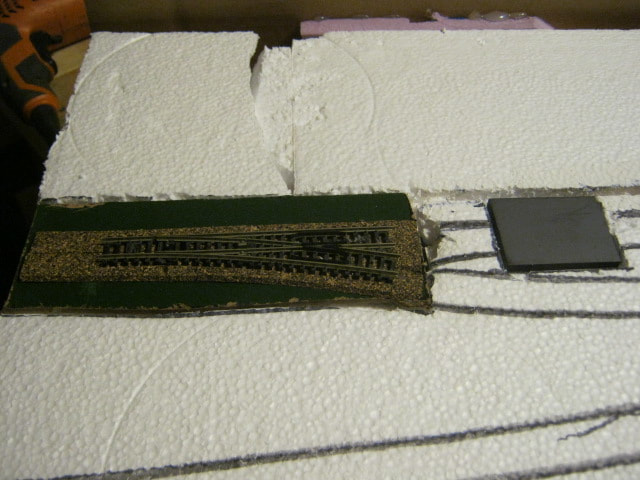
Since the contour is steep, I used blocks of white bead styrofoam glued to the plywood base, then added the roadbed on top of it. BIG MISTAKE!. If you look to the lower right, I had to use masonite to glue the cork to, so that the Atlas switch machine could be mounted on the underside of the masonite. Then I dug out the styrofoam to accomodate the switch machine. The problem with this is that if the switch machine malfunctions - which they will at some point - you can't get to the switch machine without either ripping ou the track, or cutting up through the scenery from underneath the layout to get to the switch machine - which is exactly what I had to do to replace the burnt-out switch machine.
Now, I either use open benchwork or a 3/16" plywood base with 1/2" urethane sheet insulation, or open wooden benchwork depending on the contour of the terrain for that area of the layout.
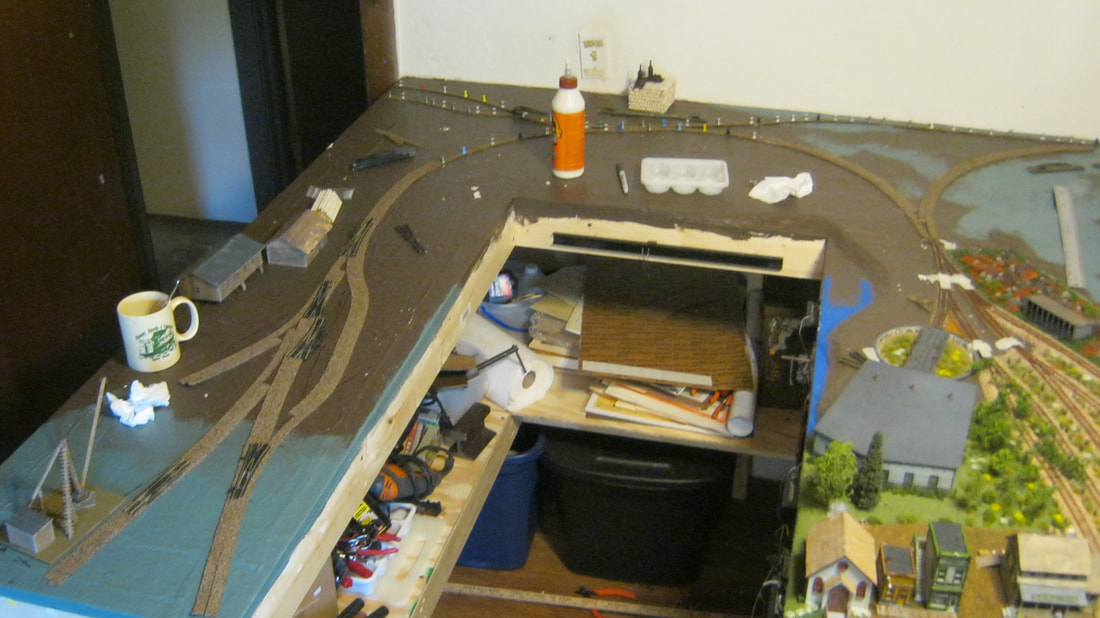
Another note while we're here on these photos, DON'T put permanent magnets under the track, like the square Atlas one in the lower right photo. They work fine for uncoupling, which is what they're for. The problem, is that they're strong, and HOn30 locos are small. I was having lots of problems with locos stalling in my Rangeley and Langtown yards. One day I was testing a loco chassis without the body on it in the Langtown yard, and every time the chassis went over a magnet, the chassis would immediately spin sideways on the track literally stopping at a 90 degree angle across the track over the magnets. They are THAT STRONG, and will cause problems anywhere you put them. Forget using them completely, and either use electromagnets that only work when you press a button/flip a switch, or use meat skewers or whatever and manually uncouple rolling stock. I have yet to go back and find every magnet I've laid and rip them out, which will be quite a chore without destroying trackwork and scenery to do it.
Since the contour is steep, I used blocks of white bead styrofoam glued to the plywood base, then added the roadbed on top of it. BIG MISTAKE!. If you look to the lower right, I had to use masonite to glue the cork to, so that the Atlas switch machine could be mounted on the underside of the masonite. Then I dug out the styrofoam to accomodate the switch machine. The problem with this is that if the switch machine malfunctions - which they will at some point - you can't get to the switch machine without either ripping ou the track, or cutting up through the scenery from underneath the layout to get to the switch machine - which is exactly what I had to do to replace the burnt-out switch machine.
Now, I either use open benchwork or a 3/16" plywood base with 1/2" urethane sheet insulation, or open wooden benchwork depending on the contour of the terrain for that area of the layout.
Another note while we're here on these photos, DON'T put permanent magnets under the track, like the square Atlas one in the lower right photo. They work fine for uncoupling, which is what they're for. The problem, is that they're strong, and HOn30 locos are small. I was having lots of problems with locos stalling in my Rangeley and Langtown yards. One day I was testing a loco chassis without the body on it in the Langtown yard, and every time the chassis went over a magnet, the chassis would immediately spin sideways on the track literally stopping at a 90 degree angle across the track over the magnets. They are THAT STRONG, and will cause problems anywhere you put them. Forget using them completely, and either use electromagnets that only work when you press a button/flip a switch, or use meat skewers or whatever and manually uncouple rolling stock. I have yet to go back and find every magnet I've laid and rip them out, which will be quite a chore without destroying trackwork and scenery to do it.
|
|
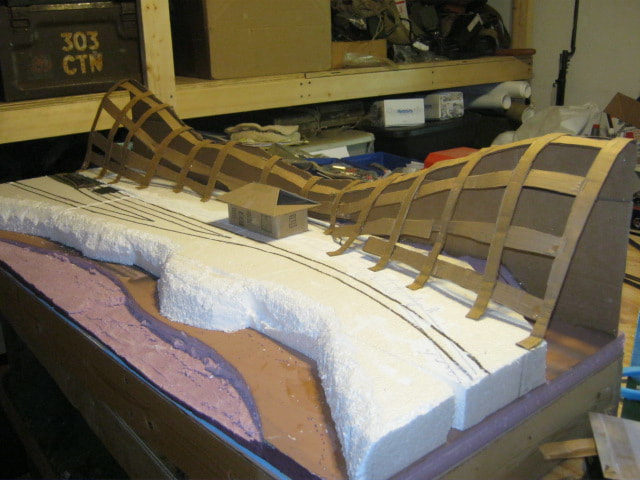
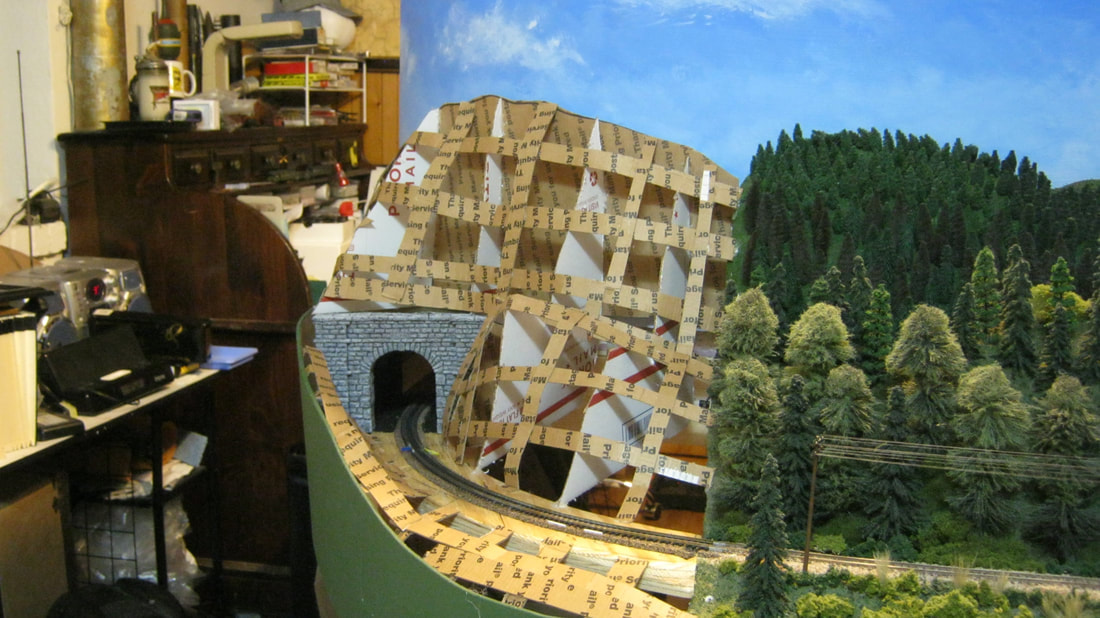
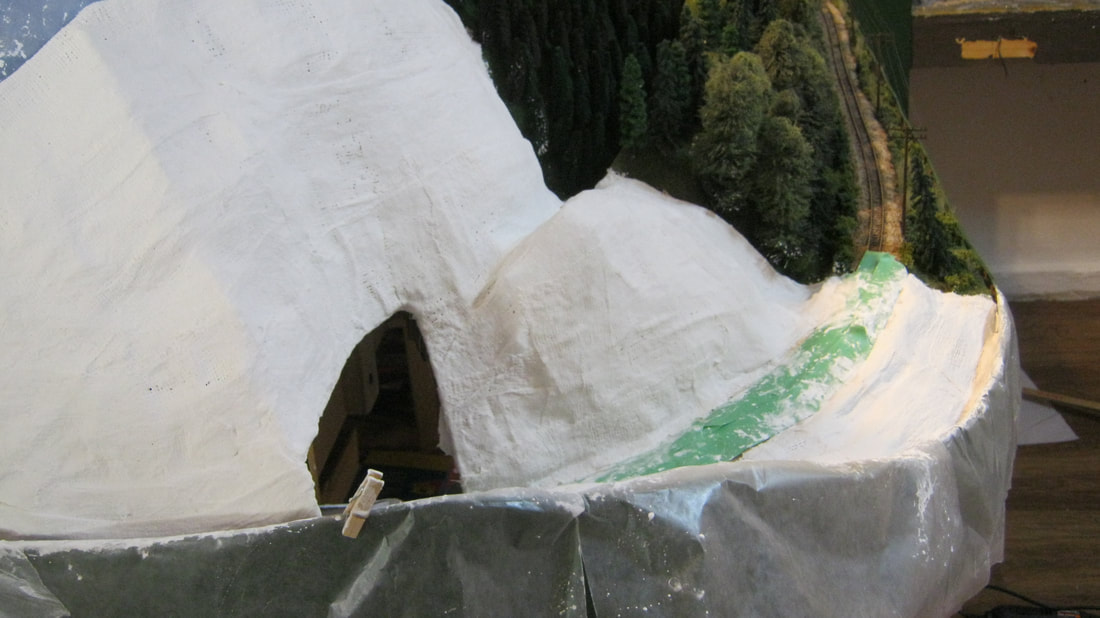
Below are examples of building up scenery with cardboard strips over open benchwork. To get around this curve disappearing into the tunnel in the below right photo, the support for the roadbed was cut out of 5/8" plywood and attached to the existing roadbed to the right and runs into the tunnel and under the layout behind the backdrop. A 1"x2" pine board was attached between the completed scenery to the right and the edge of the layout to the left to support the cardboard backing that is forming the back of the hillside. I then attach the cardboard cutouts to the backing with a hot glue gun that will shape the mountain from back to front, and hot glue the bottom front edges to the plywood road bed. You can see this process clearly in the below left photo on the right side of the photo. Then I cut roughly 1" wide strips of cardboard (I don't measure these, just eyeball them with a metal yardstick and utility knife), and hot glue them to the previous cardboard shaper pieces. This forms the framework that I then cover with plaster cloth strips. To make the strips more flexible, I run them over the edge of the work bench.
|
|
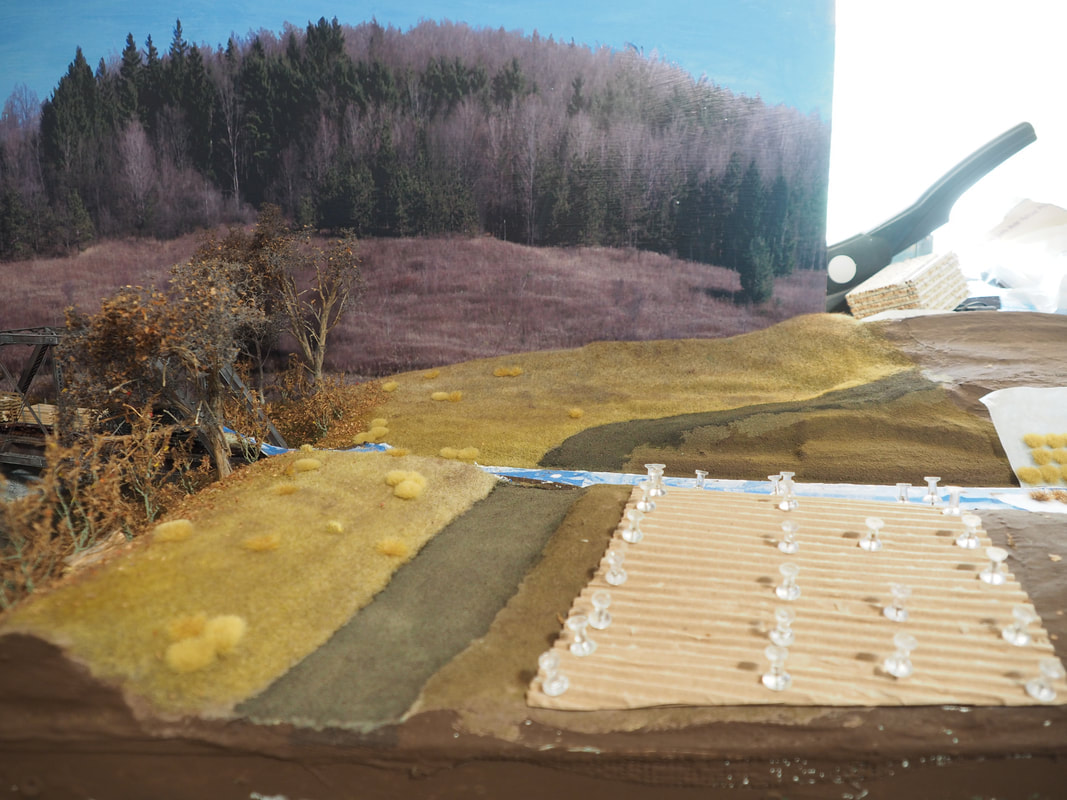
Below left, I've temporarily removed the tunnel entrance and applied the plaster cloth over the cardboard framework. You can see I covered the track with green painters masking tape to protect it from the plastering process. I use three layers of the plaster cloth, because this is a strong enough shell that you can punch nails through it to make holes to plant your trees. If you only use two layers, the shell can break and make weak spots, ruining the shell for tree planting.
Below right, after the plaster cloth has dried, I first put a good thick coat of paint of whatever color base I need, green, brown, etc., to seal the plaster cloth and get rid of the white. After the first coat dries, I apply a second coat, paying attention to any spots where white is still showing through. While applying this second coat, I sprinkle on fine ground foam onto the wet paint to give the scenery a base texture.
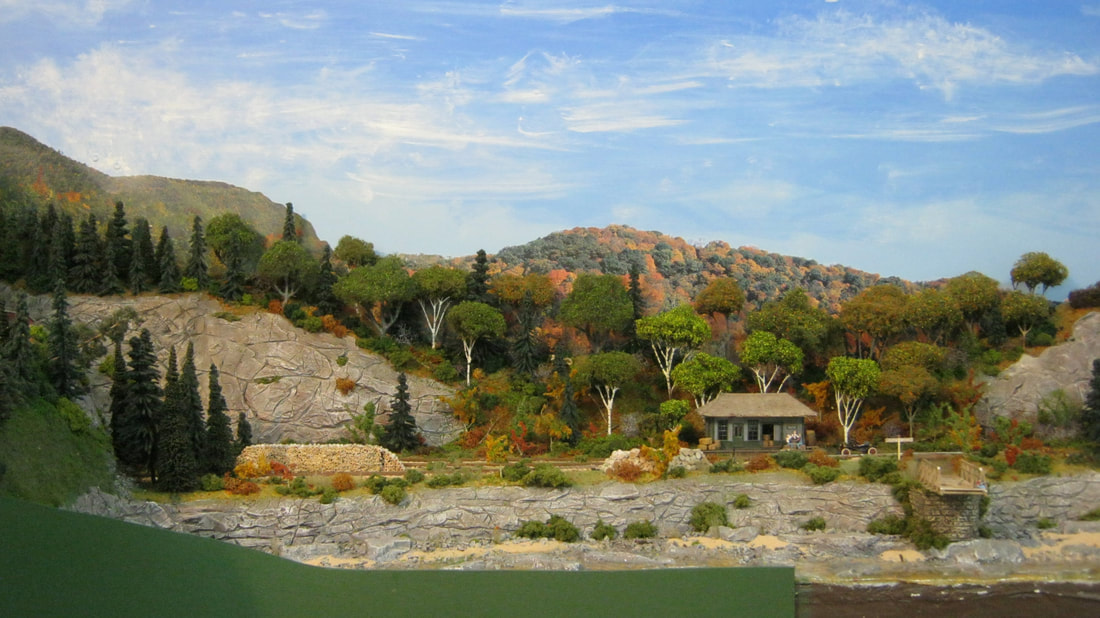
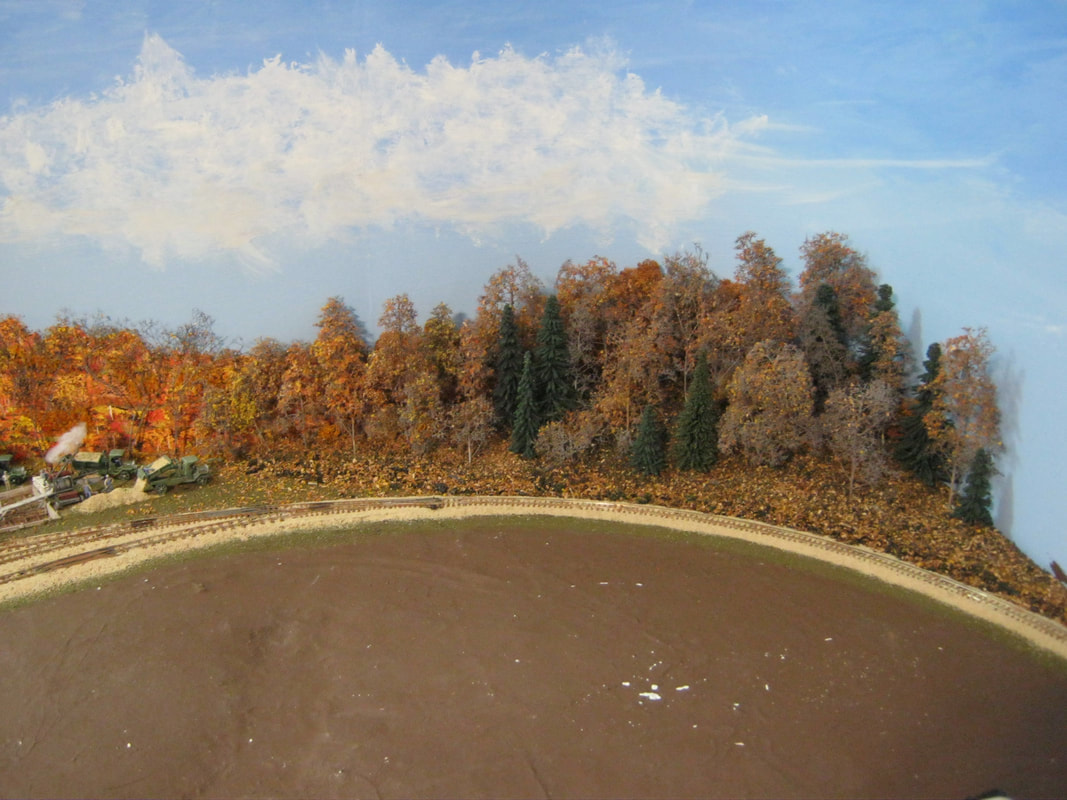
While we're looking at that lower right photo, notice that I use forced perspective on these hills, planting small trees on the back hill, medium sized trees on the same hill below the small trees, and then full-sized trees on the near hill. It gives the illusion of depth to the scene, even though this whole portion of the layout is only 18" deep total. I'll talk more about forced perspective further down the page.
Below right, after the plaster cloth has dried, I first put a good thick coat of paint of whatever color base I need, green, brown, etc., to seal the plaster cloth and get rid of the white. After the first coat dries, I apply a second coat, paying attention to any spots where white is still showing through. While applying this second coat, I sprinkle on fine ground foam onto the wet paint to give the scenery a base texture.
While we're looking at that lower right photo, notice that I use forced perspective on these hills, planting small trees on the back hill, medium sized trees on the same hill below the small trees, and then full-sized trees on the near hill. It gives the illusion of depth to the scene, even though this whole portion of the layout is only 18" deep total. I'll talk more about forced perspective further down the page.
|

|
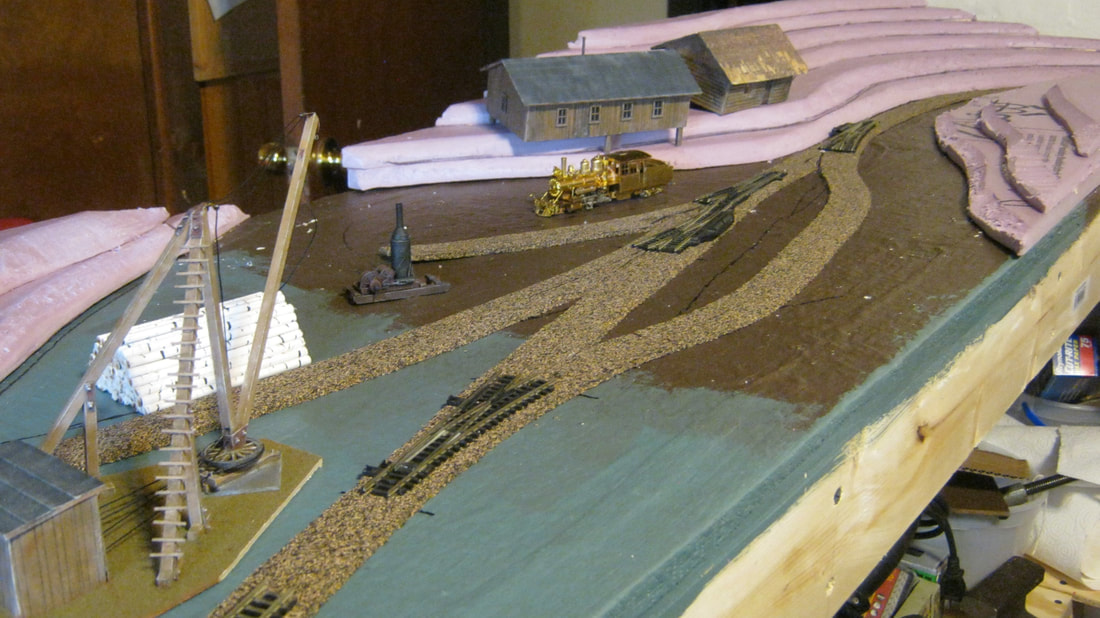
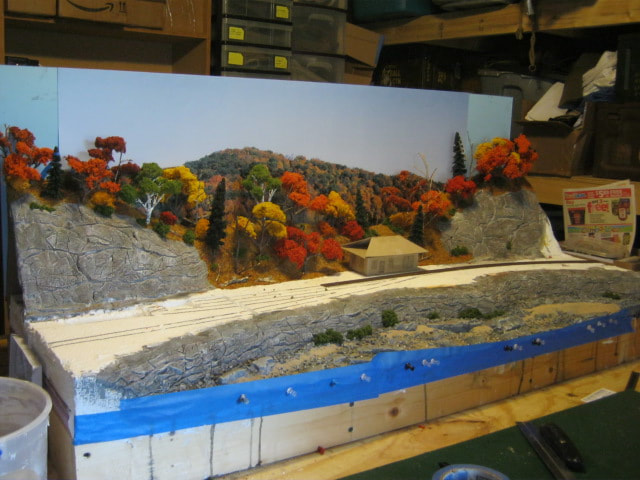
The other technique I use is built-up foam board. Langtown is nestled into a valley, so the roadbed is on a flat surface. I glued down the 1/2" foam insulation sheet onto the 3/16" plywood base, then covered it with a layer of plaster cloth to give the scenery components something to stick to. Then I give the plaster cloth a coat of paint to get seal and hide the white plaster cloth. Note that recently, I've started gluing the cork road bed straight onto the foam board and then applying the plaster cloth up to the edge of the cork roadbed, to make sure the roadbed is as flat as possible.
Below left the base has been completed, and below right they contour on the sides of the valley has been started with layers of foam board cut to the shape needed for the hillsides. Once the contour looks like a layer cake, then I take a rasp or a chunk of 40 grit sandpaper on a sanding block, and shave down the square edges to being sloping the hillside. After that, I finish filling in those gaps with Celluclay, basically the same thing as Sculptamold, both paper-mache materials. After the shaping is complete, I then cover them with plaster cloth as previously described. I once experimented with Gypsolite as a covering, as some do, but found that this stuff hardens like concrete, and trying to punch holes through it to plant trees breaks the dried gypsolite into pieces, so that was a one-time experiment only. You would have to drill holes through the stuff with a masonry bit to plant trees.
Below left the base has been completed, and below right they contour on the sides of the valley has been started with layers of foam board cut to the shape needed for the hillsides. Once the contour looks like a layer cake, then I take a rasp or a chunk of 40 grit sandpaper on a sanding block, and shave down the square edges to being sloping the hillside. After that, I finish filling in those gaps with Celluclay, basically the same thing as Sculptamold, both paper-mache materials. After the shaping is complete, I then cover them with plaster cloth as previously described. I once experimented with Gypsolite as a covering, as some do, but found that this stuff hardens like concrete, and trying to punch holes through it to plant trees breaks the dried gypsolite into pieces, so that was a one-time experiment only. You would have to drill holes through the stuff with a masonry bit to plant trees.
|
|
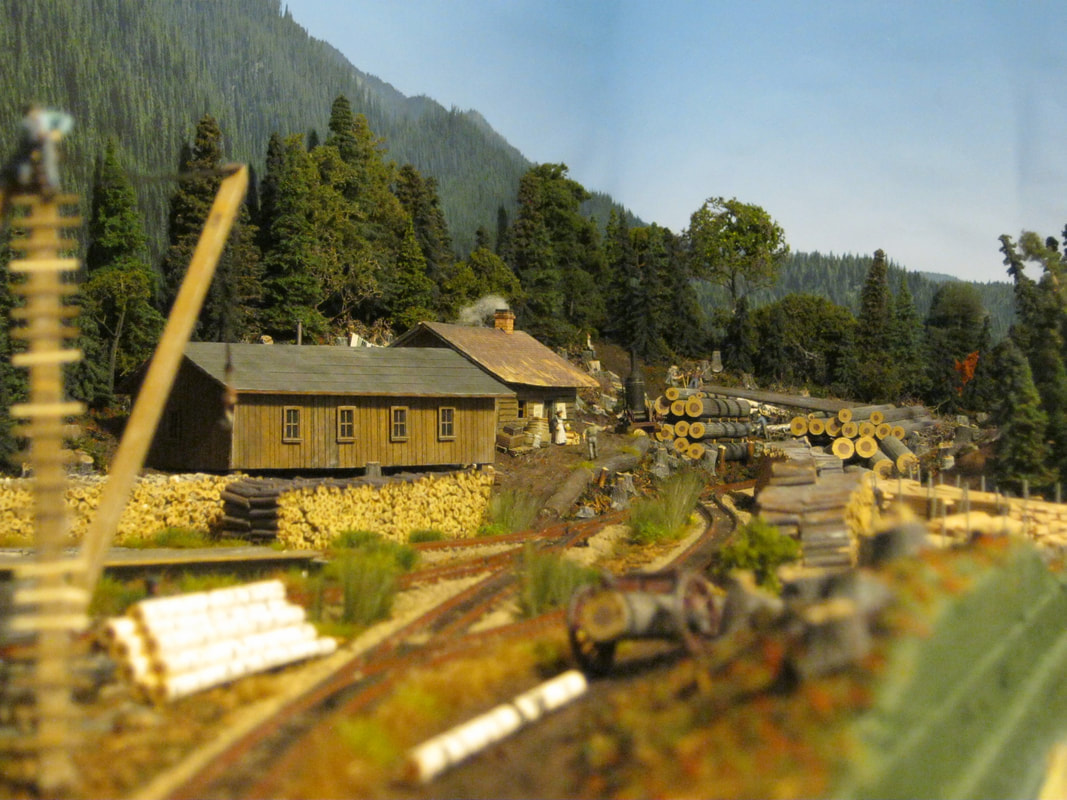
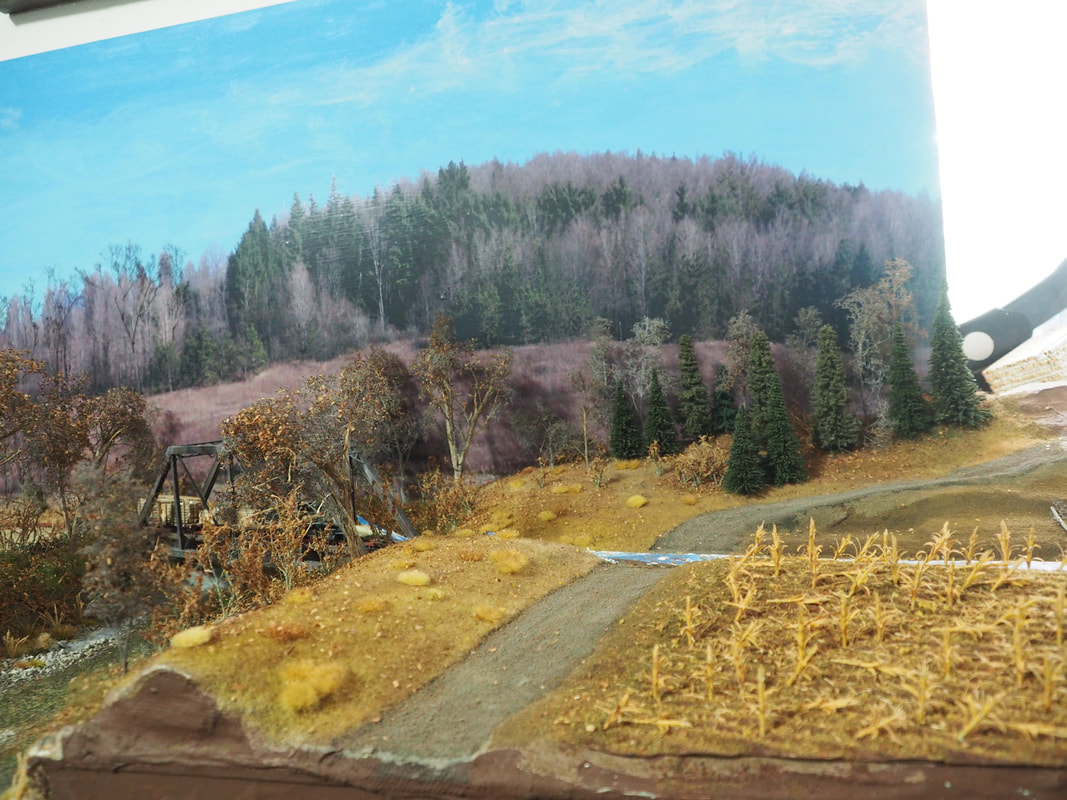
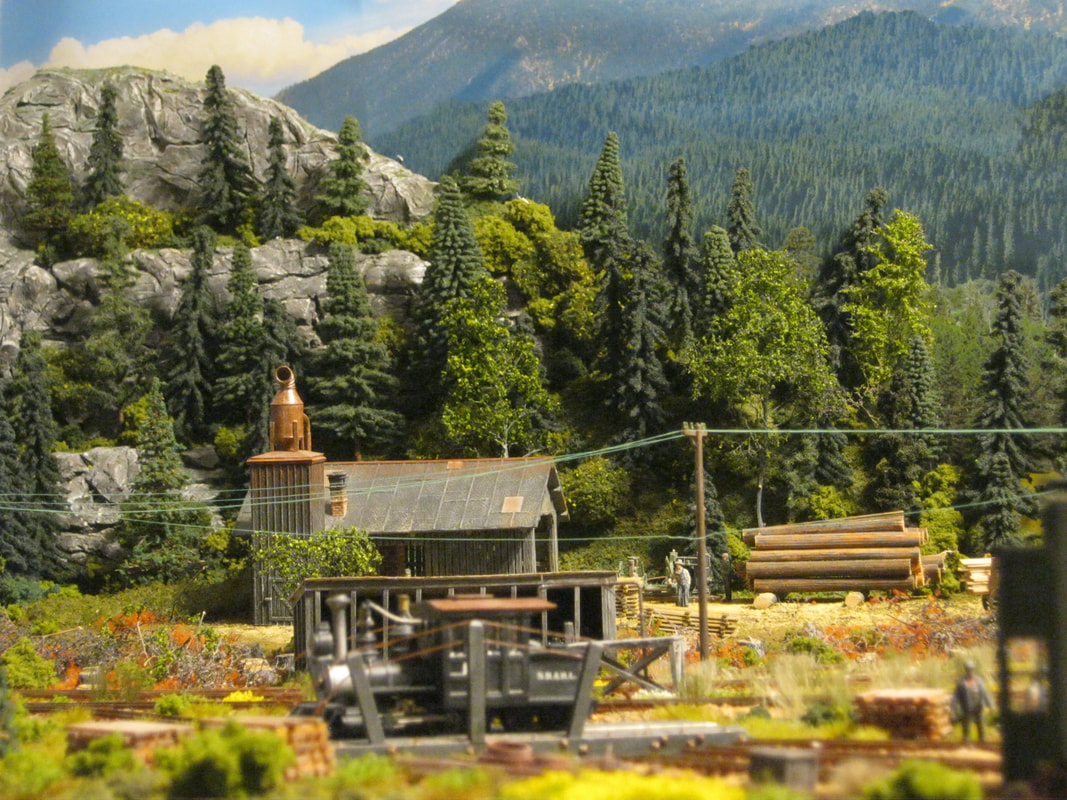
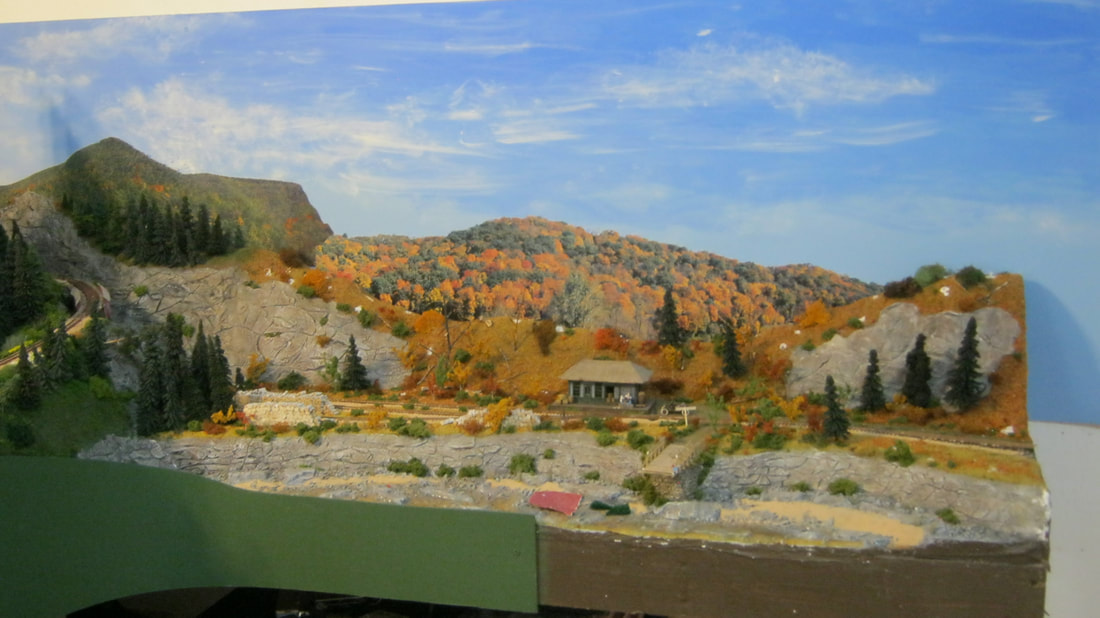
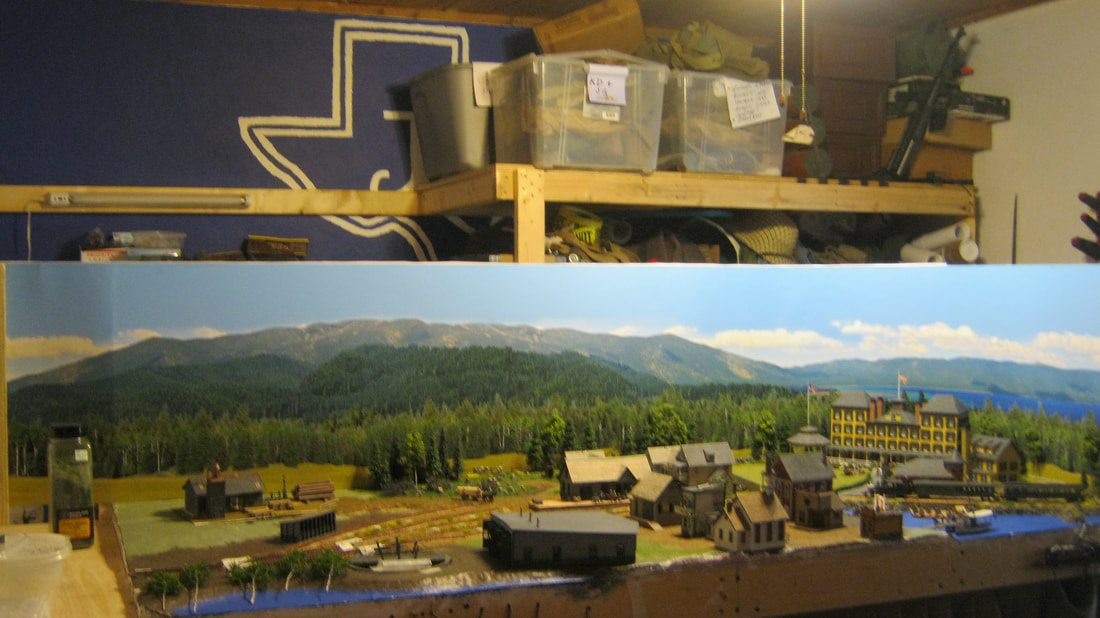
Below, the finished scene, looking down the valley along the tracks, through the logging camp.
Ground Cover
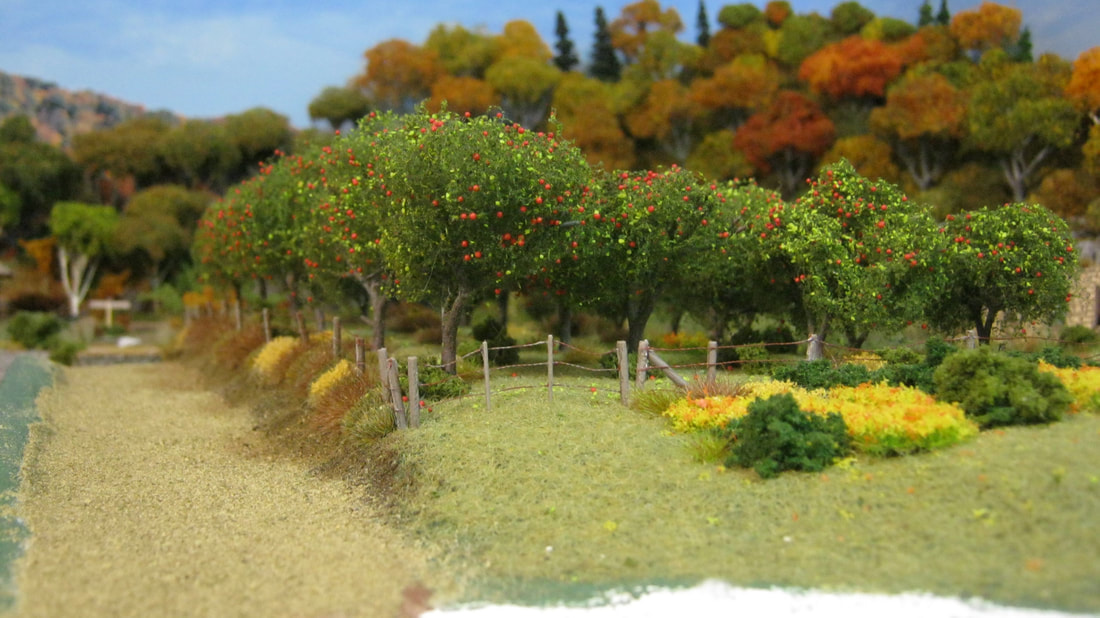
Below are two examples of basic ground cover. To the left you can see that I've sprinkled on some different shades of ground foam, from green to brown to tan, etc. Below right, I've sprinkled brown/tan 'fine turf' onto the road as a basic cover, and on the slope to the right of the road, a mix of green ground foam and grass 'flock'. I chose these two shots because you can see both basic ground cover, and the beginning of the first layers of vegetation. On the left, this will be forested with trees as the final layer, and on the right this will have bushes, flowers, crops and whatnot as a finished layer, with the beginnings of that second layer of vegetation visible on the near side of the fence around the orchard. I always apply the base layer of ground cover sprinkling it onto an appropriate shade of wet paint.
|
|
Below left, the basic ground cover is grass, and this was done by using a battery powered flock applicator and 'static grass' flocking. The base got a coat of green latex paint, and the flocking was applied with the applied with the applicator to the wet paint. If you want taller grass, after the first application has dried, spray it with either diluted matte-medium or hair spray, then apply more flocking with your applicator.
To the lower right, the base ground cover was a mix of fine and course shades of brown ground foam mixed with brown flocking, sprinkled onto wet brown latex paint. After that had dried, sprayed it with hair spray, and I sprinkled ground-up leaves from the back yard on top of it. These were ground up in a blender with some wather, squeezed the water out, and spread them on a cookie sheet to dry out.
After my ground cover has been applied, I use a pump spray bottle to spray it down with diluted matte-medium to lock it all into place when dried.
|
|
Below left, the base ground cover is grass flocking. I couple of different shades have been applied, and then after they have been applied, I damp brushed the tops of the grass in different areas with different shades of tan/brown to get rid of the monotone color of the grass. The second layer of ground cover is bushy grass tufts, of a couple of different shades. These were then damp brushed as well, to help blend them with the base ground cover. The corn field area was given a base of brown and tan fine turf blend, and the corn rows were made by gluing down corrucated cardboard, also covered with a coat of brown latex paint and fine brown turf. The second layer of ground cover for the corn was a sprinkling of chopped up sisal twine to look like decaying dried up corn husk, and JTT corn stalks to look like a harvested corn field. A final layer of ground cover for the whole area was a light sprinkling of ground-up leaves from the back yard to show dead leaves blown over the whole area from the nearby forest.
|
|
Below is a finished example showing the layered effect of ground cover and vegetation. The base cover of different areas in the scene are mixtures of ground foam and flocking, covered by small vegetation such as grass tufts and ground foam clumps for small plants. Some areas are covered by very thinly stretched green poly-fiber sprayed with hair spray, then lightly sprinkled with various shades of Super Leaf material, which is then sprayed again with hair spray to lock it in place. Some areas such as on the right-side bank of the river, have clumps of tall grass glued into holes in the ground made with a nail.
After all the ground cover has been applied, some areas are blended a bit with a damp-brushing of the tops of the ground cover with tan or brown paint, and then matte medium is sprayed on with a pump bottle or applied with a bulb syringe to lock everything into place. Once all your ground cover is done, then you apply trees where needed.
After all the ground cover has been applied, some areas are blended a bit with a damp-brushing of the tops of the ground cover with tan or brown paint, and then matte medium is sprayed on with a pump bottle or applied with a bulb syringe to lock everything into place. Once all your ground cover is done, then you apply trees where needed.
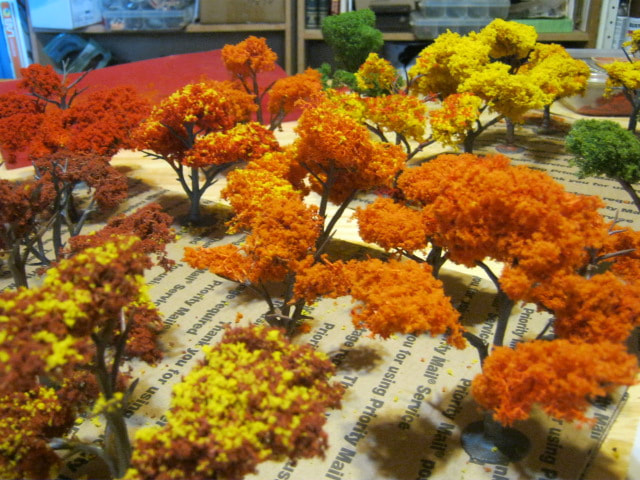
Trees
Trees are a big subject. I have a huge mix of store-bought and home-made trees on my layout. The further I get into making better looking newer scenery, generally the less I like the trees that I used in older scenery. But I don't get rid of old trees. What I do these days is pull up old trees in important areas that I don't like, and use them in the background or less seen areas of new scenery as 'filler'. Then I replace them with better trees, whether store bought or home-made.
In fact, trees are SUCH a big subject, I've got a separte page for them. Click this button below.
In fact, trees are SUCH a big subject, I've got a separte page for them. Click this button below.
Rock
My layout is located in western Maine, and western Maine means granite. Lots of it. New Hampshire's motto is The Granite State, but you could just as easily attribute it to Maine next door (and much more beautiful by the way).
So I had to learn how to make good looking rock. When I was a kid I did the old 'crumple up tinfoil and then uncrumple it and pour the plaster in' technique. Well, that's a good start, but you still have to carve it to make it not look like crumpled tinfoil. So I dove into carving plaster and using rock molds. It's the easiest thing in the world, almost. Some things actually really are easier.
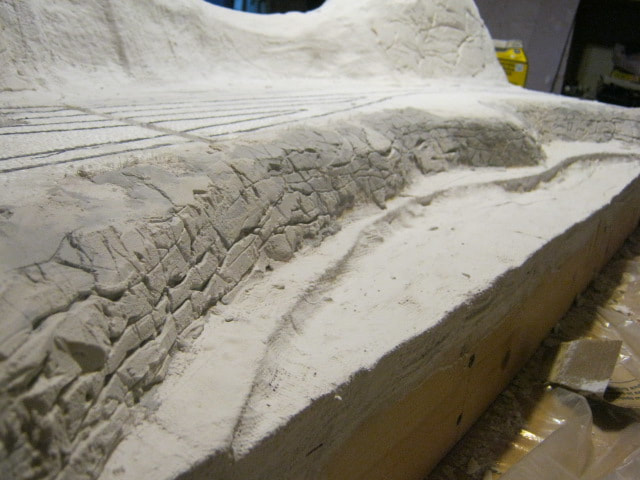
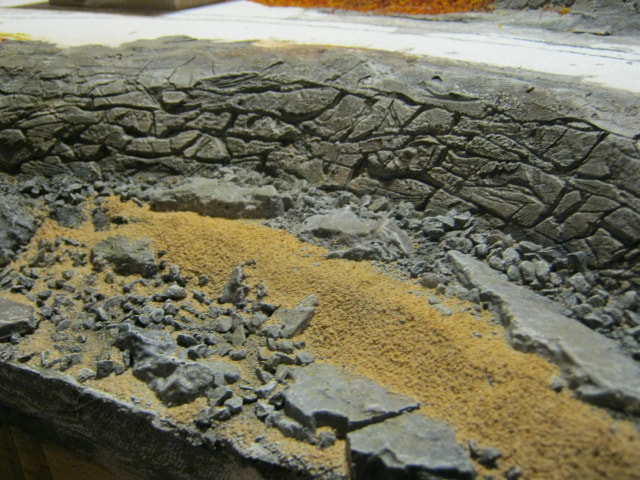
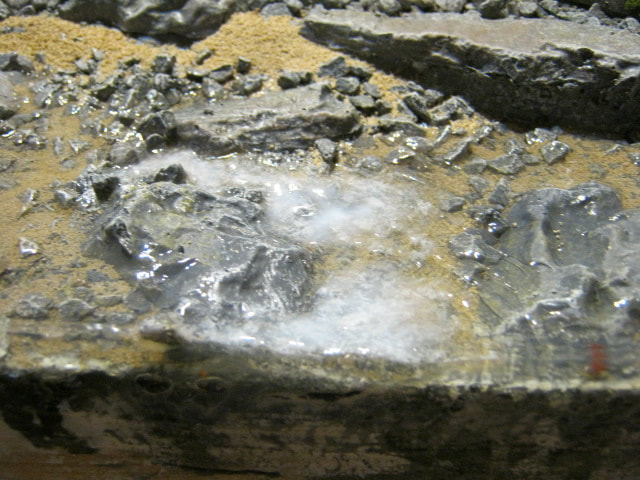
Below left is my first experiment with carving rock on my layout. I mixed the casting plaster as instructed from the box, and then as it thickened, I plastered it on there with a large putty knife. You can start carving it while it's still wet, and I highly recommend that. I use a dull X-acto #11. This is a riverbed cut through stone as so many are in Maine, so I figured the walls are going to be slowly breaking off in pieces from the water erosion, and just randomly cut grooves into the wet plaster. As it hardens up, it gets harder to cut into, so that's when you start making shallower cuts and randomly scraping the knife along the edges of crevices and whatnot to give more shape to the stone. Then I just kind of stabbed gouges out here and there, and scratched across the surface and whatnot.
You really do quickly get a feel for it, so don't be afraid, just dive in.
After you're done carvings, you color the stone. I had bought one of those Woodland Scenics stone casting 'learner' kits, which came with four little plastic tubs of different shades of acrylic paint. I think it comes with something like black, tan, ochre and burnt umber or something. The large slabs of rock in the bottom of the riverbead in the lower right photo were made with that kit. So I just used the leftover paints from that kit and did the same method the kit called for. I've modified it since, but it's basically the same thing. I first give the rock an overall wash of black, and I just eyeball the amount of water to paint when I'm mixing. After the black, I do a wash of ochre or raw umber. After that I do dark gray, then light gray, then tan, and once that's all dry, I do another light wash of black. Once that's dry, I dry brush the rock with Oyster White acrylic.
The more you do it, the more you'll develop your own technique for coloring rock for the area and type of rock you're modeling. For talus, the small rocks in the river bed, I use the same colors and techniques as the cast rock, just doing it in batches in an old yogurt or margarine tub. I'm impatient, so when I paint talus, I blow dry it with a hair dryer in between washes in the tub.
So I had to learn how to make good looking rock. When I was a kid I did the old 'crumple up tinfoil and then uncrumple it and pour the plaster in' technique. Well, that's a good start, but you still have to carve it to make it not look like crumpled tinfoil. So I dove into carving plaster and using rock molds. It's the easiest thing in the world, almost. Some things actually really are easier.
Below left is my first experiment with carving rock on my layout. I mixed the casting plaster as instructed from the box, and then as it thickened, I plastered it on there with a large putty knife. You can start carving it while it's still wet, and I highly recommend that. I use a dull X-acto #11. This is a riverbed cut through stone as so many are in Maine, so I figured the walls are going to be slowly breaking off in pieces from the water erosion, and just randomly cut grooves into the wet plaster. As it hardens up, it gets harder to cut into, so that's when you start making shallower cuts and randomly scraping the knife along the edges of crevices and whatnot to give more shape to the stone. Then I just kind of stabbed gouges out here and there, and scratched across the surface and whatnot.
You really do quickly get a feel for it, so don't be afraid, just dive in.
After you're done carvings, you color the stone. I had bought one of those Woodland Scenics stone casting 'learner' kits, which came with four little plastic tubs of different shades of acrylic paint. I think it comes with something like black, tan, ochre and burnt umber or something. The large slabs of rock in the bottom of the riverbead in the lower right photo were made with that kit. So I just used the leftover paints from that kit and did the same method the kit called for. I've modified it since, but it's basically the same thing. I first give the rock an overall wash of black, and I just eyeball the amount of water to paint when I'm mixing. After the black, I do a wash of ochre or raw umber. After that I do dark gray, then light gray, then tan, and once that's all dry, I do another light wash of black. Once that's dry, I dry brush the rock with Oyster White acrylic.
The more you do it, the more you'll develop your own technique for coloring rock for the area and type of rock you're modeling. For talus, the small rocks in the river bed, I use the same colors and techniques as the cast rock, just doing it in batches in an old yogurt or margarine tub. I'm impatient, so when I paint talus, I blow dry it with a hair dryer in between washes in the tub.
|
|
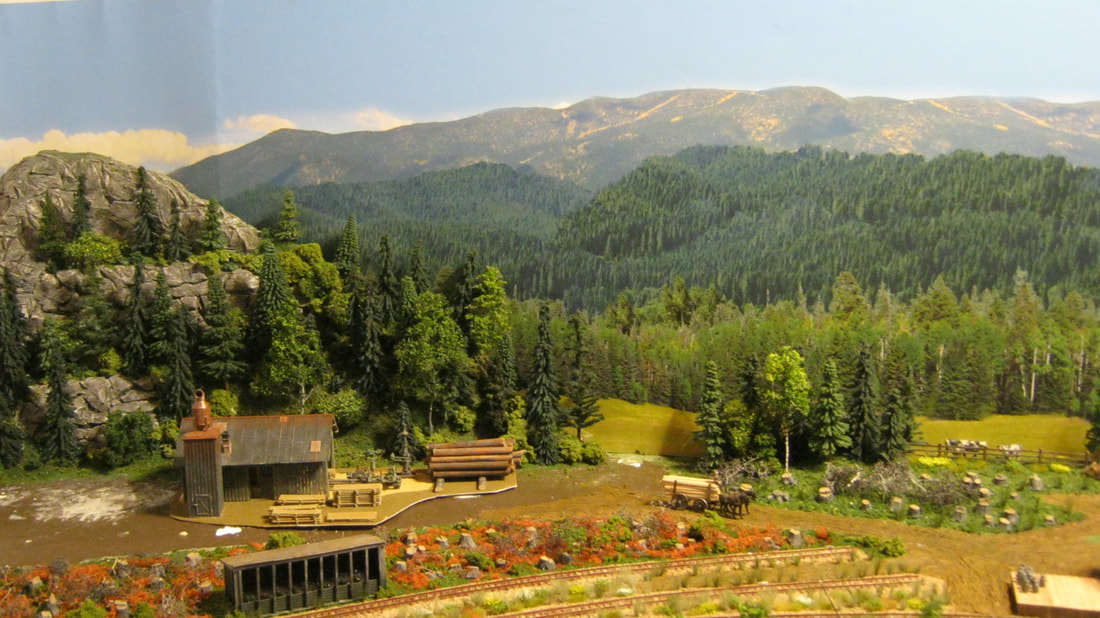
Below left is my second attempt at carving and painting rock, which is on the same module as the above river bed. Below right is a small granite hill behind the sawmill in the Rangeley module. I made the same cardboard lattice work covered with plaster cloth as usual, then applied a thick layer of plaster with a putty knife as I did with the river bed and cliff face.
|
|
This is the left side of that same rocky hill in the last photo at Rangeley. This is my first use of large rubber rock molds. I got two of these rubber molds cheap out of a bin under a table at a train show. I used both of them in this photo. The rocky outcrop in the upper right of the corner is one, and the large rocky ledge in the lower front of the photo on the edge of the pond is the other. This is too easy. You simply pour plaster into the mold, wait till it's firm enough to not pour out when you tip it, then flip it on it's side and hold it up againts the mountain, or flip it upside down as is the rock near the water. Once it's dried, simply peel the mold off and color it as described above. The rock cliff face in the center rear is simply a lump of hardening plaster that I flattened out on a sheet of waxed paper, carved to shape and painted, and then glued to the photo backdrop to create the 'gap' that the track goes through to leave the scene.
Water
The SR&RL wound its way through the woods of Franklin County along river and stream beds and around and along ponds and lakes. So I have had some really good opportunities to experiment with modeling water in various ways and with various materials.
The first thing I do (now) is paint the area blue that will be water. It just helps me visualize the scene better to see if I need to modify anything, and every coat of paint you put down in the area to pour water is insurance against the resin leaking through the plaster underneath. Below right is my first experience with making water. This is NOT how to do it. I made a dam with plastic wrap taped along the edge of the river to build a dam to hold the 'water' in, and reinforced it with tape and push pins. Well, you can see for yourself all the lines running down from the tape, which was the water material leaking through. What I do now, is I take a piece of plexiglass (you can get large sheets cheap at Hobby Lobby) and cut a strip long enough and tall enough to hold the water in. I glue it to the edge of the layout, then on the INSIDE of the plexiglass where it meets the layout edge, caulk it with silicone caulk. This is fool proof and worth the few bucks' worth of plexiglass and caulk. Once the water is done being modeled, you can remove the plexiglass and caulk if you want.
The first thing I do (now) is paint the area blue that will be water. It just helps me visualize the scene better to see if I need to modify anything, and every coat of paint you put down in the area to pour water is insurance against the resin leaking through the plaster underneath. Below right is my first experience with making water. This is NOT how to do it. I made a dam with plastic wrap taped along the edge of the river to build a dam to hold the 'water' in, and reinforced it with tape and push pins. Well, you can see for yourself all the lines running down from the tape, which was the water material leaking through. What I do now, is I take a piece of plexiglass (you can get large sheets cheap at Hobby Lobby) and cut a strip long enough and tall enough to hold the water in. I glue it to the edge of the layout, then on the INSIDE of the plexiglass where it meets the layout edge, caulk it with silicone caulk. This is fool proof and worth the few bucks' worth of plexiglass and caulk. Once the water is done being modeled, you can remove the plexiglass and caulk if you want.
|

|
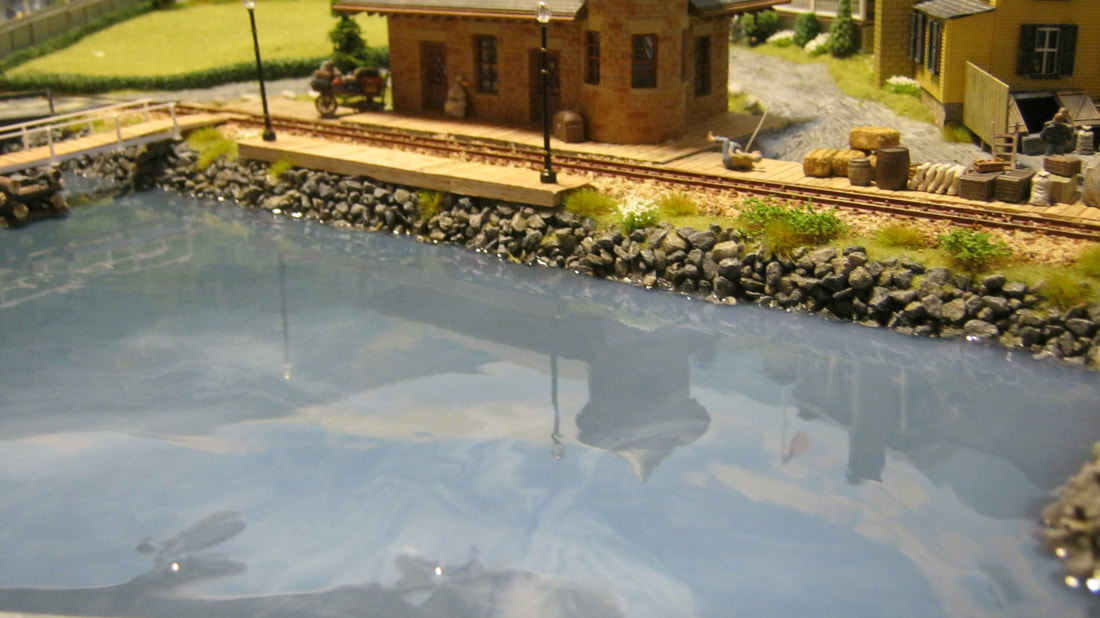
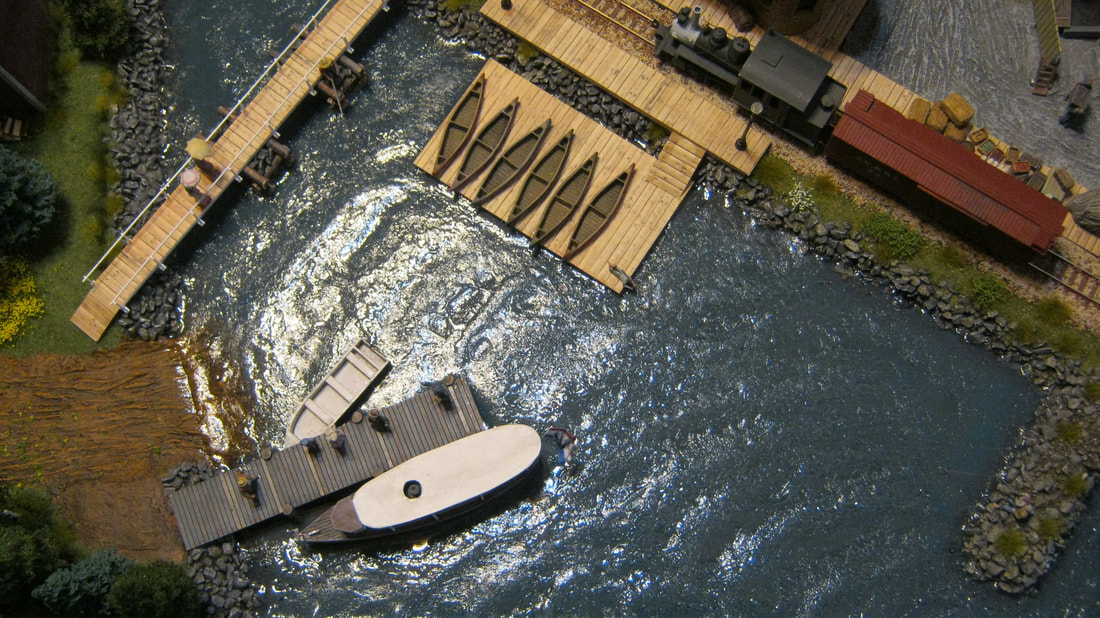
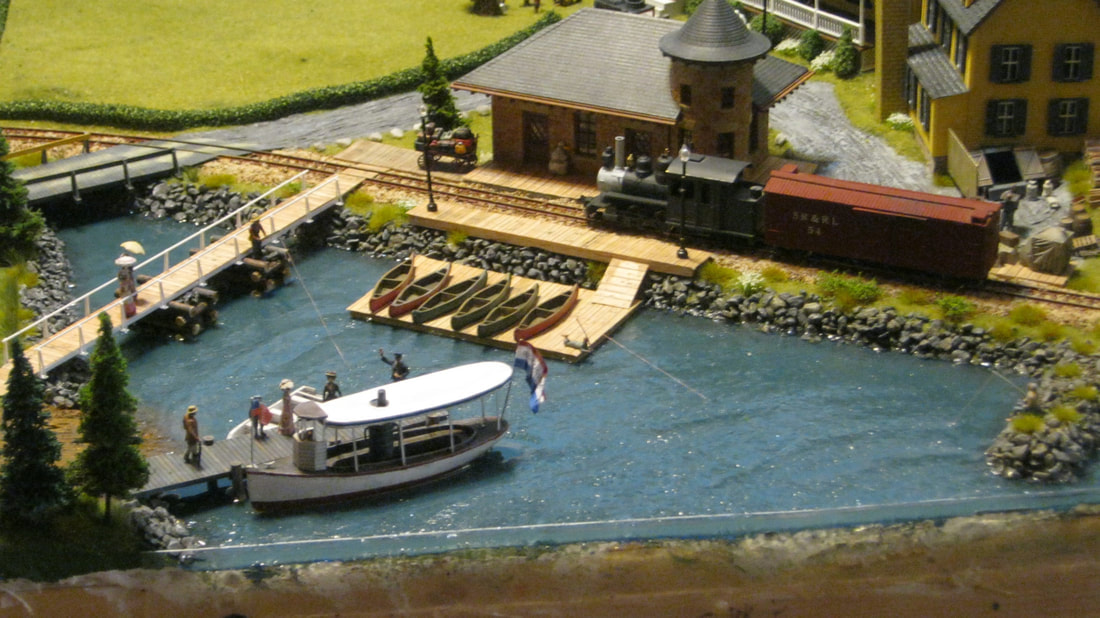
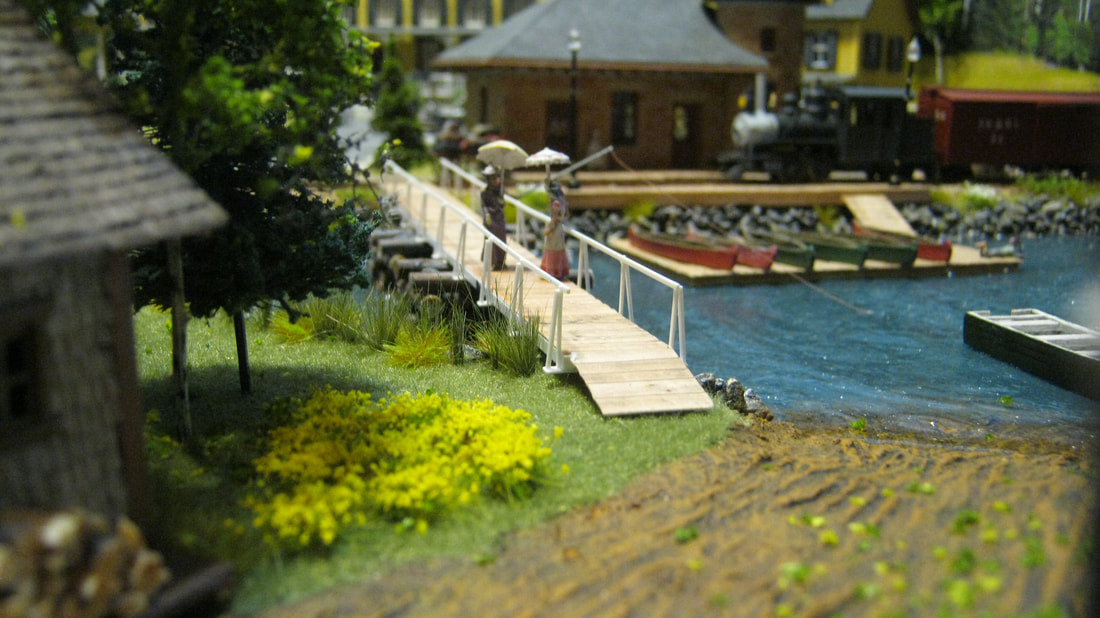
Before pouring water, you want to add any details to the water edge that will have water up into/around them, and paint the bottom of the area to be watered. For the Town Cove scene at Rangeley, the water's edge is built up with large stones and a breakwater extended from the Rangeley Lake House side of the cove to help cut down on the chop at the boat docks. So these were all added before the water was poured. Also, the stone cribs for the walkway across the base of the cove were added, along with the wooden dock and the raft for the canoes. In the lower right photo, you can see how the boat ramp next to the steamboat dock extends down into the 'water'. this was molded and painted before the water was poured as well.
In the lower left photo, the 'water' has just been poured. The base was painted a light blue before pouring, as the effect desired was this is a deep cove on the edge of Rangeley Lake, and the water is 'reflecting' the light blue summer sky of the photo backdrop.
The 'water' material for this was Woodland Scenics Realistic Water. I used this for both this cove and for Orbeton Stream on the Reeds module. I discovered that over time, this shrinks, and your water level will 'drop' over time. I have since switched to two-part epoxy resin. I'll talke about the waves and shaping water later.
|

|
Below at Haley Pond and Moose Pond, you can see a different technique. The bottoms of the ponds were painted using four different colors of acrylics. Near the shore is a tan mud color, then a light brown next as you get deeper into the pool, then dark brown, and finally black in the center. While the paints are still wet, they're blended into each other with a brush for a smooth transition so they won't look like tree rings. The effect of the paint job gives the illusion of shallow water around the edge getting deeper in the middle of the pond. After the paint has dried, I then planted cat tails and weeds around the edges, along with some flowers and ground foam clump foliage and loose rock and whatnot. Then the two-part epoxy was poured and left to dry over the weekend. Once the epoxy was poured, printed lily pads were placed on top of the water around the edges of the ponds.
Making Water Move
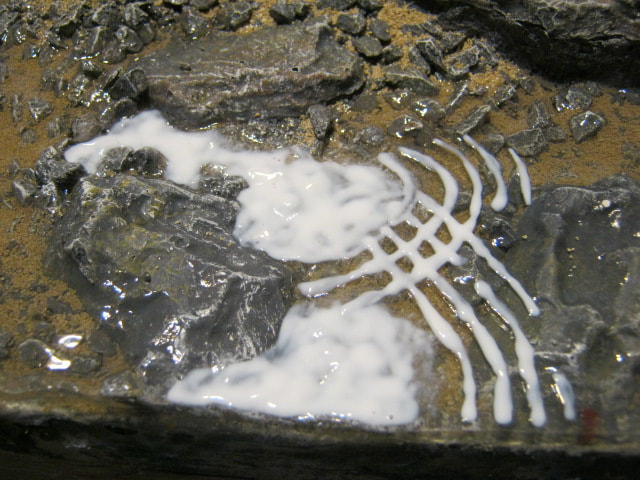
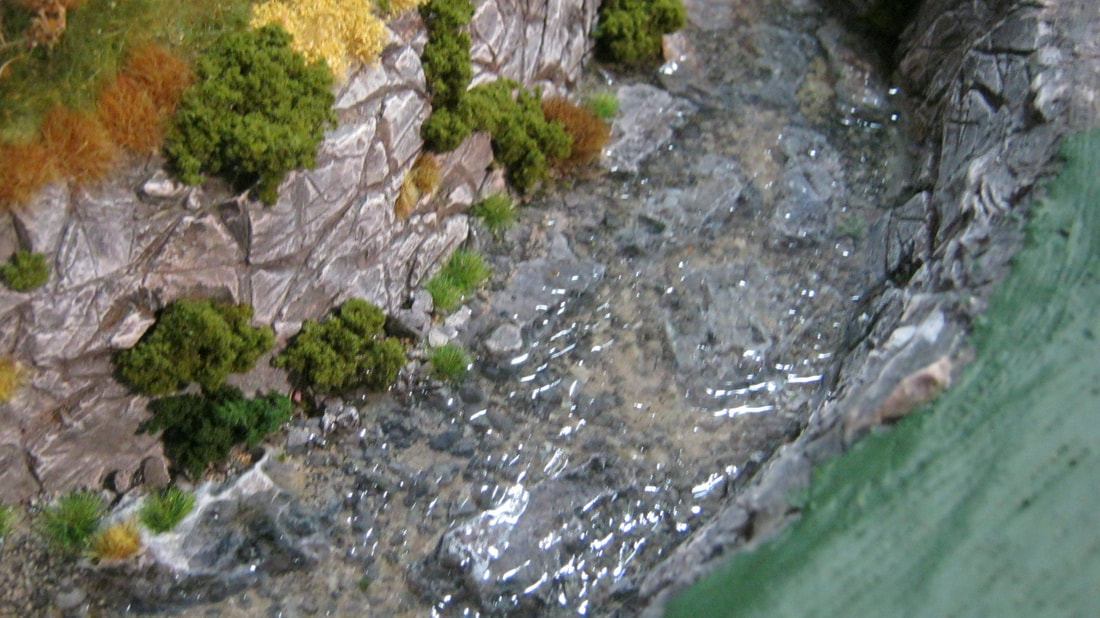
Woodland Scenics has some really good products for making 'moving' water. Below is a scene where Orbeton Stream passes Reeds Station. It's a small white water scene as the stream flows down through a rocky area. Using Water Effects, I simply dabbled on some of it with a brush where it drops down a level through the rocks, and brushed on some waves moving down from the rocky area. After these had dried, I gently dry brushed a dabbling of white acrylic paint on the 'rapids', and after that dried, went over the whole area with a couple more coats of water effects so that the white water would look in the water and not on top of it.
|
|
The next products I tried were Woodland Scenics Waves and Ripples. You simply brush these on top of your dried flat water, and I shot for a look of waves making it past the breakwater and spreading out into the harbor, getting smaller and more subtle as they get to the back of the cove. As you can see, someone with a first attempt can make something that looks pretty convincing.
|
|
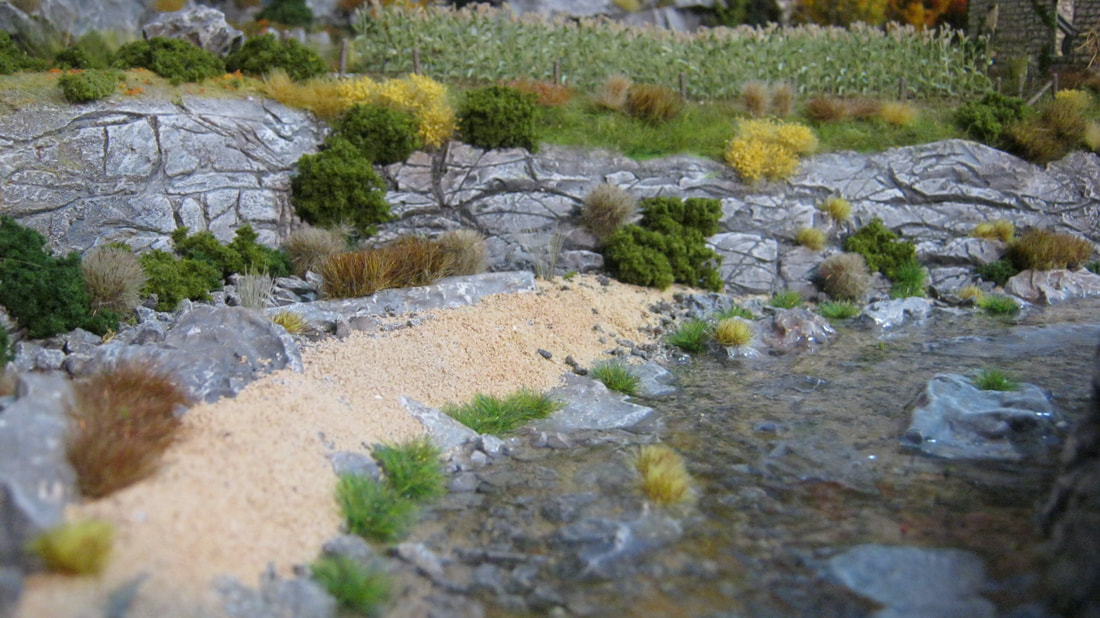
Below is some rapidly flowing water down the Sandy River as it travels around a bend into Phillips. After the river bed was filled with rocks and gravel, the water was poured. When it had dried, if you look closely in the lower left photo, you can see the "V"s added using Water Effects with a brush as the water parts around lard rocks sticking up from the river bottom. The way water flows, it looks much like a boat wake as if a boat was moving up-river. From eye-level in the lower right photo, it's very convincing.
|
|
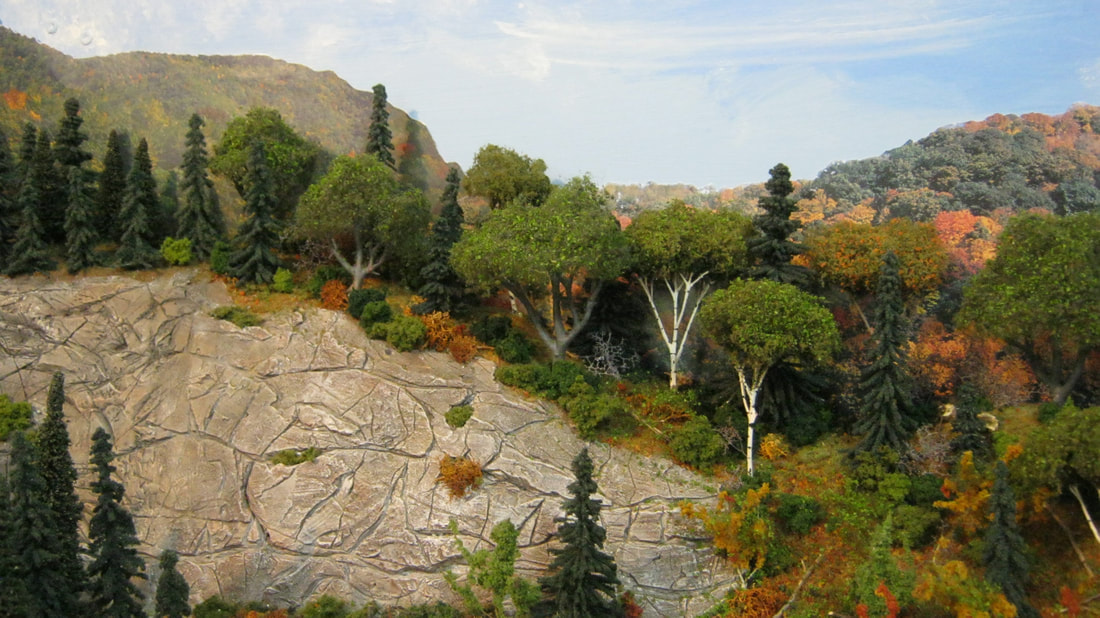
Forced Perspective
Something I touched on in Scenery Bases above was forced perspective. One of the simplest techniques you can use is simply putting smaller things behind the larger things at the front of your scenery. The best way to do this is elevating them back there on hills or at least higher ground to enhance the illusion of distance.
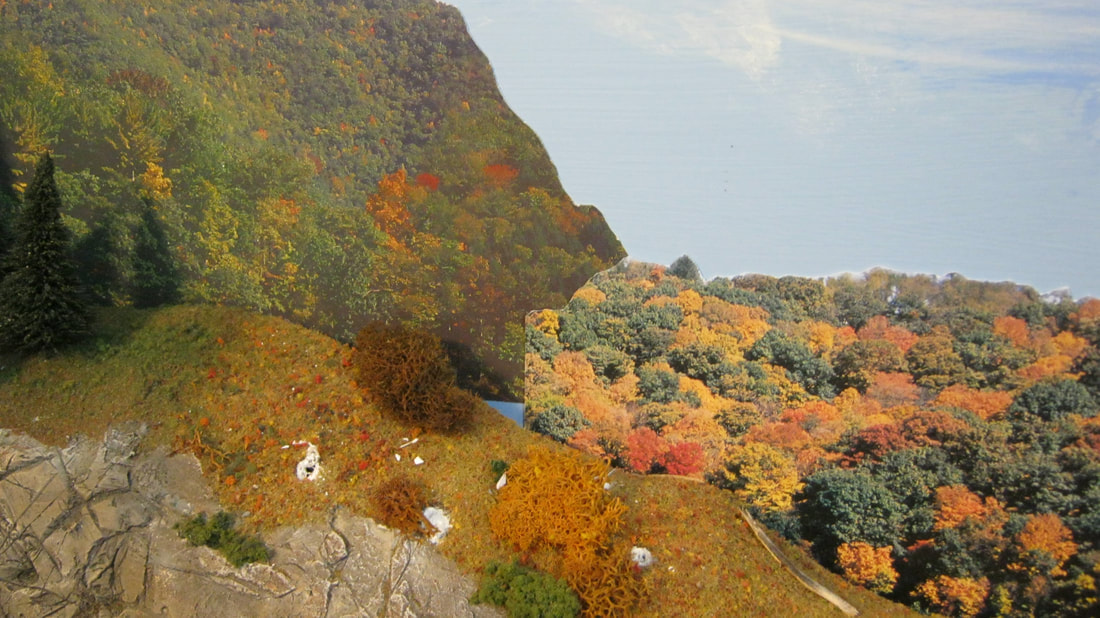
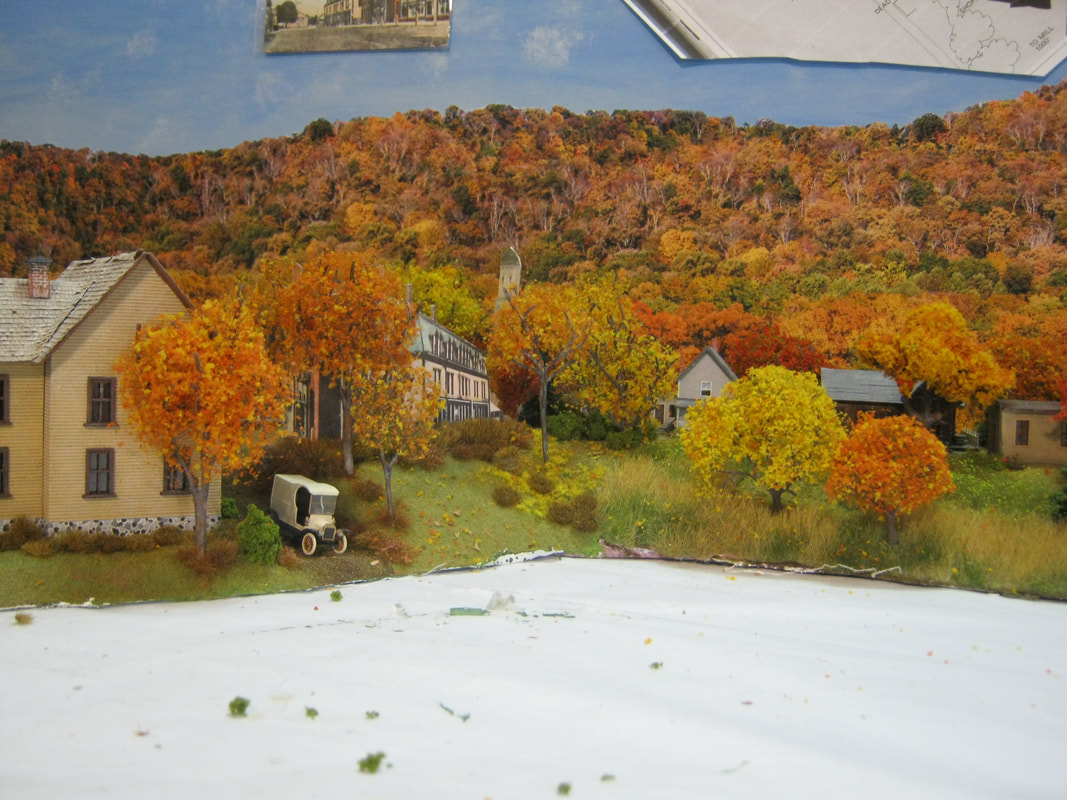
At Sluice Hill on my layout, the trees get progressively smaller as you get toward the backdrop. The far mountain is only a silhouette cut out of masonite and painted green with a couple of shades and coursenesses of green ground foam sprinkled on the wet paint. The masonite mountain is placed about two inches from the blue sky painted backdrop to give it more illusion of depth. The whole scene from the front edge to the backdrop is only 18" deep, but seems much deeper.
At Sluice Hill on my layout, the trees get progressively smaller as you get toward the backdrop. The far mountain is only a silhouette cut out of masonite and painted green with a couple of shades and coursenesses of green ground foam sprinkled on the wet paint. The masonite mountain is placed about two inches from the blue sky painted backdrop to give it more illusion of depth. The whole scene from the front edge to the backdrop is only 18" deep, but seems much deeper.
|
|
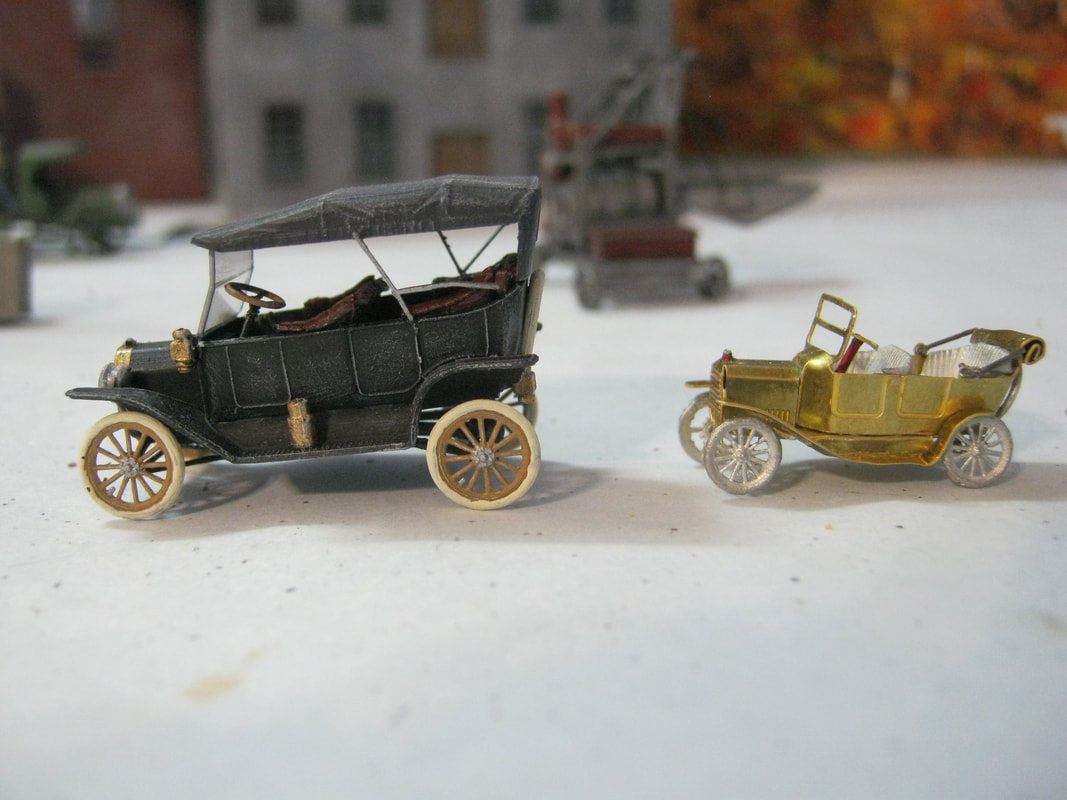
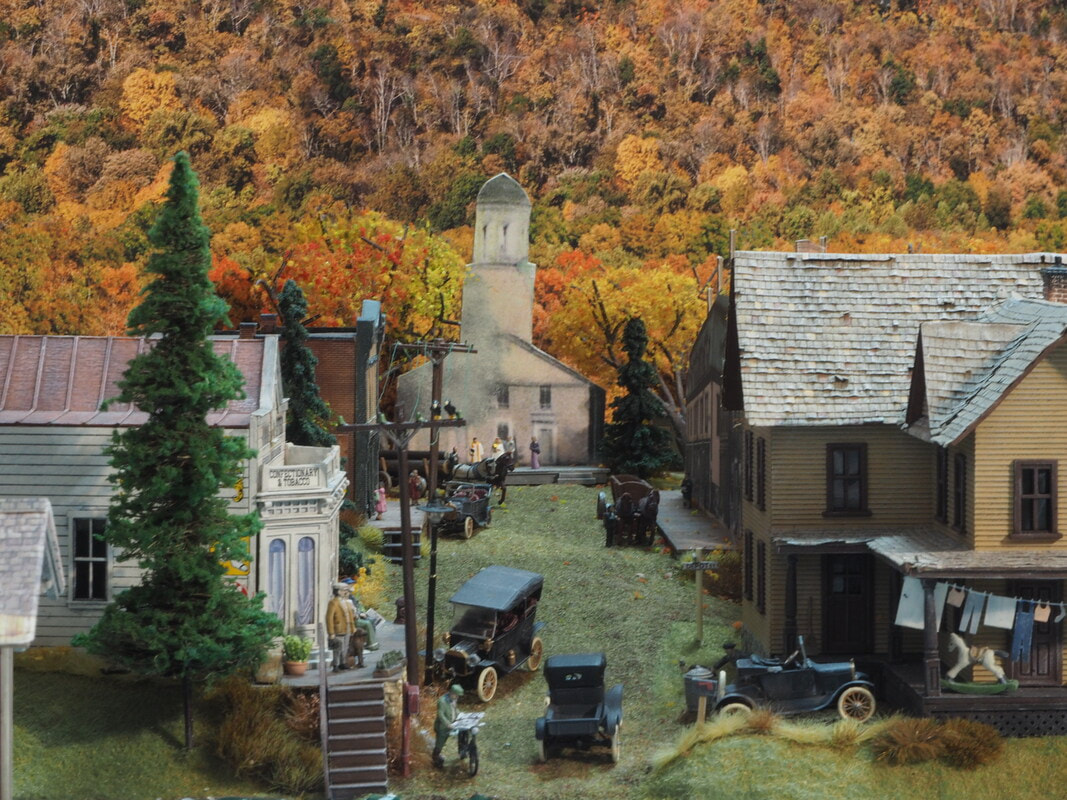
Here's a good example of putting smaller stuff in the background. Below left is an HO scale Model T from Jordan's Highway Miniatures next to a brass kit N scale Model T. In the lower right scene, the same two model T's are on the left side of the street parked at the same angle, one behind the other by just a few inches. The two buildings at the front of the photo are HO scale, and everything up the street behind them is N Scale, including the store to the left, the wagons and horses and the people. The Telephone pole at the front is HO, and the one behind it is about 1/120 scale, and the far phone pole is N scale. The wooden sidewalks up the street are wider at this end and taper to smaller at the far end, enhancing the illusion of distance. The depth of the scend from the top of the steps at the front to the porch at the church at the back is only 11".
|
|
In the photo below left, the house to the left is HO as well as the Model T delivery truck. The building to the right of it is simply an enlarged period post card of a building that was there at the time, and was glued to card stock and cut out. The buildings to the right of that are all N scale, and are only about 10 inches from the HO building. The whole back street is N scale as can be seen in the lower right photo.
|
|
The lower left photo is a closer look at that N scale back street. The detail is not nearly as elaborate as those toward the front of the layout, but structures and figures are still weathered the same as the full scale HO front details. With the rear street elevated a few inches higher than the foreground, and the trees in between sized at about half way between the front trees and rear trees, it's completely believable while operating the layout that the town is much larger than it actually is.
|
Backdrops
Below left is my first ever use of a photo backdrop, on my first ever module. Notice how the backdrop isn't wide enough for the module, so I tried to hide it by adding trees near the edges of the photo. Below right is the same module when I blended it into the overall layout. I got rid of my circus colored fall trees, and cut the sky from the photo, and glued it to the masonite painted sky backdrop attached to the wall.
|
|
Below left is a closeup of the left edge of the backdrop, overlapped a bit with the photo backdrop to its left. The gap and crappiness will be camouflaged with scenery. Below right is the original photo backdrop now incorporated into the same scene, using better techniques of blending it into the overall scenery.

|
|
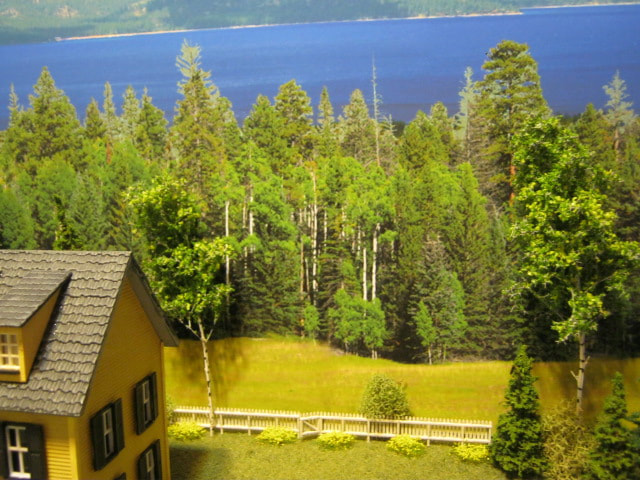
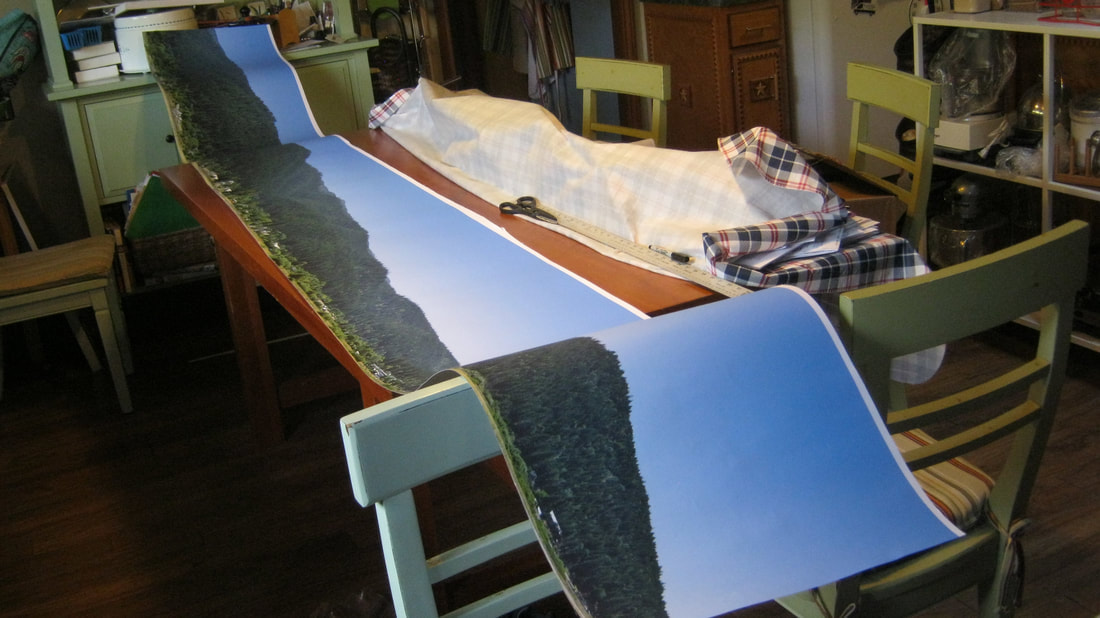
Here below left is my second photo backdrop, which was my first full length one ordered to fit the whole module for Rangeley. I learned to curve the masonite around behind the hotel to the right, so the photo surrounded the whole scene. I decided that since the height of the photo was the same height I would make the masonite, I'd keep the sky. So I used a ton of glue stick to adhere the paper photo to the masonite. The problem that has developed over time is that changing humidity in the train room has caused 'blisters' to form in the sky where there wasn't full glue stick coverage. Since then, I have either trimmed the sky away if the backdrop is not self-adhesive, or if it is adhesive and the photo sky works for the scene, leaving it on.
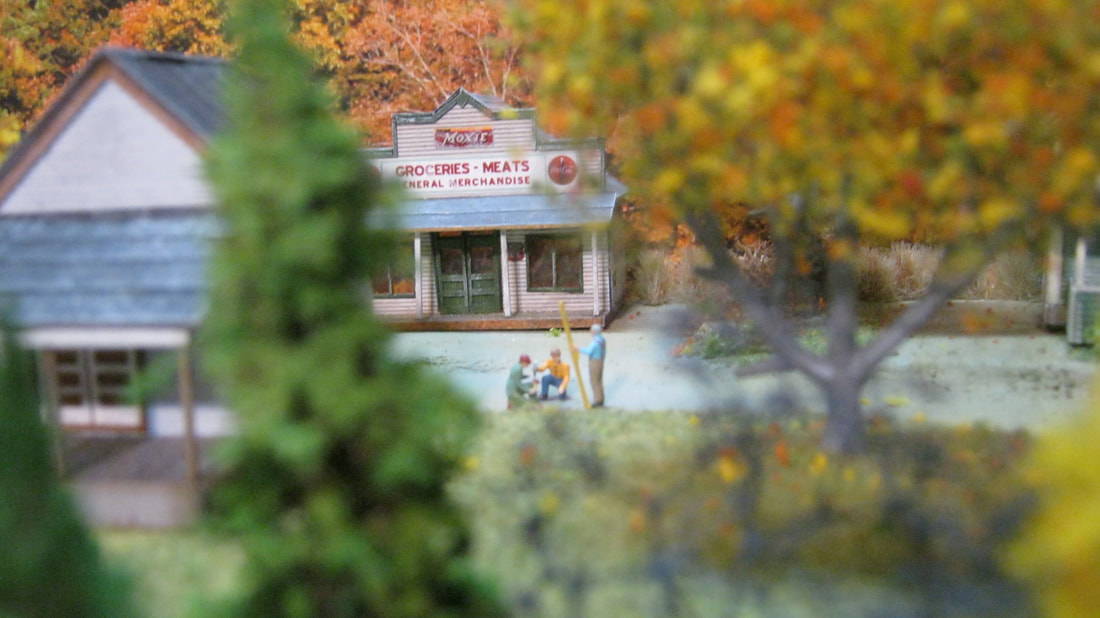
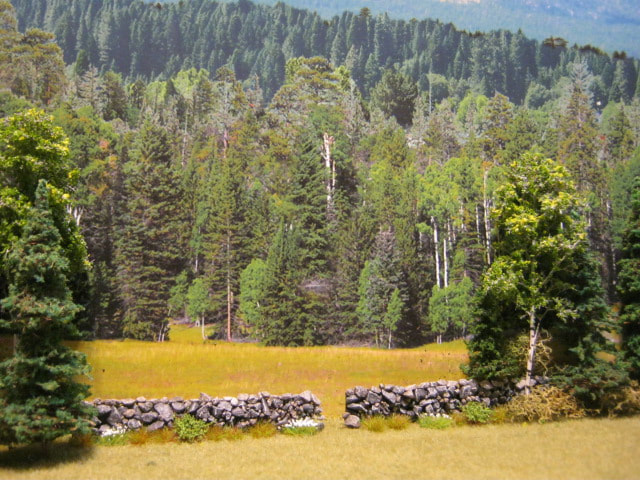
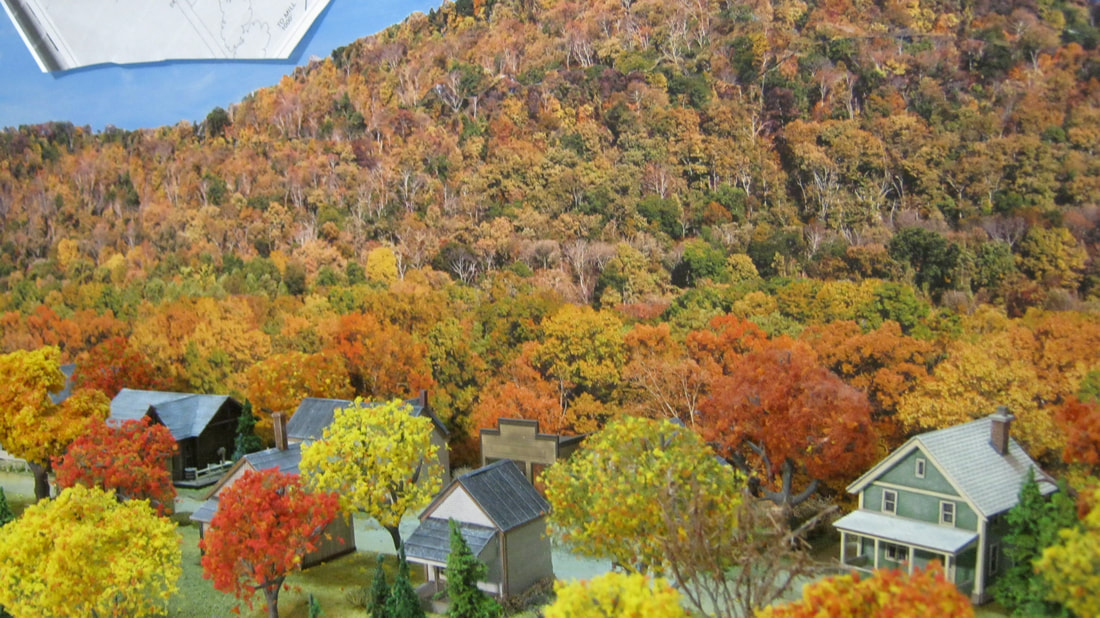
There are a few ways you can use to blend where the 3D scenery meets the backdrop so that it's not obvious where one ends and the other begins. Below right, carefully blended a few shades of static grass flock to get the color close to the photo grass in the backdrop. Then I put a stone wall about 1" in front of the photo, and added some grass clumps and flowers in front of the wall to distract you from the color changes in the grass. Finally, I added trees that were carefully colored to match the trees in the photo on both ends of the rock wall. This is a well blended backdrop scene.
There are a few ways you can use to blend where the 3D scenery meets the backdrop so that it's not obvious where one ends and the other begins. Below right, carefully blended a few shades of static grass flock to get the color close to the photo grass in the backdrop. Then I put a stone wall about 1" in front of the photo, and added some grass clumps and flowers in front of the wall to distract you from the color changes in the grass. Finally, I added trees that were carefully colored to match the trees in the photo on both ends of the rock wall. This is a well blended backdrop scene.
|
|
Below left is another variation of that. The grass flock is mixed to a similar shade as the photo grass, the fence is place about half an inche in front of the photo, flowers and a bush are added to distract your attention, and the left and right have trees and a structure to frame the scene.
Below right is the same technique on a larger scale. The scene is framed by the photo mountain disappearing behind the 3D one to the left, and to the right, there is a small hill with stumps on it. The hill has a fence on top about an inch from the photo, and it slopes down out of sight on that inch behind the fence. The cows are on the down slope, and it appears that the 3D terrain slopes down into the photo behind. Compare it to the gap in the trees in the center of the photo where the 3D scenery isn't finished yet, and you can clearly see where the model ends and the photo begins.
Below right is the same technique on a larger scale. The scene is framed by the photo mountain disappearing behind the 3D one to the left, and to the right, there is a small hill with stumps on it. The hill has a fence on top about an inch from the photo, and it slopes down out of sight on that inch behind the fence. The cows are on the down slope, and it appears that the 3D terrain slopes down into the photo behind. Compare it to the gap in the trees in the center of the photo where the 3D scenery isn't finished yet, and you can clearly see where the model ends and the photo begins.
|
|
Below left is the photo backdrop for Langtown, unrolled after arrival. I wanted it for the conifer hills, but there is a modern airfield and modern buildings along the bottom edge. I cut the bottom off it to get rid of them, and made sure the 3D scenery hills that would be in front of it would be tall enough to cover that bottom gap. This backdrop is self adhesive and a clear blue sky worked for the scene, so I left the sky on.
Below right is the photo backdrop for Phillips. Note that the sky on it is gray clouds, so i cut the sky off and the masonite backdrop mounting was painted by hand to match the sky along this whole section of the layout.
Below right is the photo backdrop for Phillips. Note that the sky on it is gray clouds, so i cut the sky off and the masonite backdrop mounting was painted by hand to match the sky along this whole section of the layout.
|
|
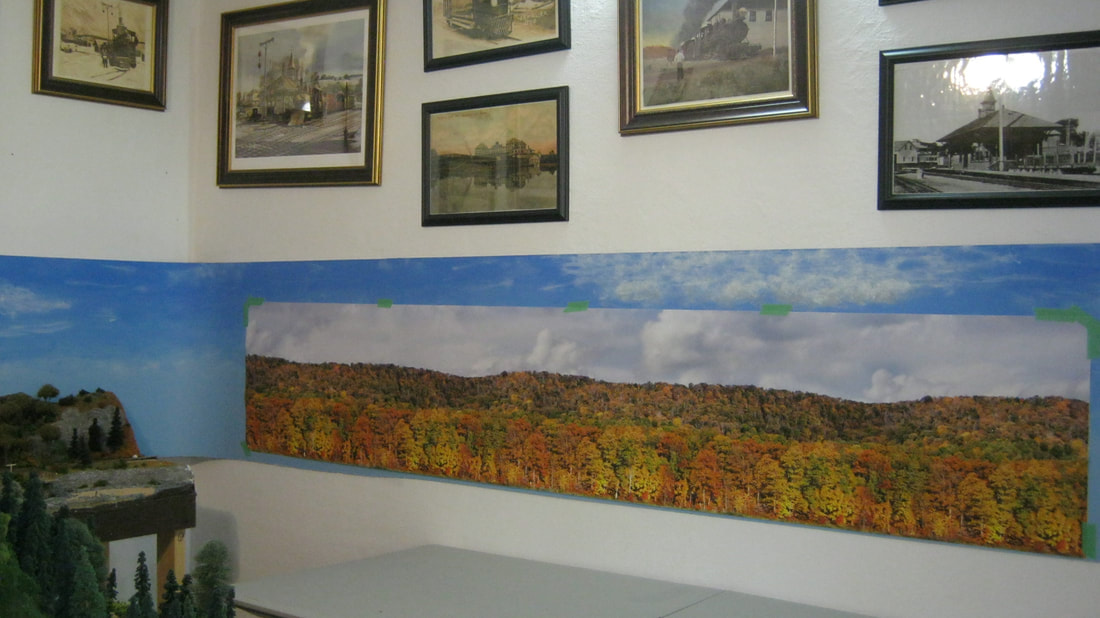
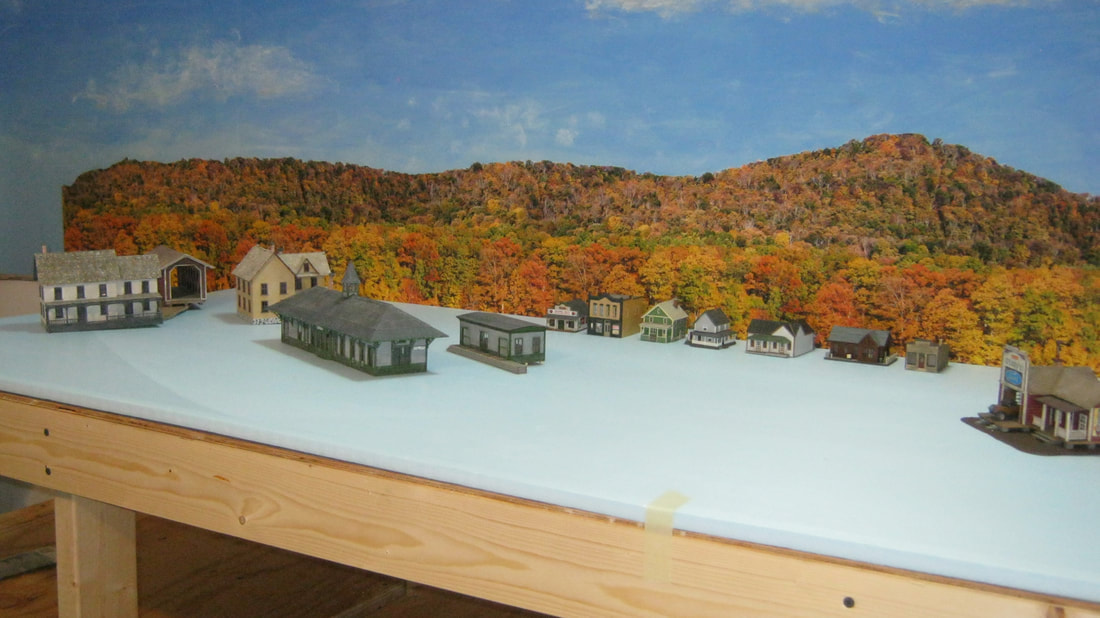
Below left, the benchwork is in, and the height of the photo has been adjusted where I want it for blending the scenery. The horizon was too level for the hilly area Phillips is in, so note that I cut the top left and right corners off the photo and used them to make a tall hill seen to the right side of the lower left photo. Compare it to the previous photo.
Below right, notice how I carefully blended the foliage colors on the 3D trees to blend them with the photo trees. It's very difficult to see where the 3D stops and the photo begins.
Below right, notice how I carefully blended the foliage colors on the 3D trees to blend them with the photo trees. It's very difficult to see where the 3D stops and the photo begins.
|
|
Below left is the right side of the fall foliage backdrop where it ends. To transition the scenery from the bright fall colors to the leaflessness before teh snows, the 3D scenery that overlaps the end of the backdrop and comes around the curve of the masonite sky transitions from colorful leaves to brown leaves and bare branches. Note there is not backdrop behind the trees to the right of the photo.
Below right, the photo backdrop has been added, the left edge of it hidden behind the 3D scenery. This photo backdrop had the sky cut off from it, but because the thin branches at the tree tops were impossible to cut around, they were cut as jagged as possible and then the photo was stuck onto the masonite sky. I then blended that sky into the branches by using a 000 paint brush and blue acrylic to paint hash marks into the tree tops to define the thin branches better.
Below right, the photo backdrop has been added, the left edge of it hidden behind the 3D scenery. This photo backdrop had the sky cut off from it, but because the thin branches at the tree tops were impossible to cut around, they were cut as jagged as possible and then the photo was stuck onto the masonite sky. I then blended that sky into the branches by using a 000 paint brush and blue acrylic to paint hash marks into the tree tops to define the thin branches better.
|
|
Below is a close up, to show how I added flat fine trees and branches made from some unidentified weed from Hobby Lobby, onto the photo, glued straight onto the photo using spray glue sprayed onto the backs of the trees. Since the track only ran a little more than an inch from the backdrop, I glued more at the bottom as well do give the backdrop more depth.
Mock Ups
|
|
|
|
|
To the left: stockpiling trees made from Woodland Scenics tree armature kits, colored lychen moss and ground foam.
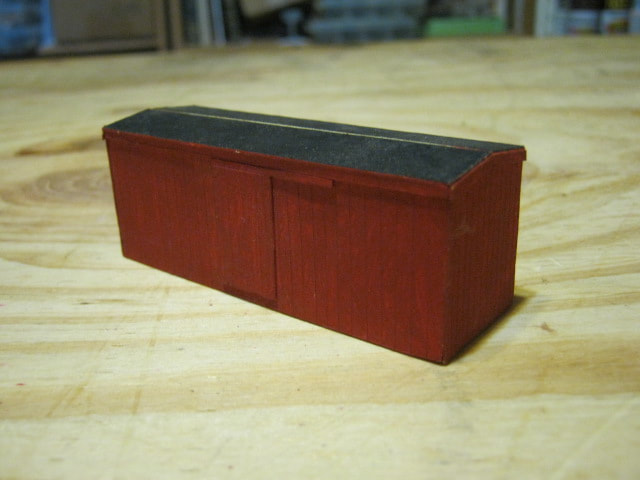
To the right: pulling old structures out of boxes that have been stored for 40 years, and trying my hand at making a few new ones. These were being eyed for possible use in a future Rangeley module. |

|
|
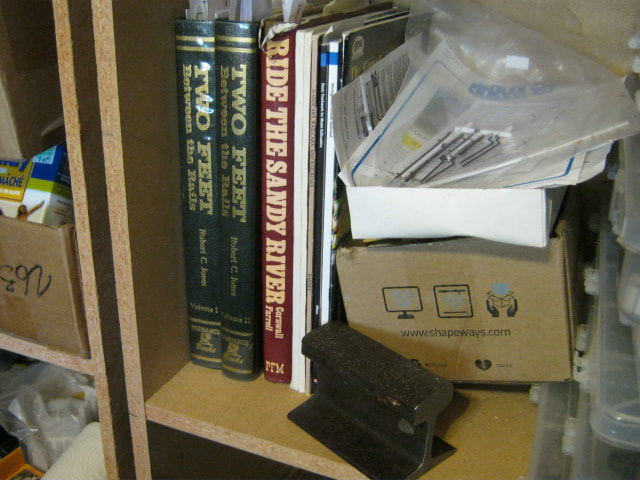
To the left: my embryonic reference library for researching the Sandy River and Rangeley Lakes Railroad. Aaaannnd....a slice of an original rail used on the original railroad. I use it for many purposes while building my layout. To the right: my forty year old first attempt at building SR&RL rolling stock. |
|
|
To the left: the beginning of stockpiling rolling stock for the layout. Virtually nothing in HOn30 for the Maine two-footers is ready-to-run. Everything is a kit. These are Railway Recollections and Funaro & Camerlengo kits. All are resin based craftsman kits with metal and other materials parts.
To the right: my "storyboard" on the back of the door for planning the future. |
|
|
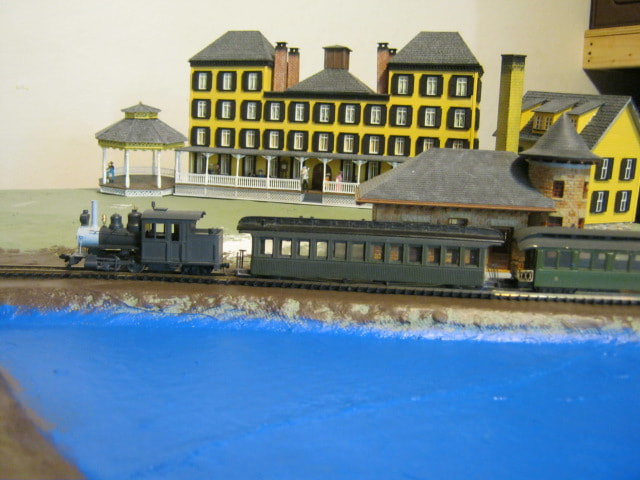
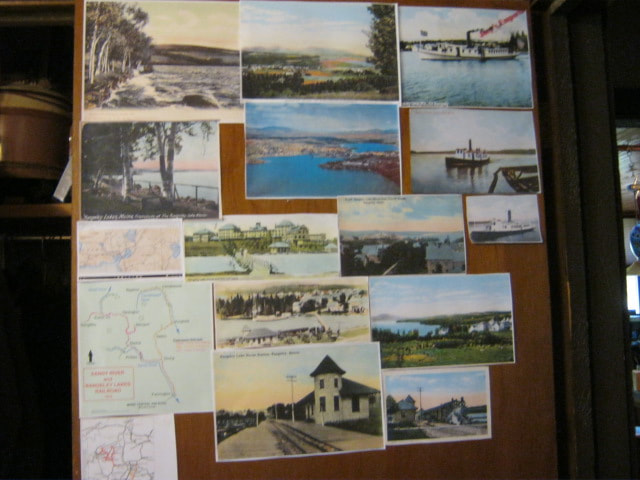
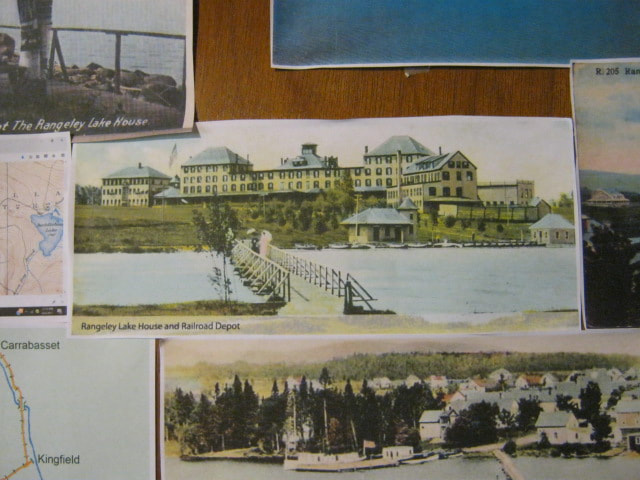
To the left: the center photo is from a period post card of the Rangeley Lake House and the Marbles Station that served it. I decided that I would model it, as it was a major revenue source and the end of the line in Rangley.
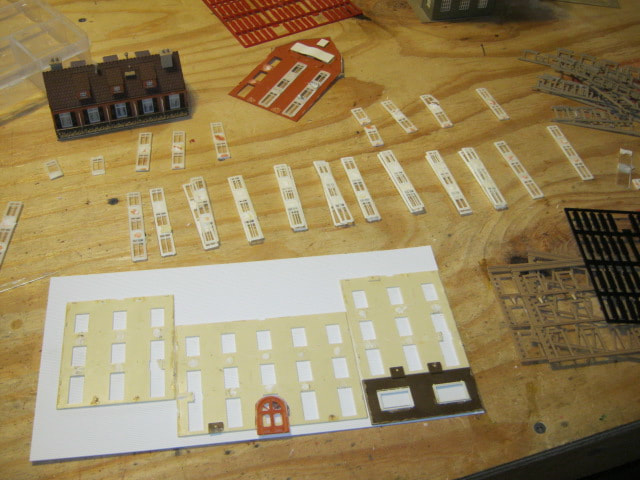
To the right: tearing apart a Vollmer german building kit to scavenge it for windows and use the walls as templates for the new hotel walls. |
|
|
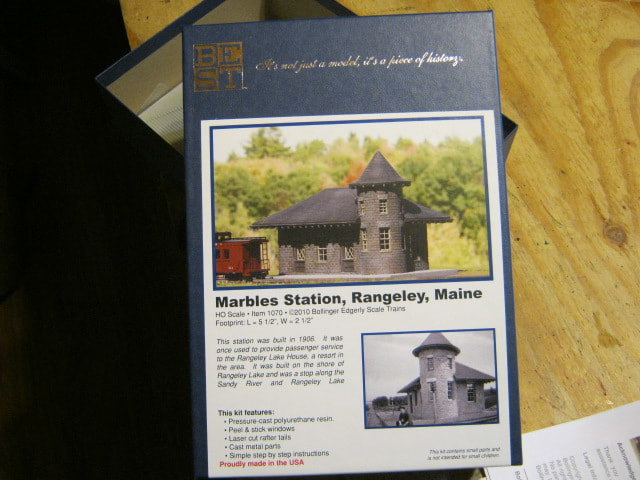
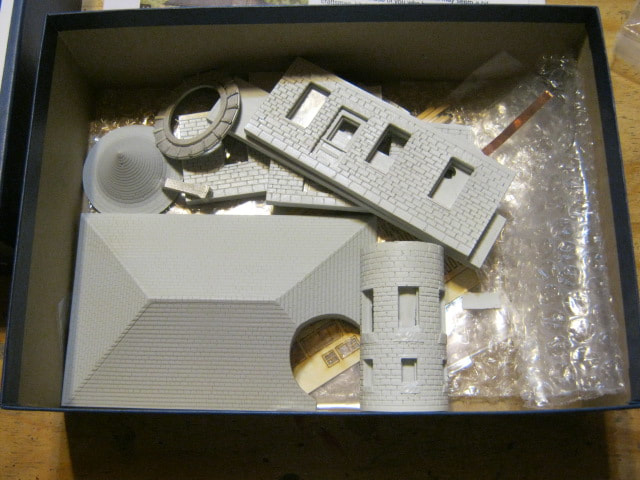
To the left and right: My first craftsman structure kit. This is probably one of the most iconic buildings on the SR&RL, the Marbles depot at the Rangeley Lake House.
|
|
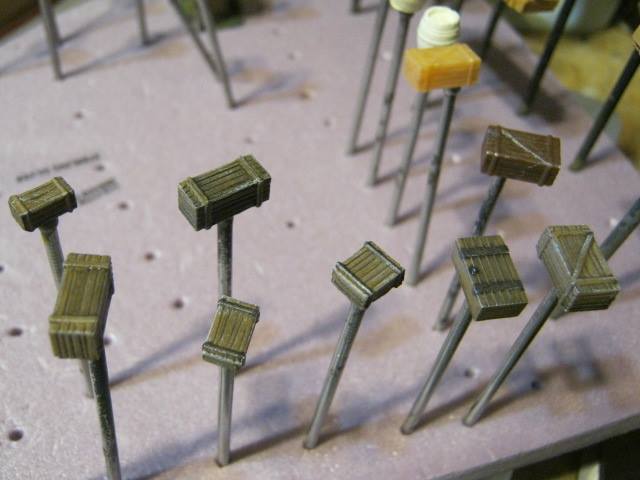
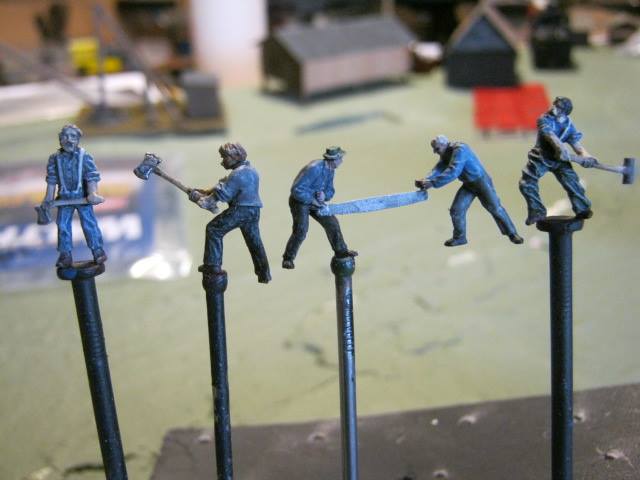
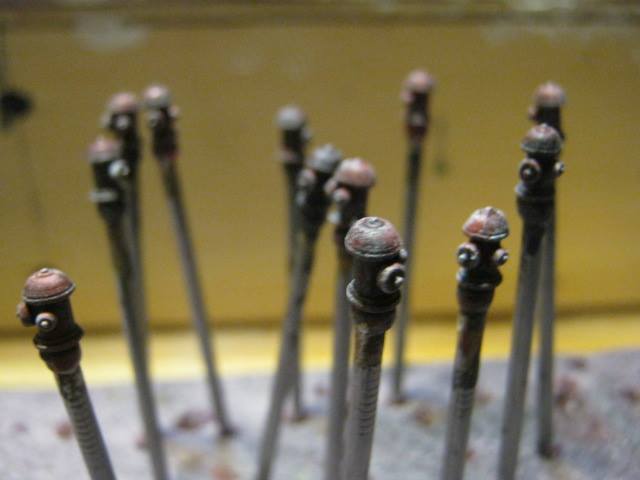
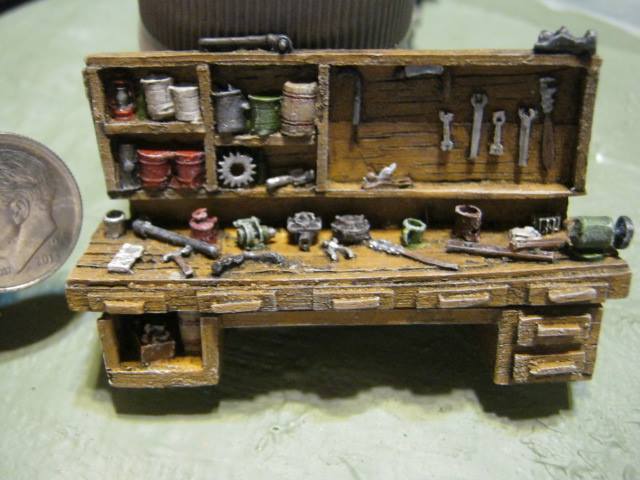
Below left, center, and right: Every myriad of details is mass produced. My standard painting technique for small details like the crates, lumberjacks and fire hydrants as well as everything else is to glue them to the heads of nails with a dot of CAA and do them assembly line style. Pull one out of the styrofoam, give it a base coat, stick it back in the styrofoam, and go to the next one. I do all of one color down the line, then the next color down the line. When painting is done, then I give everything a black or gray wash of Vallejo, depending on the lightness or darkness of the item. After that's dry, then I dry brush everything with Ceramcoat Oyster white.
|
|
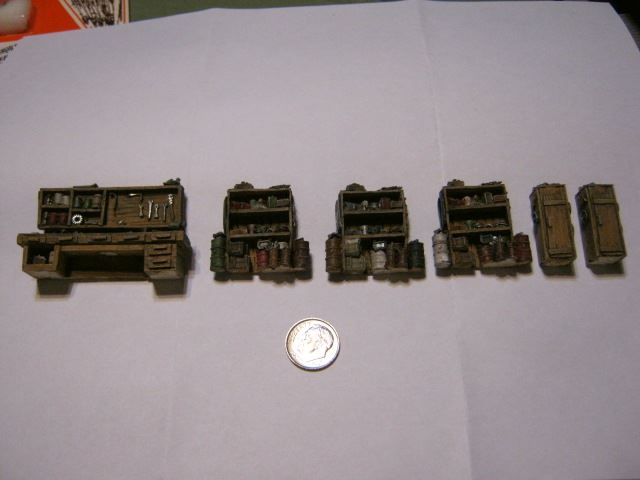
|
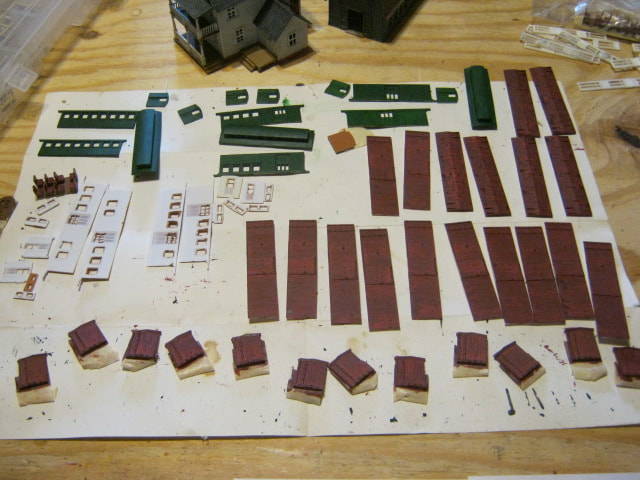
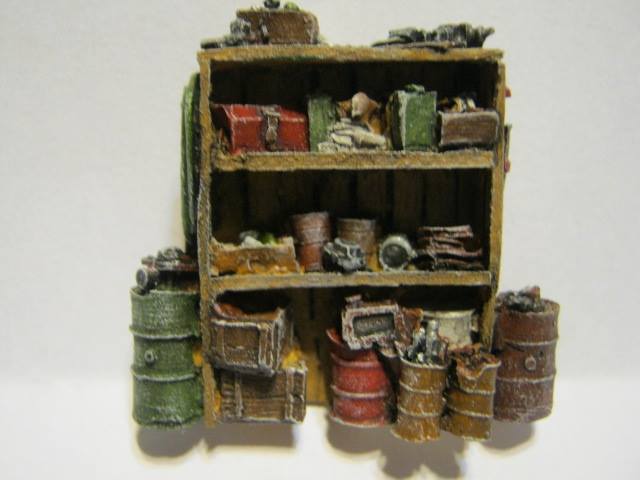
There are lots of shops, roundhouses, mills and other facilities that need work benches and shelves full of "stuff". All of these come as bare resin castings, and I can tell you, it takes a steady hand, a head mounted magnifier, and lots of patience to get these kinds of details to really "pop" out for the viewer.
|
|
|
