STRONG
|
|
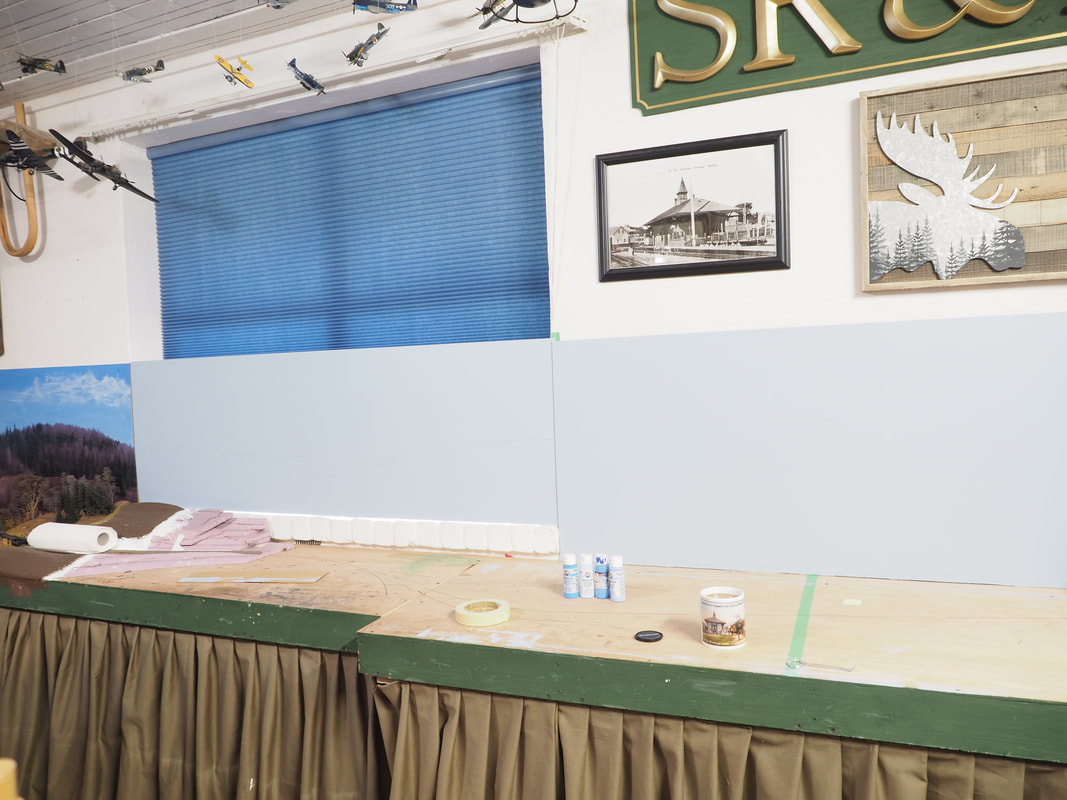
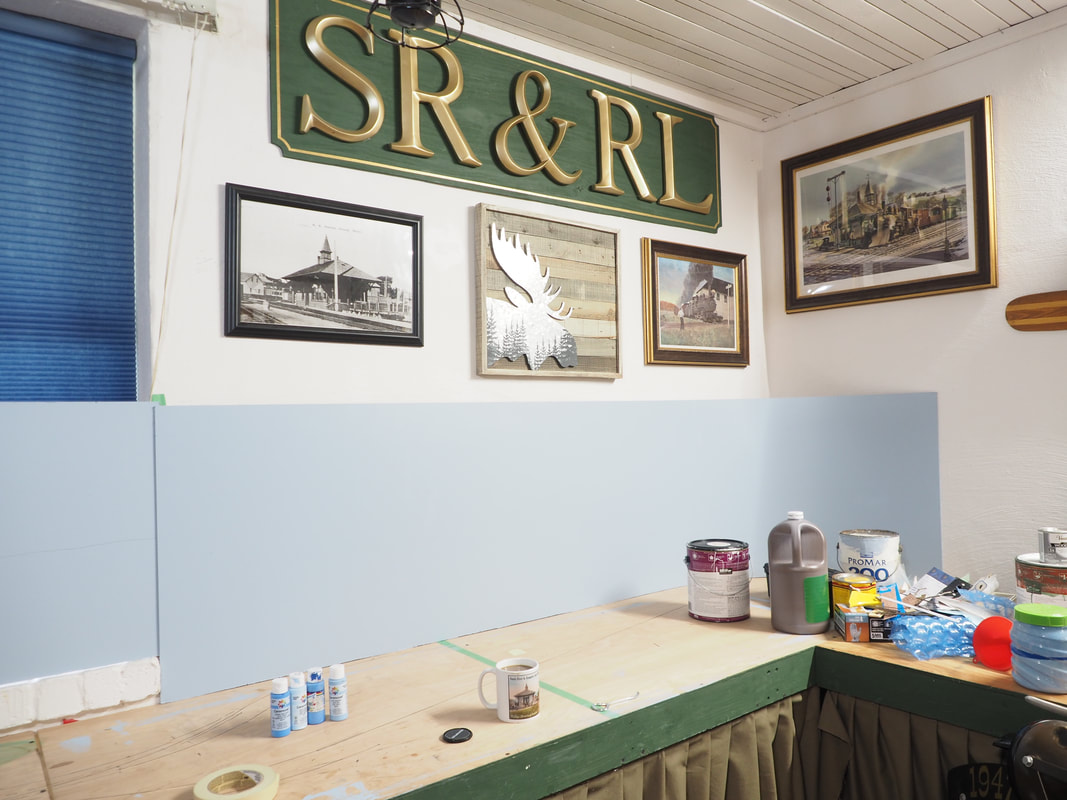
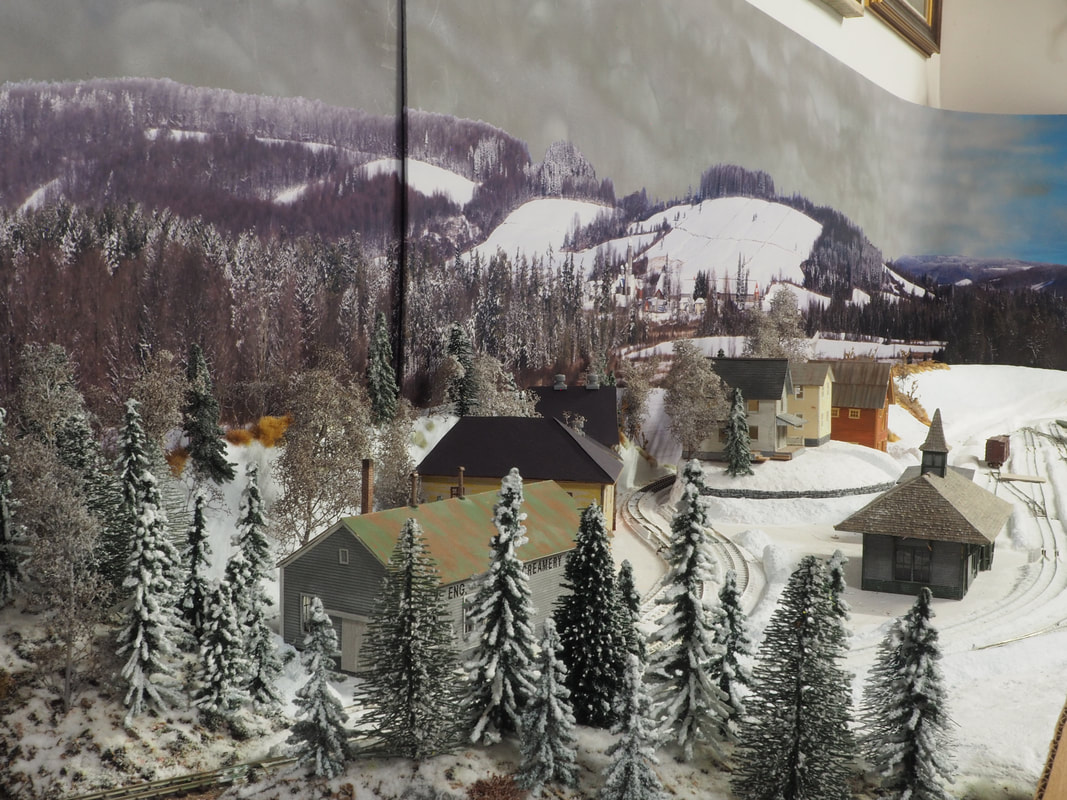
Above left is the future home of Strong on the layout. Initial benchwork is done and the wall above decorated before installing a backdrop. Above right, to the lower left closest to the camera is where Avon will be, then past it Strong. On the far wall and extending off to the right, where the 'home hobby shop' has been temporarily located, will be the Farmington module.
|
|
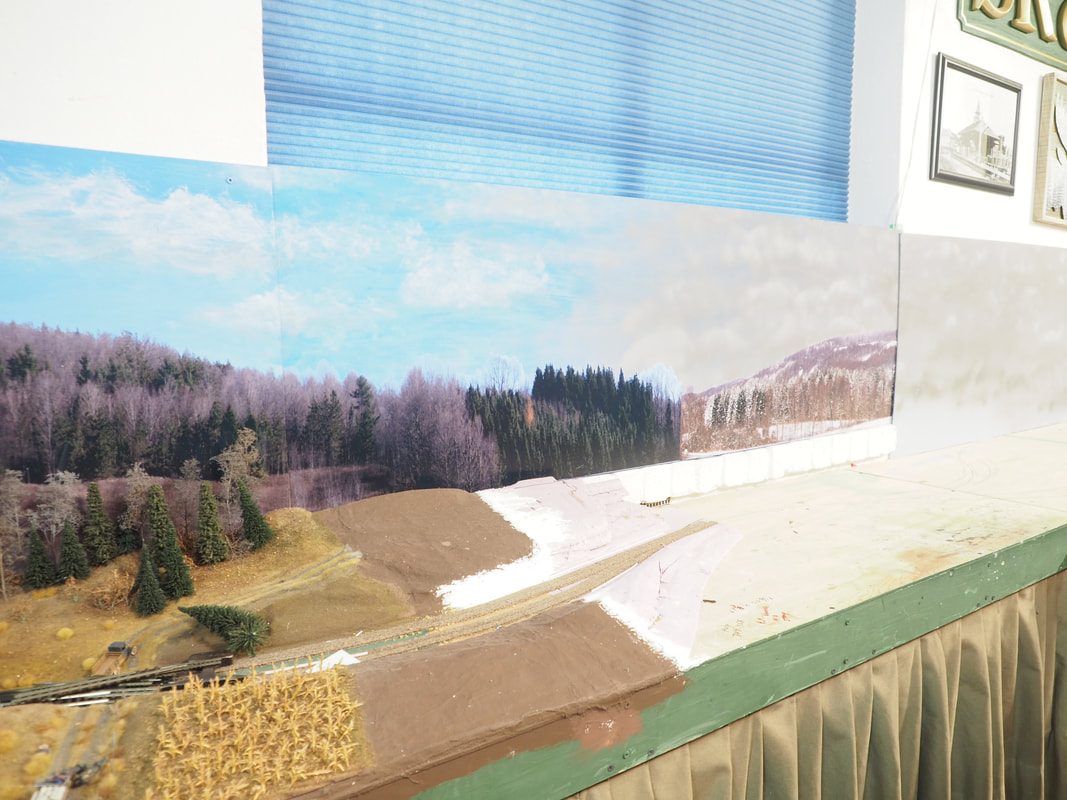
Above left you can see the masonite insert to cover the window that tucks in behind the backrop sections to the left and right. With this, I can pop it out to get at the windows behind if need be. Above right, the backdrop continues on behind what will become Strong, and curves the corner toward where Farmington will be. I paint the masonite with two coats of light blue to make sure that no brown will show through after the sky is painted. Previously I used a wide brush to do this, but found later that the brush marks show up if you look too close, so I've now switched to a mini paint roller.
|
|
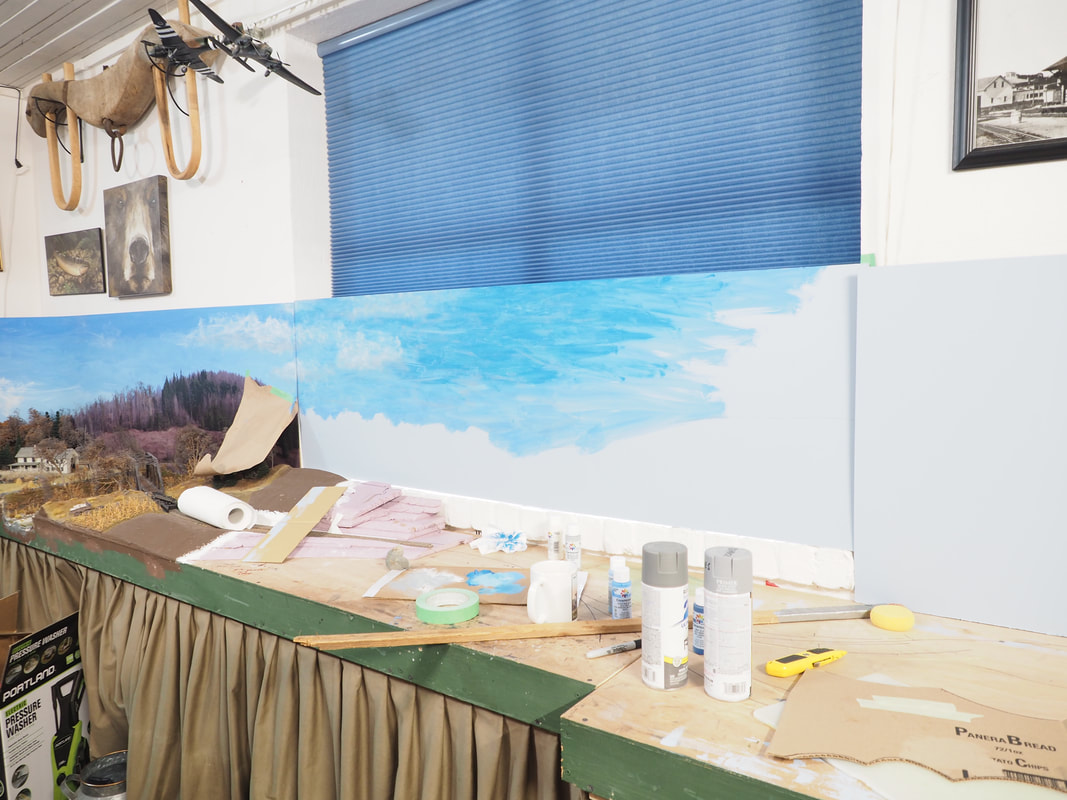
Above left, the outline of the trimmed photo backdrop has been traced on the insert, then the sky and clouds are blended to match the backrop section to the left. I use a damp sea sponge and cheap hobby acrylics to do the sky and clouds. To the above right, I used two shades of gray spray paint, and a quickie-made cardboard cloud top stencil to make the winter storm clouds and overcast that will help emphasize the 3-D Winter scenery on the ground. Light snow will be on the ground under the beginning of the storm clouds to the left, getting heavier as you move to the right.
|
|
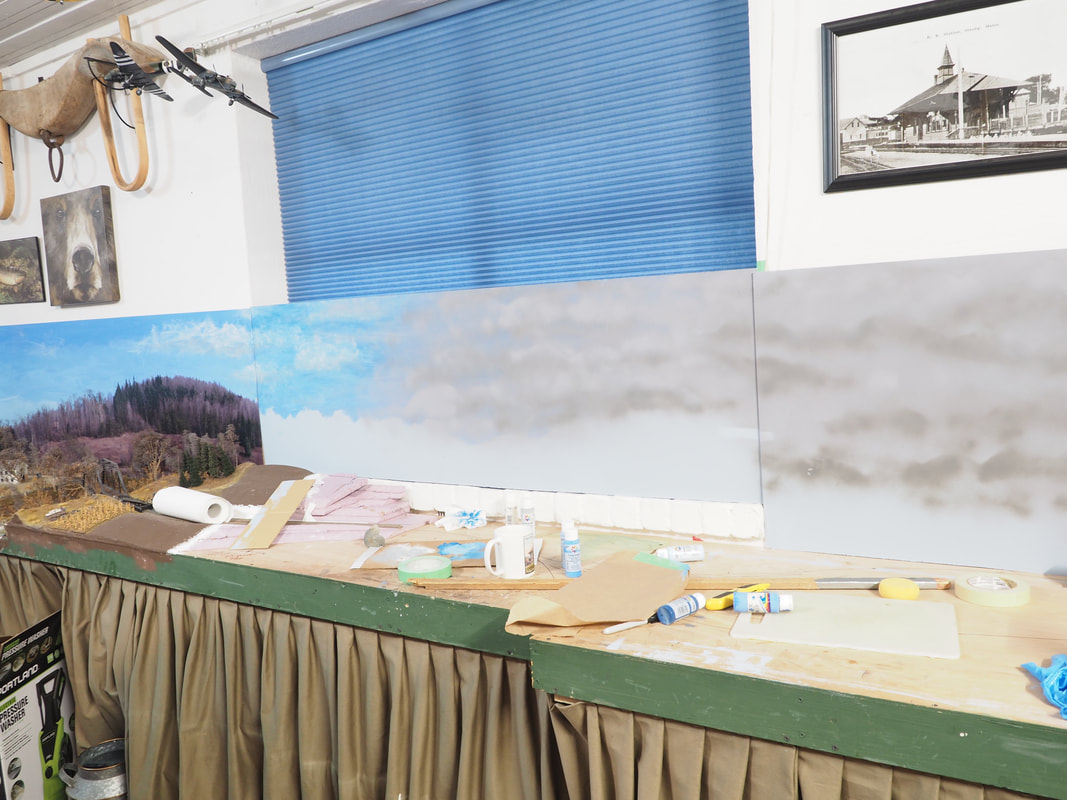
Above left, the adhesive-backed photo backdrop has been applied to the insert and the trimming of the photo backdrop touched up with paint and a fine brush to blend it with the painted sky above. Above right, the photo backdrop has been taped in place on the masonite to get a better idea of how the scene will come together. After looking at it awhile, I decided to lighten up the dark gray on this portion to look more like and overcast winter day instead of the darker storm clouds to the left. This is also helping me figure out how the backdrop continuing around the corner will transition from the Winter scenery of Strong to the Spring scenery of Farmington.
|
|
|
|
|
|
|
|
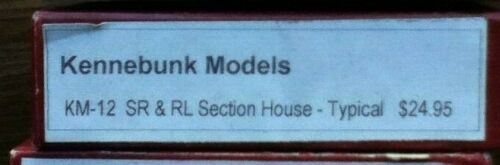
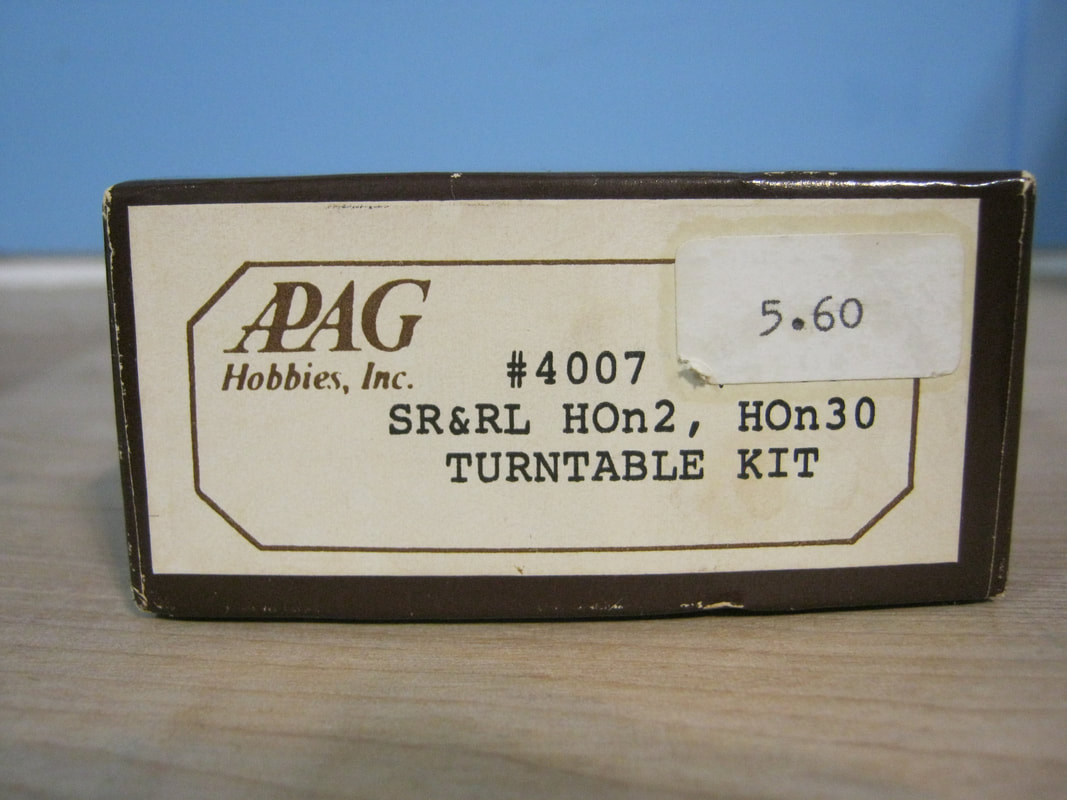
Above are kits that I've already constructed and will construct for Strong. The rest will be either kitbashed or scratchbuilt. A structure I have on hand that will become the Brantley's apple cannery is a Campbell kit that was built and painted by the legendary Bob Hayden that was previously on his Carrabasset & Dead River Railroad layout, the very layout that inspired me over 40 years ago to someday build my SR&RL RR layout.
|
|
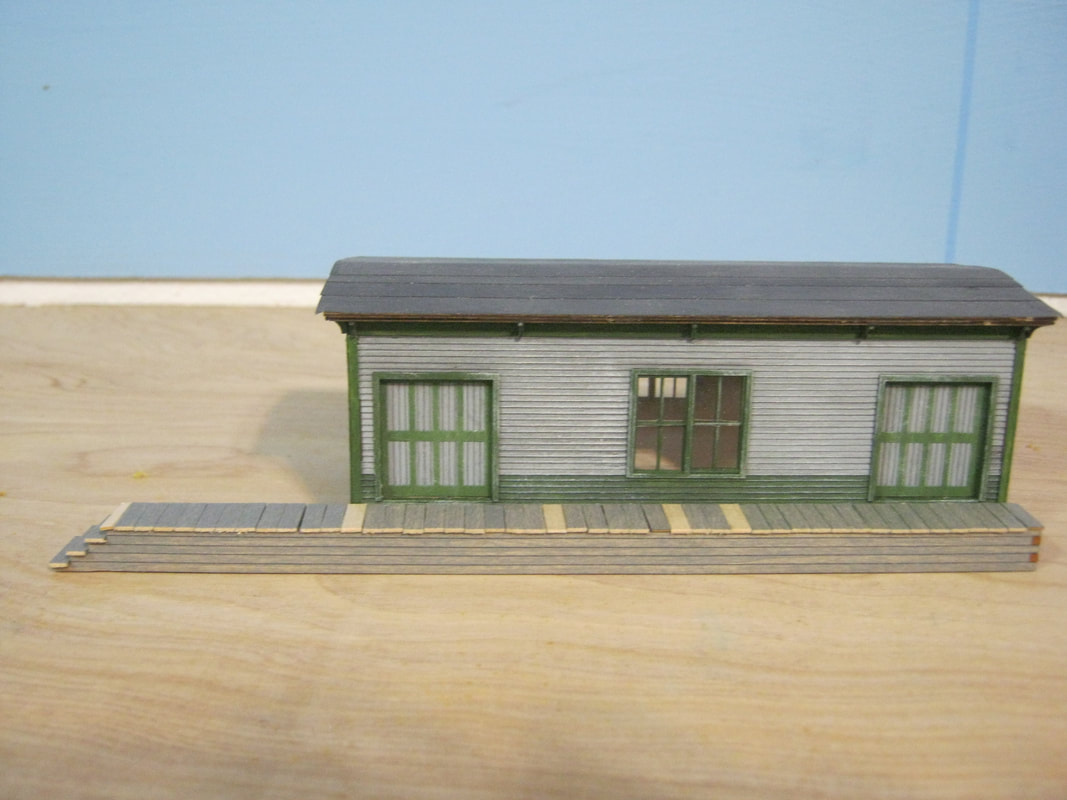
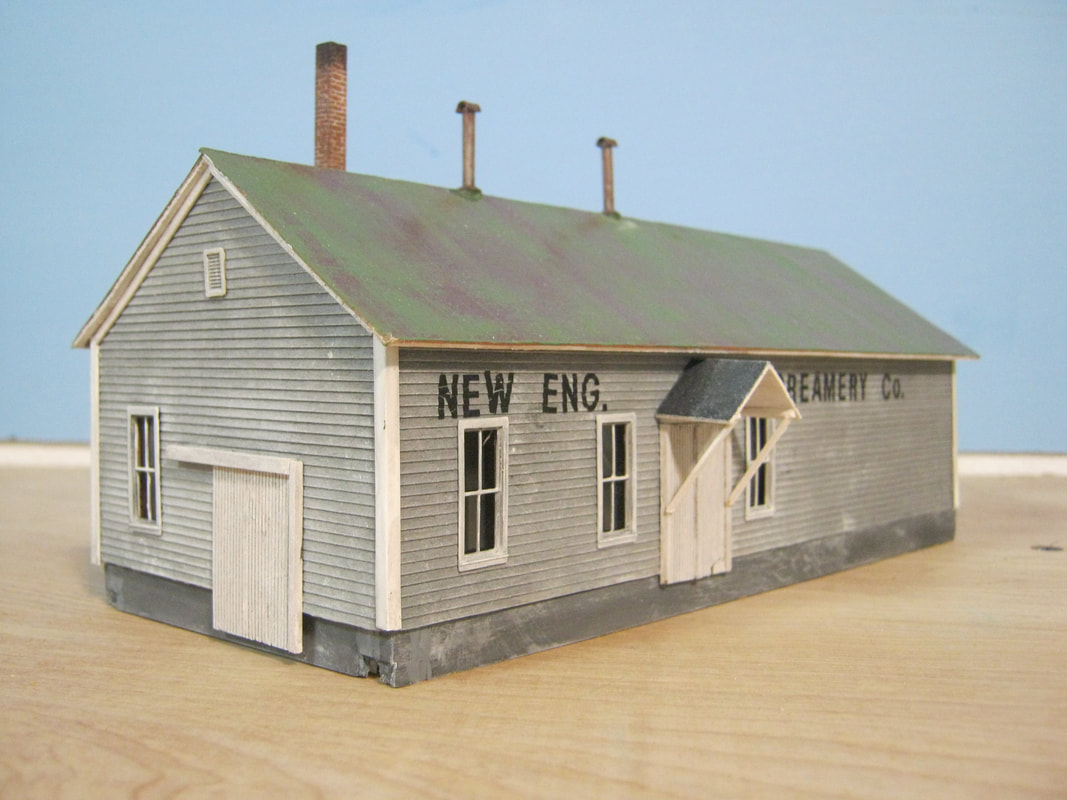
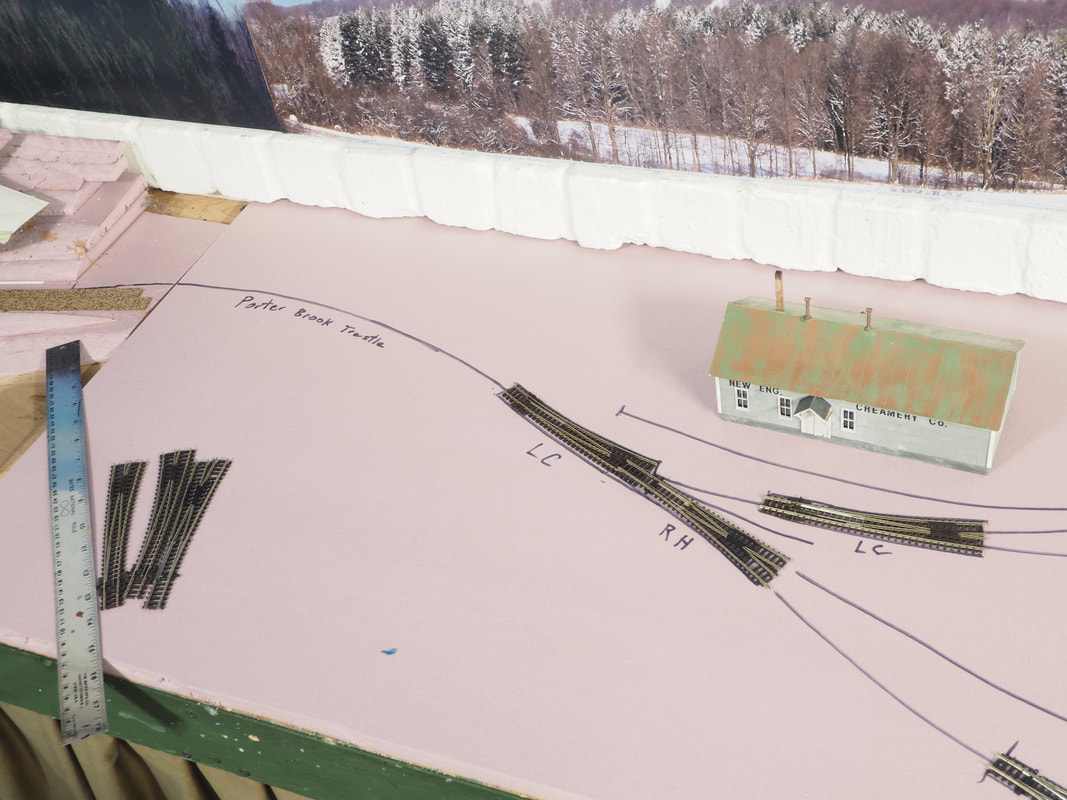
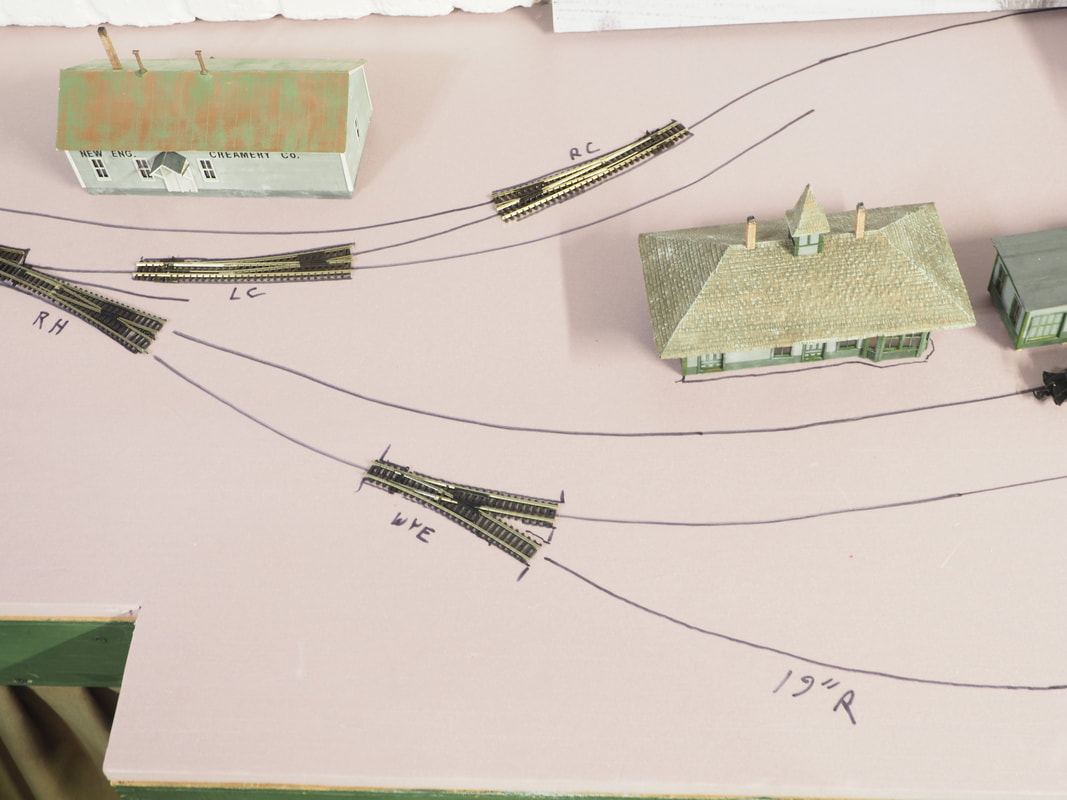
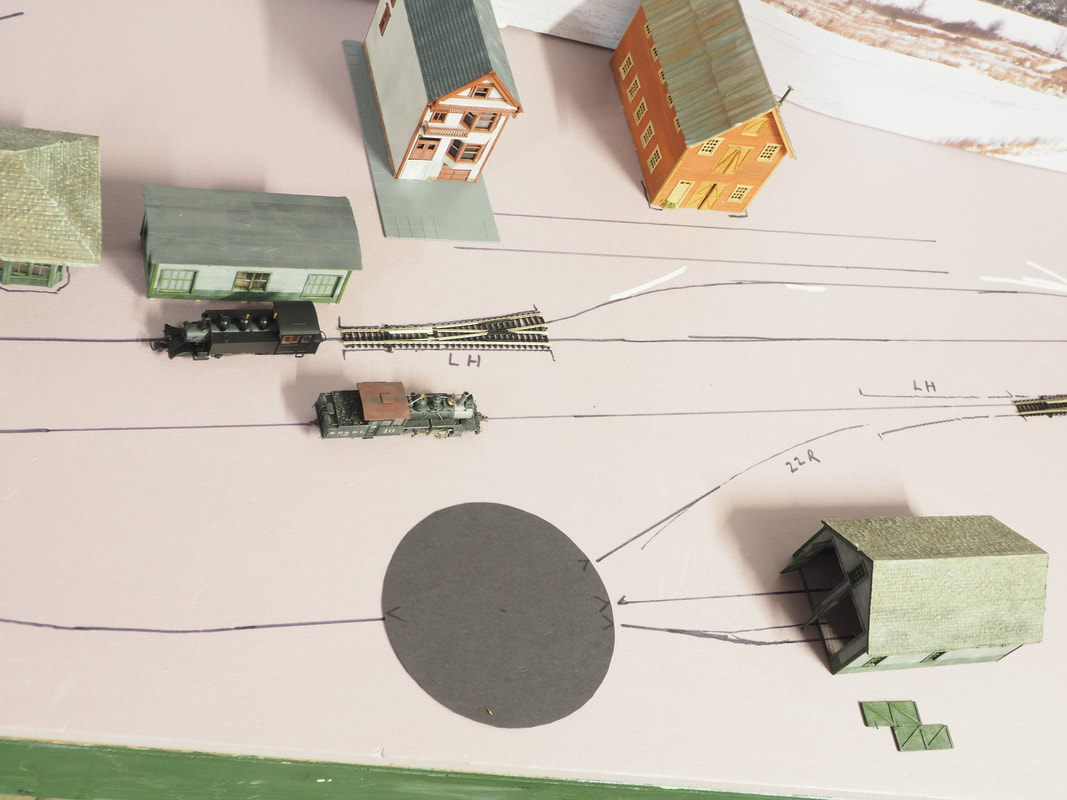
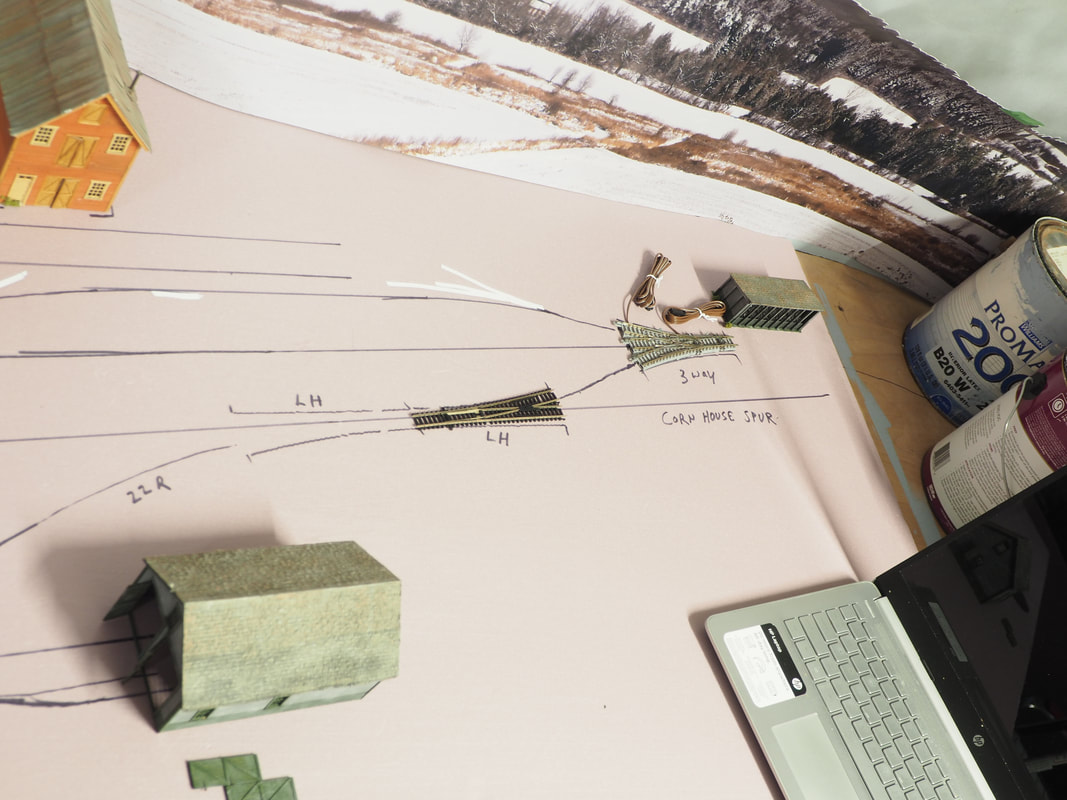
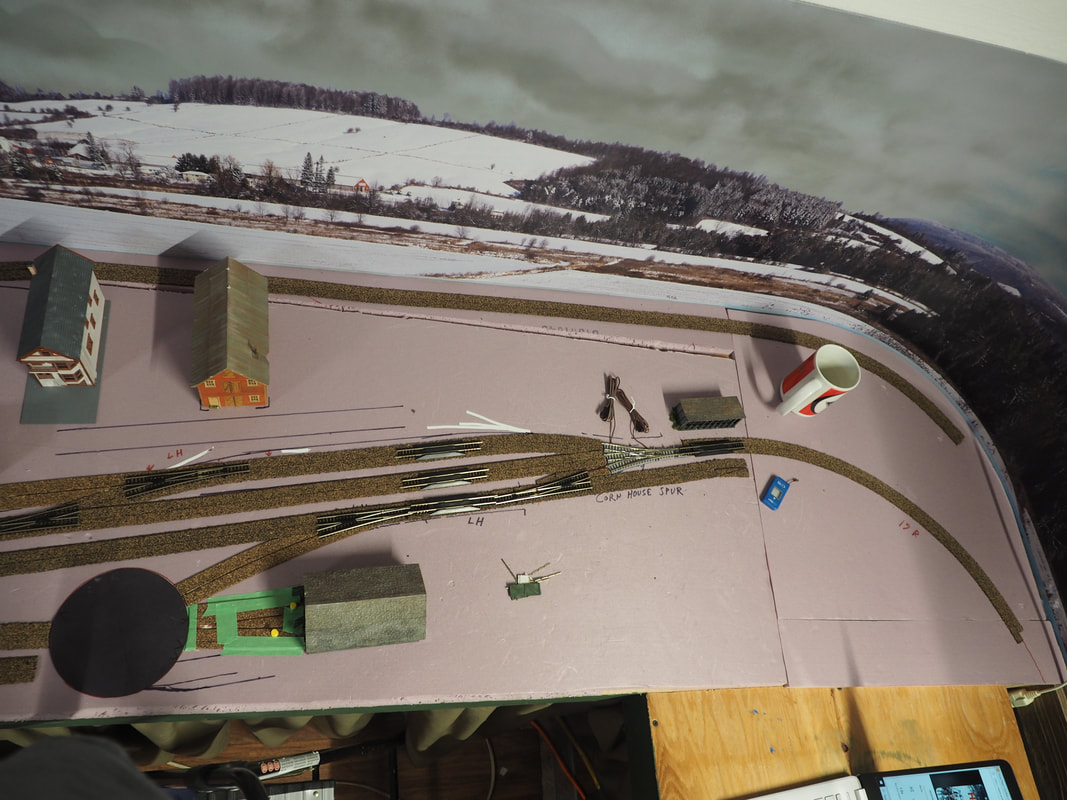
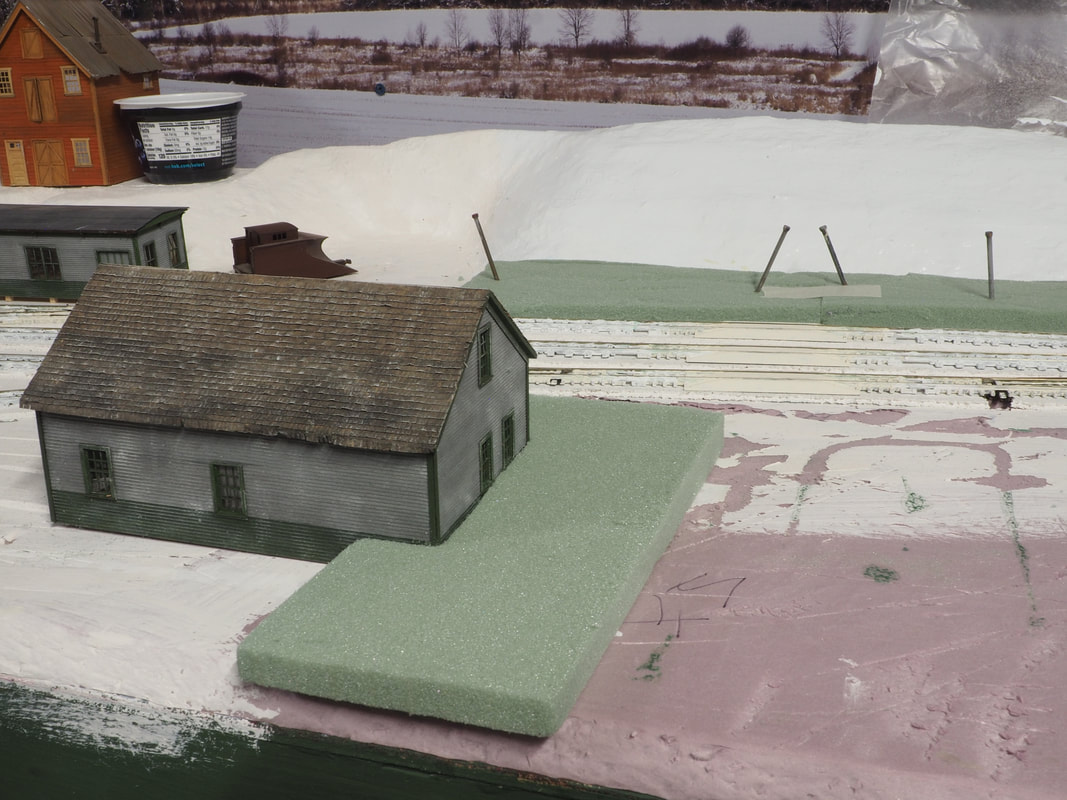
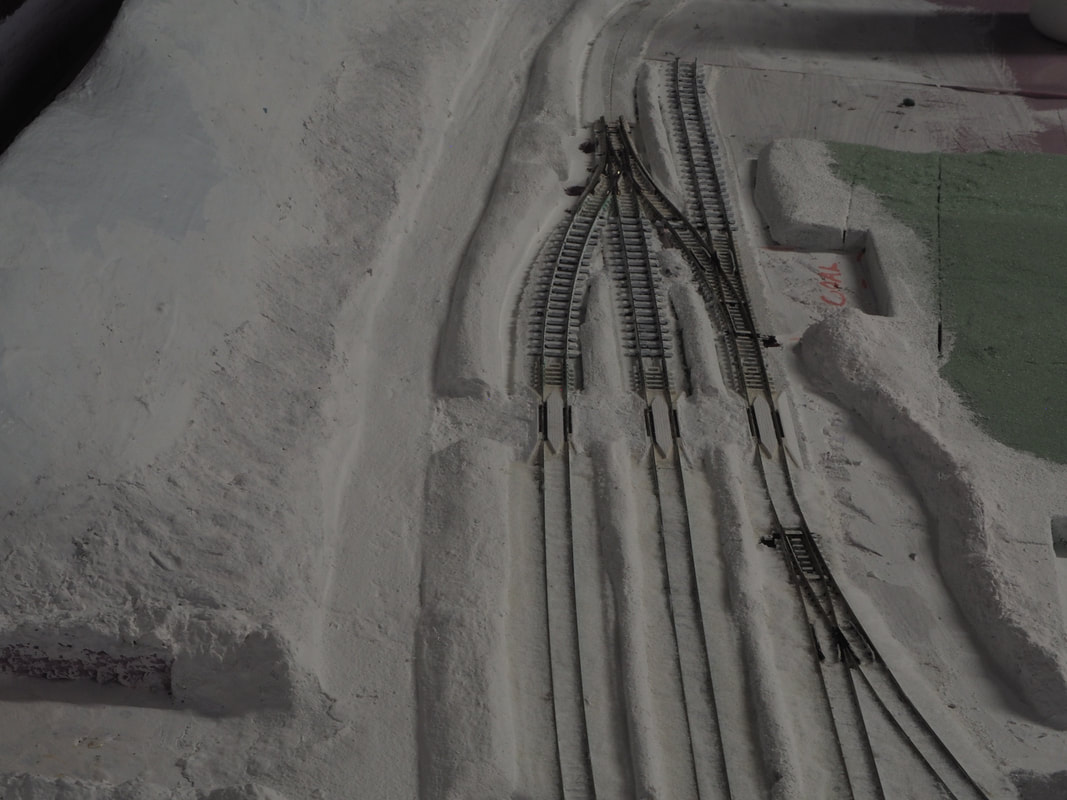
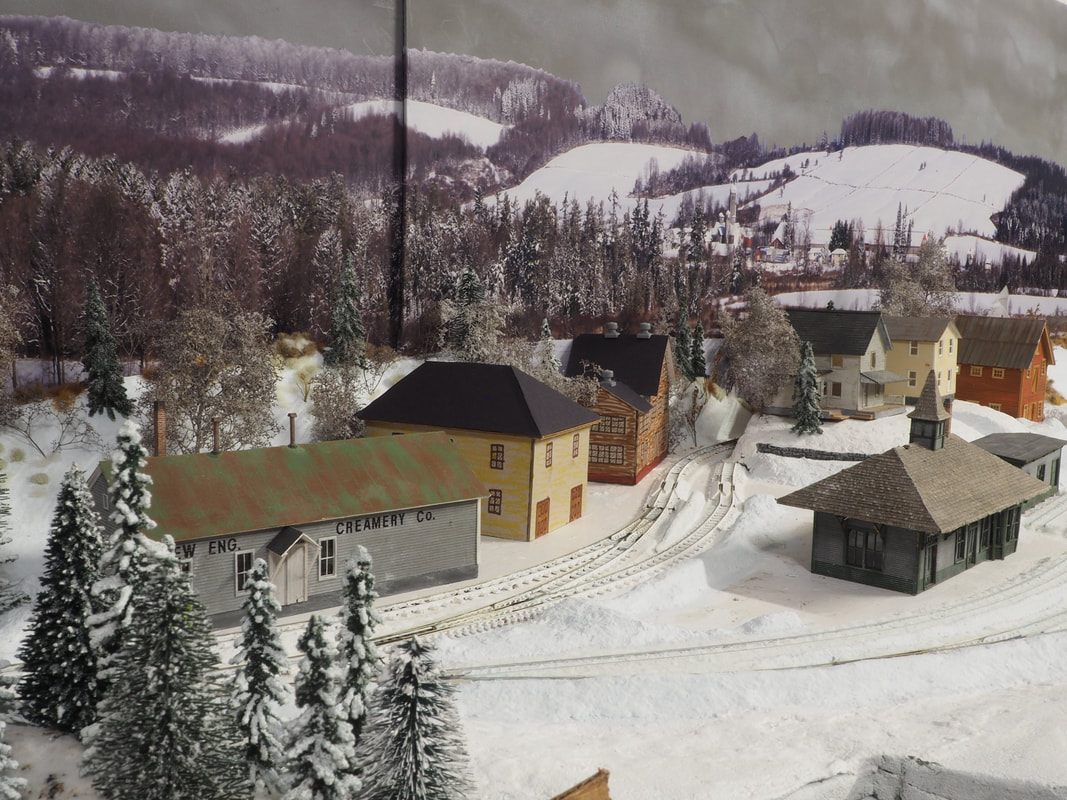
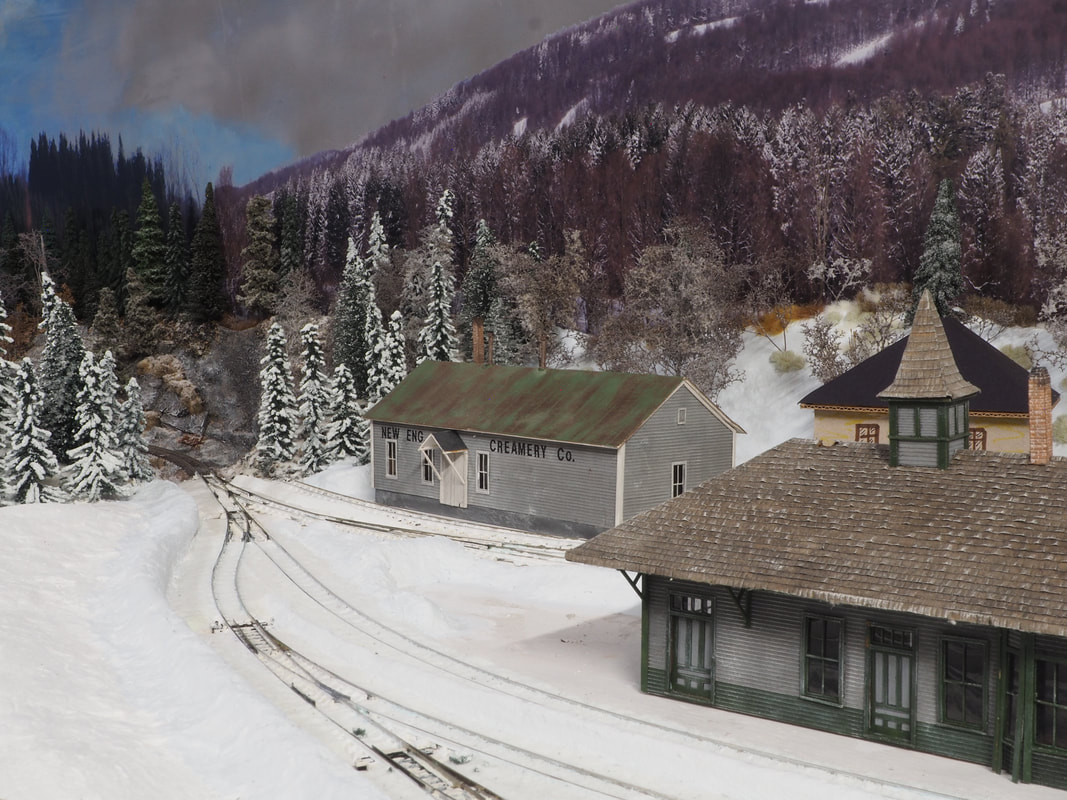
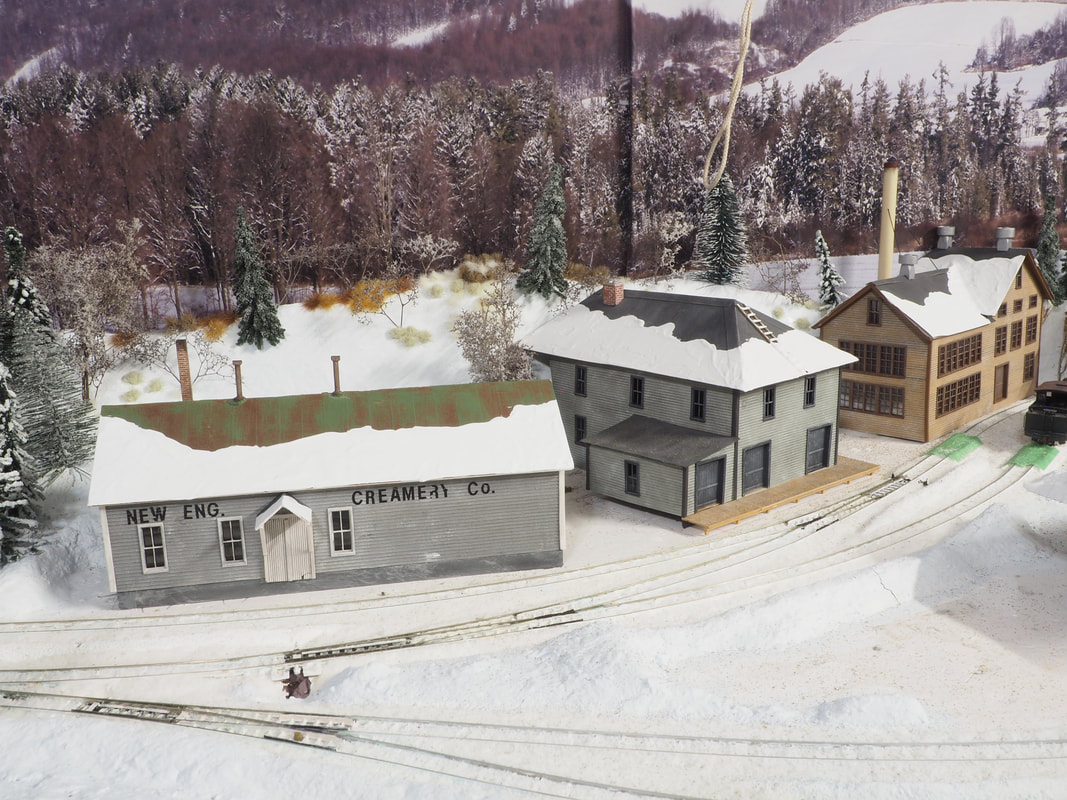
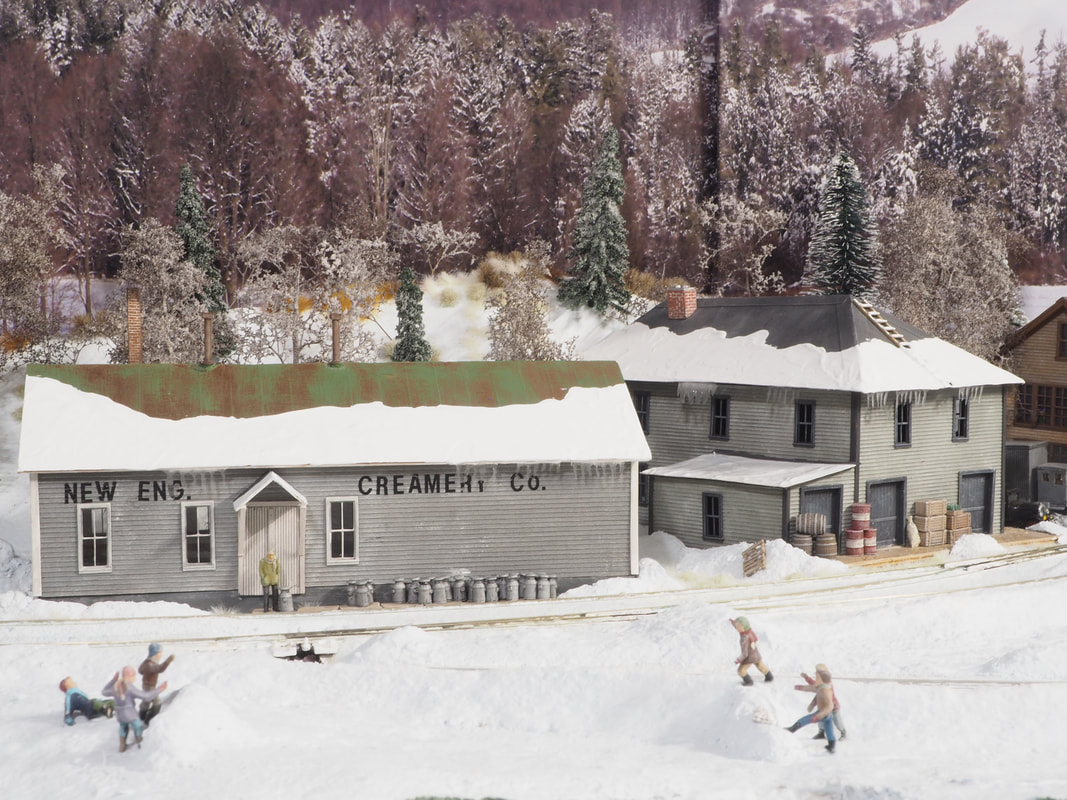
Above and below the foam base has been set in place to figure out the yard track plan, which is based closely on the prototype. Some of the structures are set in place to make sure everything will fit. The industries served here in Strong will include the New England Creamery, Dagget & Will general store, Forster's toothpick mill, Brackley's apple cannery and the Burnham & Morrill corn cannery. Full rail facilities are also located here, and the junction with the Franklin & Megantic branch of the railroad is also located here. The F&M track that heads 'north' from the junction in front of the creamery will disappear behind the buildings on the far side of the track and will serve as a hidden staging track for trains coming from and going to Kingfield on the F&M branch.
|
|
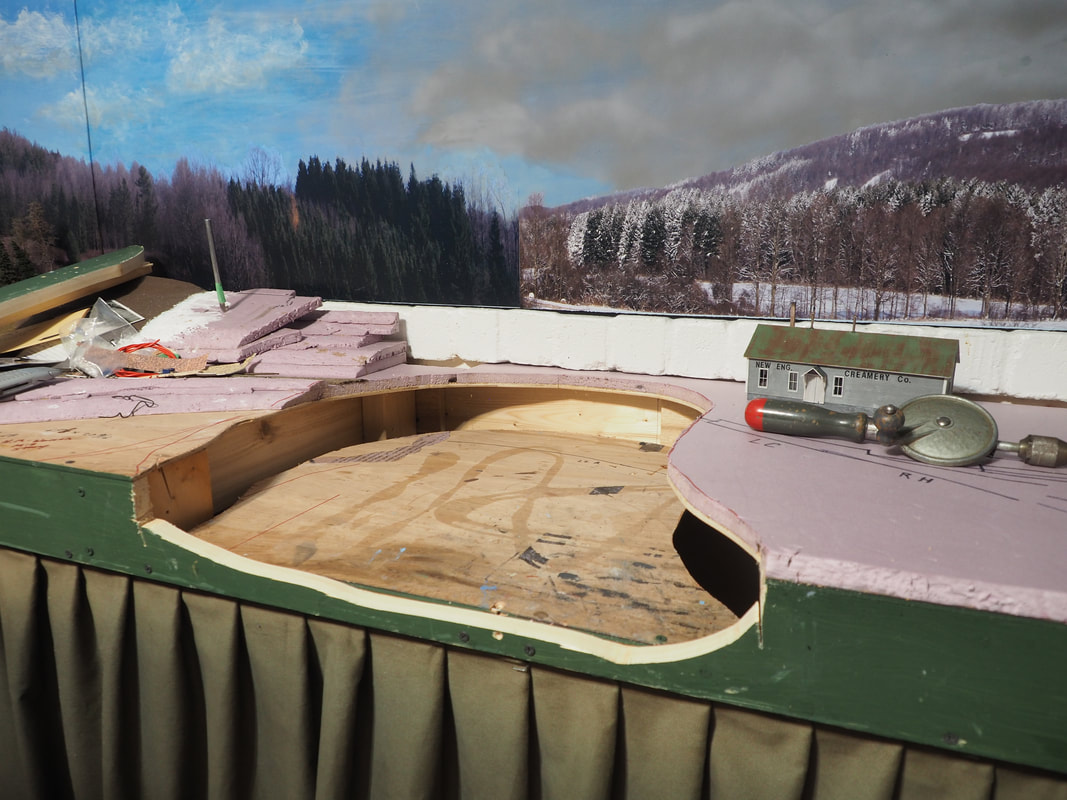
Below left is just a messy shot of the way things look while I'm figuring out what I'm doing. Below right, the valley where Porter Brook trestle will be going is cut from the plywood deck, then lowered down and screwed into place to model Porter Brook. This is at the left side of Strong.
|
|
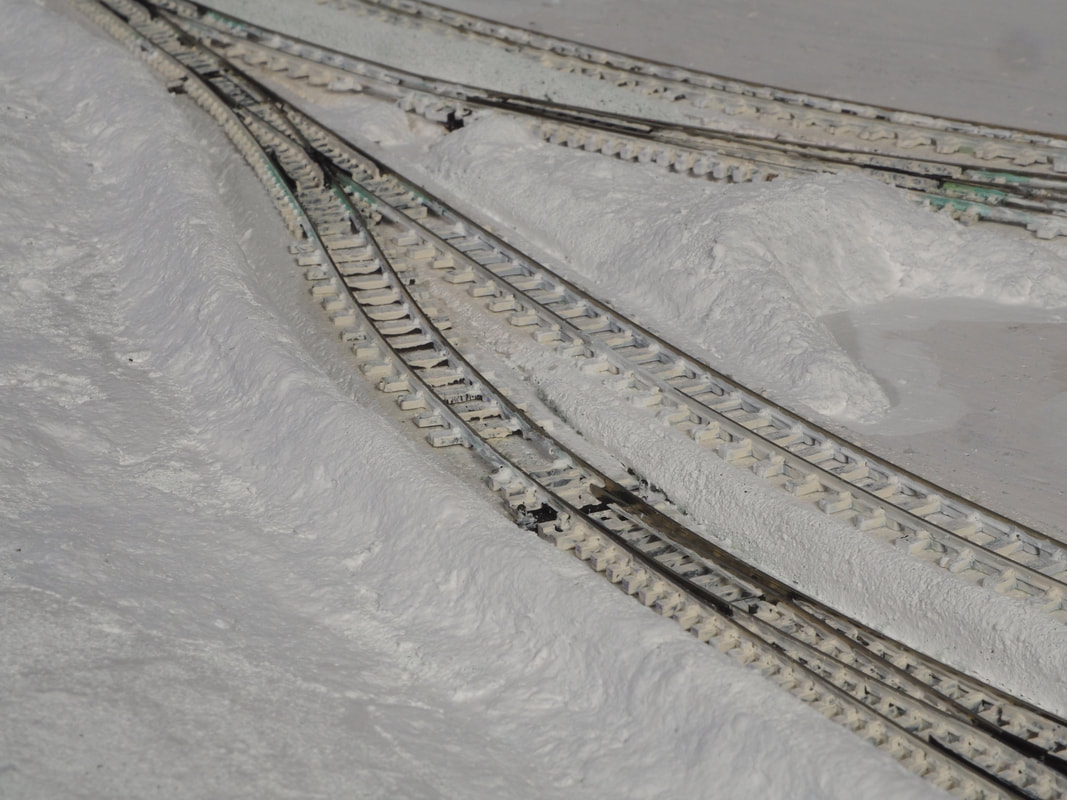
Below left and right are shots from above to get a better idea of the track plan. All the track that was in Strong is modeled, based on Volume 5 of Jerry DeVos' series of SR&RL books. Of course, it's been compressed to fit in the space available. You can see at the back of the layout next to the photo backdrop, is the track that goes 'to Kingfield'. The prototype curved off to the left, but due to space, I've curved it off to the right and it will be hidden behind the scenery. It will be used for staging trains coming 'from Kingfield', and then for trains leaving Strong going 'to Kingfield'.
The industries that will be modeled in Strong are the New England Creamery, the Dagget & Will general store, the Forster toothpick mill, the Brackley apple cannery and the corn cannery as well as the railroad's freight house.
Full railroad facilities will also be modeled with water crane, coal shed, section house, turntable and engine house.

|
|
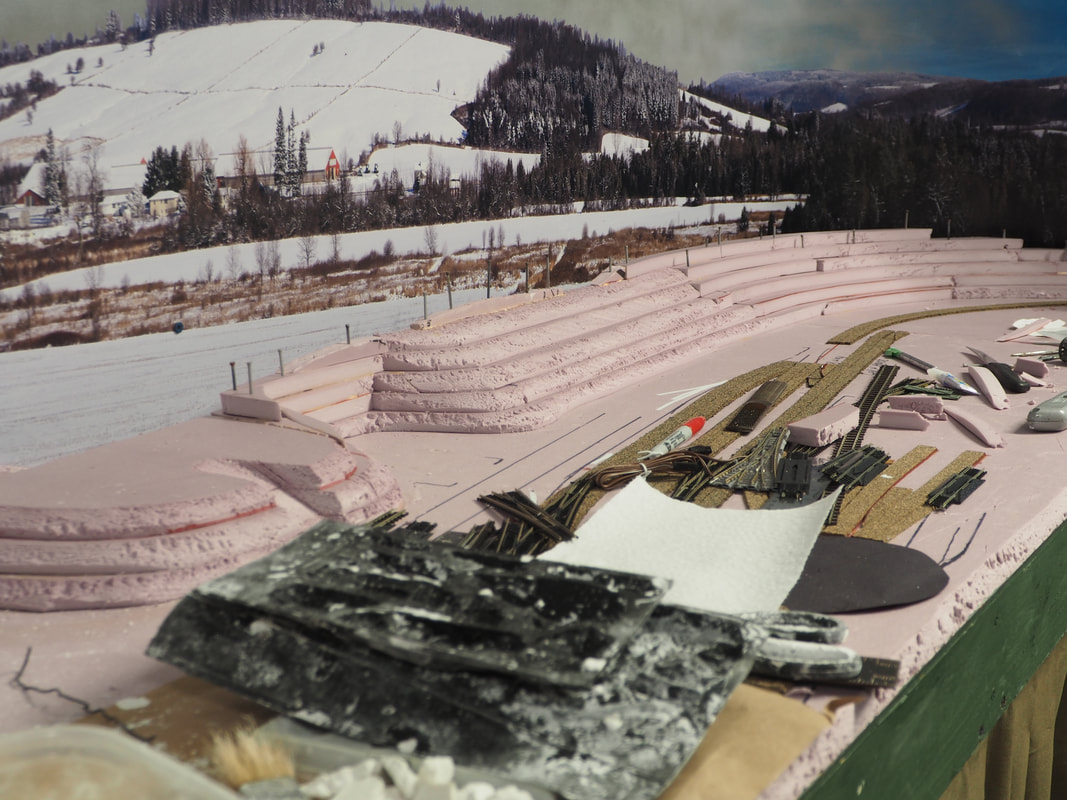
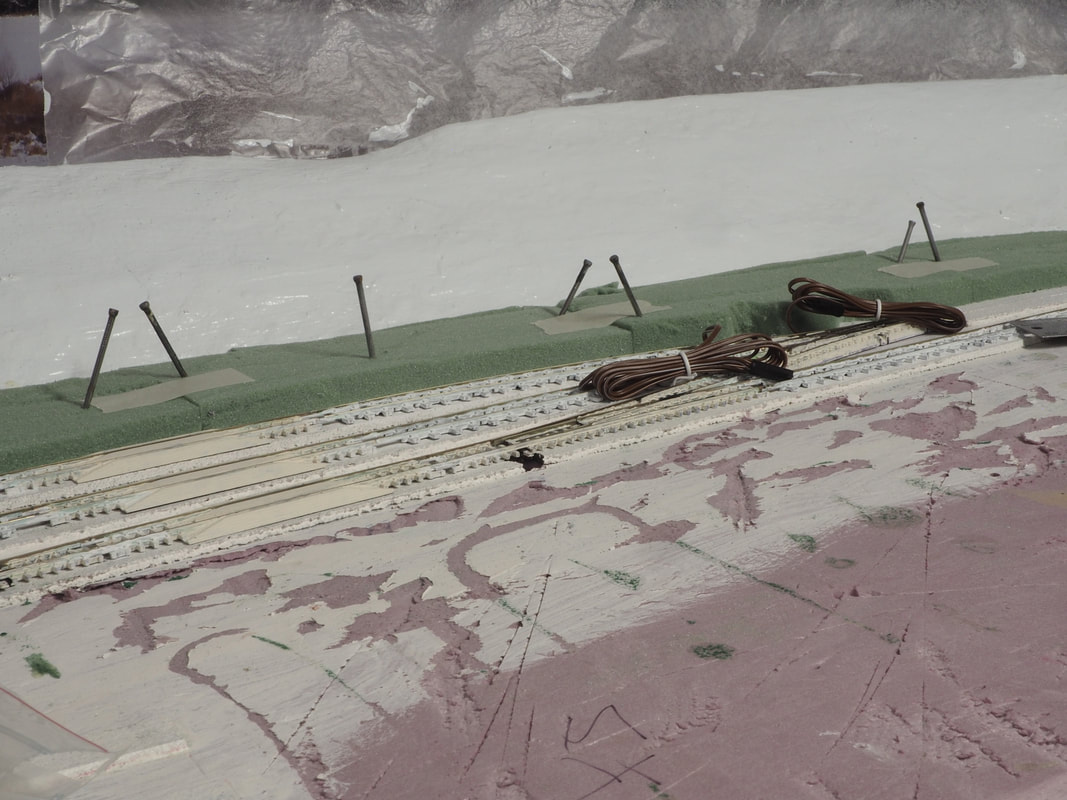
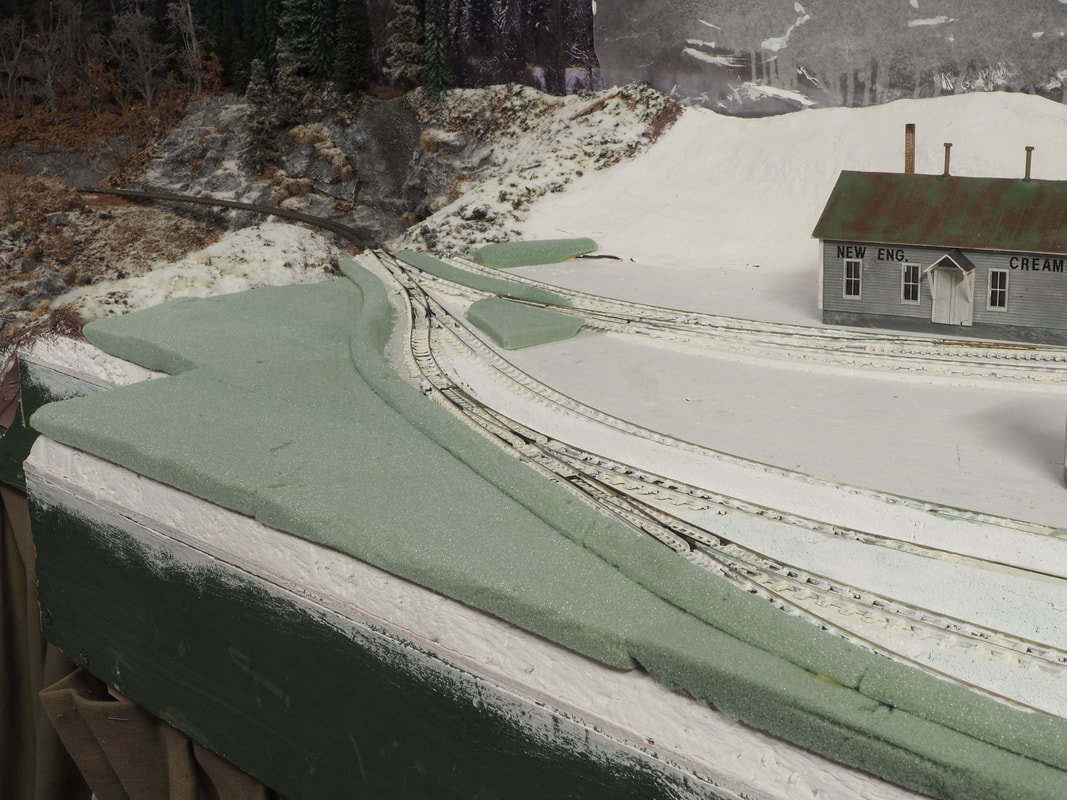
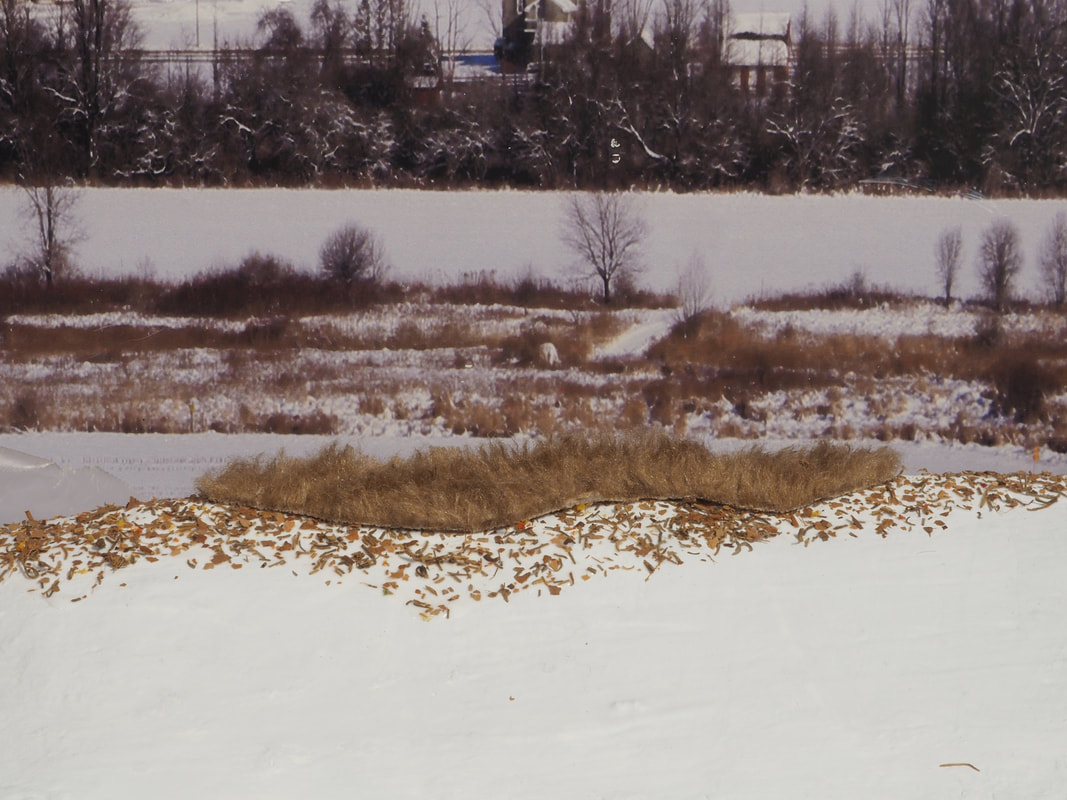
Below left, the basic shape of the hills behind the rail yard at strong are carved out of stacked/laminated foam insulation board. Below right, the the foam is covered in plaster cloth. To the far left of the photo, you can just see the cork roadbed where the track 'to Kingfield' disapppears behind the hills.
|
|
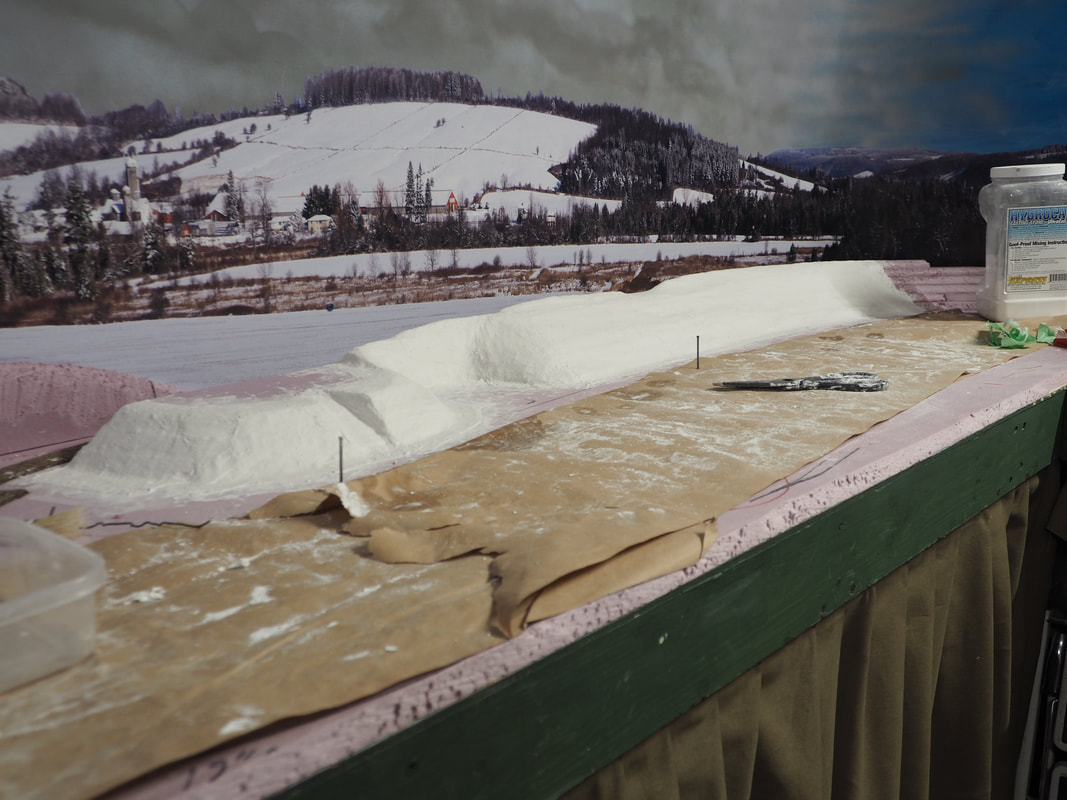
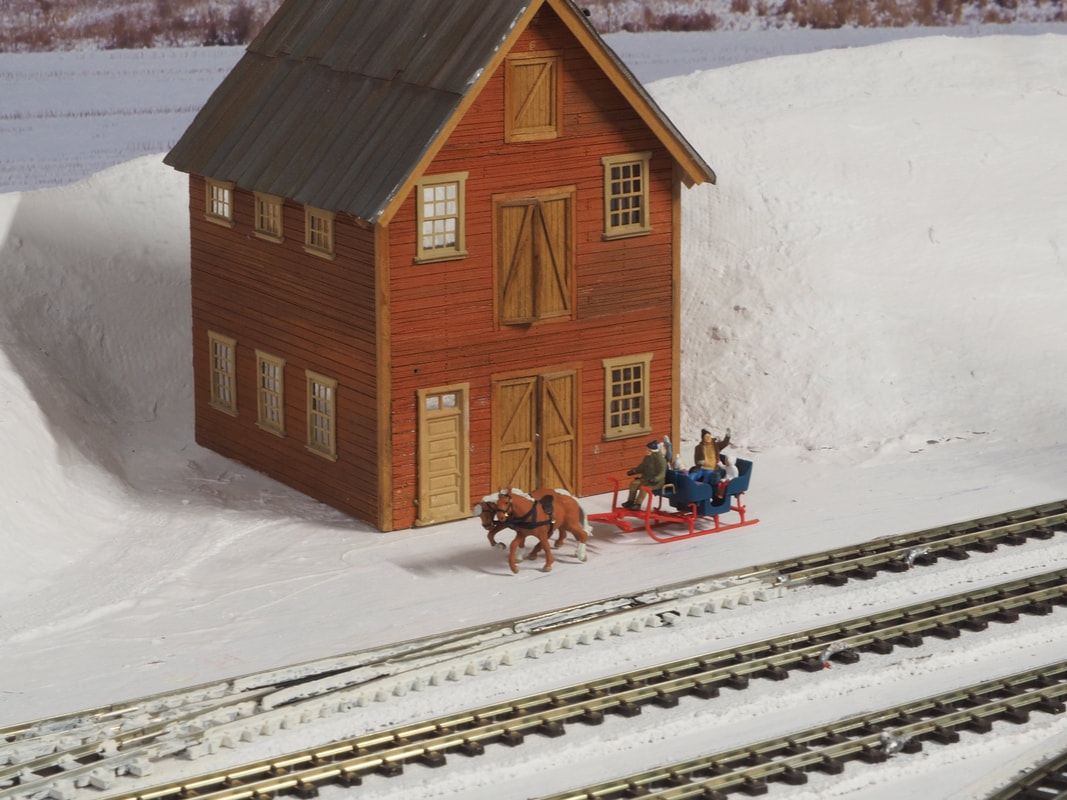
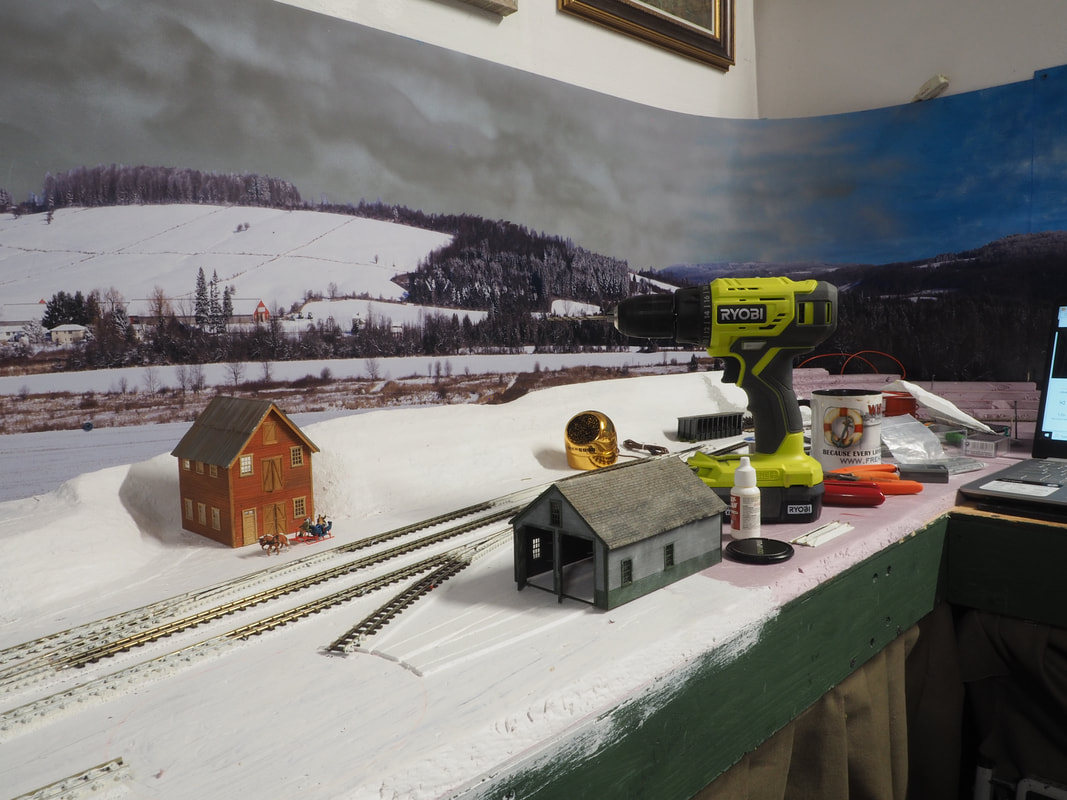
Below left and right, I've painted the scenery base white to help me visualize where I need to go from here. I put structures and things like the sleigh into the scenes to give me ideas that will go into the finished scenes. I've also painted the cork roadbed and track white that will help go toward a scene with track that's been plowed with a plow car on the railroad.
|
|
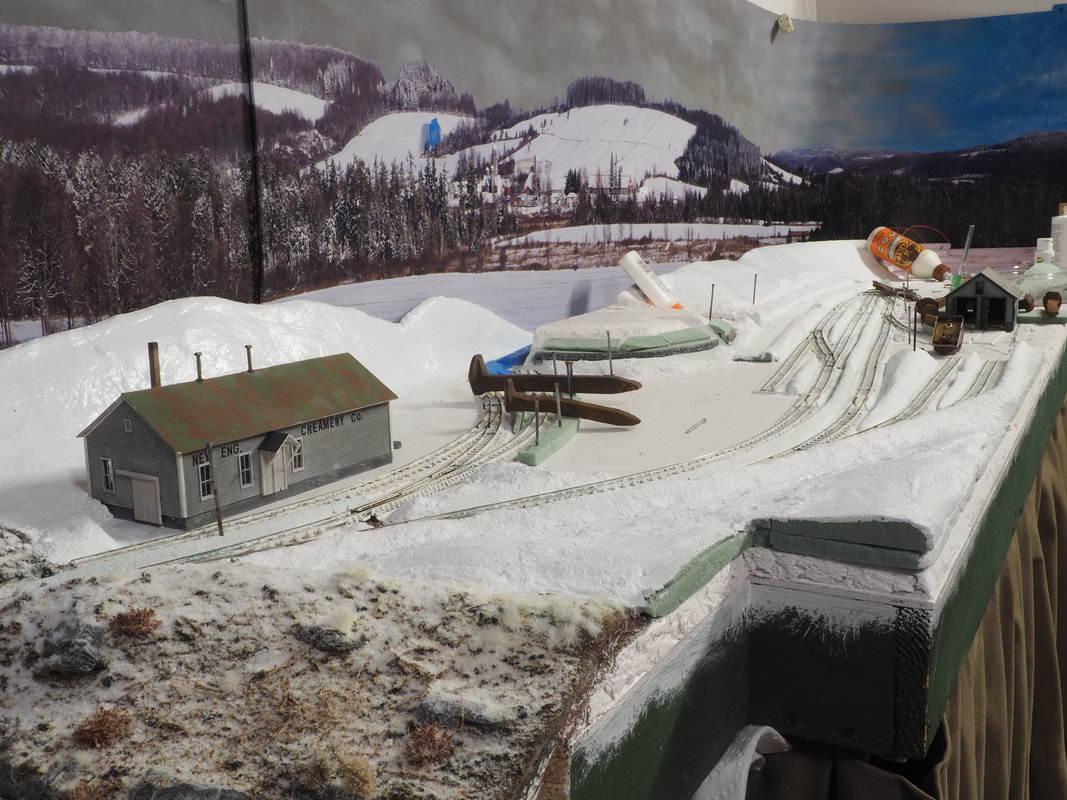
Just looking at the lower left photo, I can already visualize that the buildings will have to be snowed in, with walkways and work areas shoveled out and piles of snow where that shoveling has been thrown. There will need to be snow embankments on both sides of tracks, as well as in between tracks where the plow has pushed it. Back in the timeframe of this scene, roads weren't plowed, instead the snow was compacted down with huge horse-drawn rollers to make it easier for sleighs to move about, so that has to be modeled. Vegetation will have to be exposed in places to match the terrain in the photo backdrop. Lots of pondering, remembering my childhood in Maine and looking at photos goes into this.
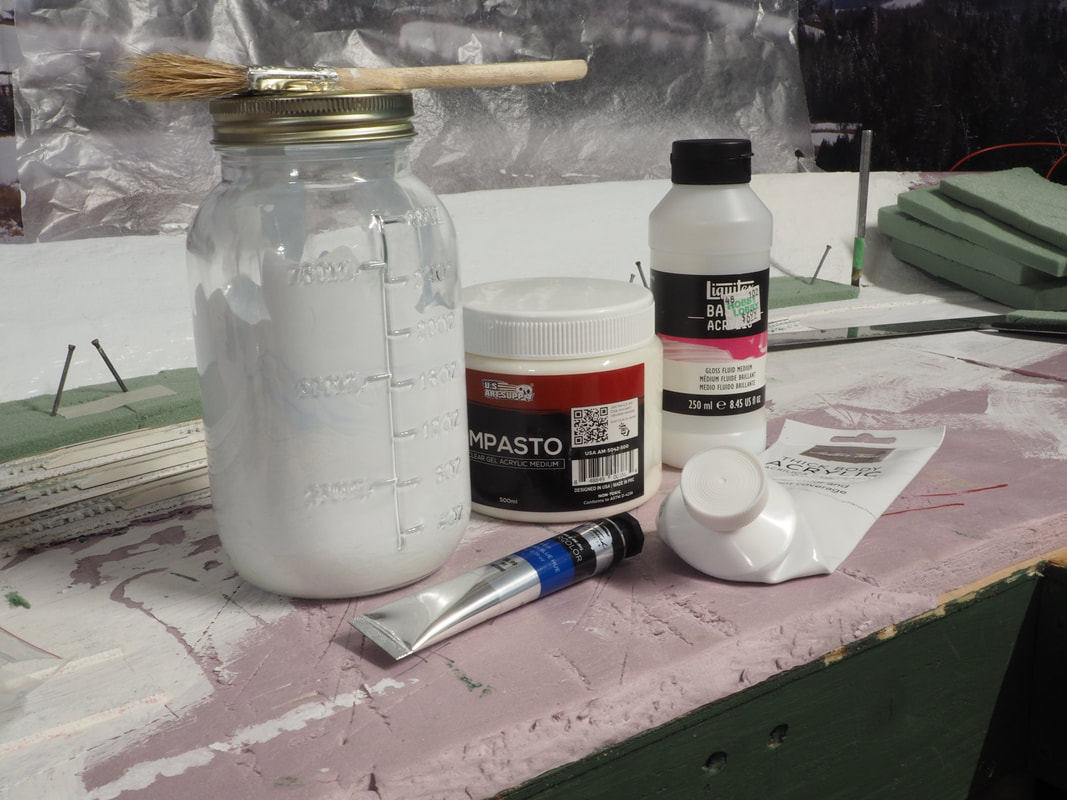
Below right, I decided to try out Dave Frary's 'snow goop' recipe. It's a mix of 1 part acrylic modeling gel, 1 part titanium white acrylic paint, 1 part gloss fluid medium, and 1/20 part acrylic cerulian blue paint. I found the perfect air-tight mason jar with molded in measurements in 8 ounce increments at Dollar Tree for $1.25, and mixed it using the 8 ounce marks, with small squirts of the blue until the color looked right.
Below right, I decided to try out Dave Frary's 'snow goop' recipe. It's a mix of 1 part acrylic modeling gel, 1 part titanium white acrylic paint, 1 part gloss fluid medium, and 1/20 part acrylic cerulian blue paint. I found the perfect air-tight mason jar with molded in measurements in 8 ounce increments at Dollar Tree for $1.25, and mixed it using the 8 ounce marks, with small squirts of the blue until the color looked right.
|
|
Being the first time using the snow goop, I tested it on the long hill behind the rail yard, not being particularly critical like front edge scenery. Dave said it takes about 3 days to fully dry. I found that it was pretty hard in 24 hours, and gave it another half day to be sure before really testing it. I don't particularly care for the gloss it hardens into, so my next batch will be with matte medium instead of gloss. The glossy areas already covered with it, I'll paint over. I've already mixed a batch of 'snow white' acrylic paint with the cerulian blue to match the snow goop because I think the color of Dave's recipe complements the snow in the photo backdrop perfectly.
One thing I didn't expect was that when you layer it on thick, as it dries it turns into a thin hard shell, so I'll have to go back with some celluclay to build up areas that I need shaped a certain way, then coat it with the snow goop. Also, Dave says to spray the goop with some water and gently smooth it out and remove bubbles by using your airbrush compressor hose without an airbrush attached. I tried this, and a couple other experiments, and found that the only way I could really smooth the stuff out quickly enough and get the finish I wanted, was to take a 2' wide foam brush, dip it in water, and slather it all over the snow to get rid of the waves and marks that brushing the snow goop on leaves. I sopped up the resulting water in front of the hill with paper towels being careful not to touch the snow goop.
I don't know if you can see the gloss on the hill in the photos below, but it's there and will be made matte before I'm done. Below right is the beginning of an experiment with floral foam. I tried the 'wet foam' first because you can simply press whatever shape you want into it to 'mold' it, but it's so soft any false move ruins what you just did. The dust it creates aggravated my asthma as well, so I wouldn't recommend bothering to try it. I picked up a pack of 'dry foam' next, and although you can't press shapes into it, a small hand rasp is the perfect tool for shaping it. In the photos below the roads and snow buildup are starting to be laid. You can simply press a building down onto the foam to make the marks where to cut it, and custom fit it in a matter of seconds to the building, then take the rasp to shape it into snow banks and drifts. Same with the rolled roads and whatnot. It's soft, but the pores soak up paint to make a hard shell on it. I bought a pack of 6 blocks for like $5 a pack, and then slice it into 1/2" rough slices with a ruler and steak knife.
|
|
Below left and right, the snow embankments and fields that will be full of drifts are glued down, and then the rough shapes made with the rasp. The final shaping will be made with celluclay, and then painted with a couple of coats of white paint to seal the foam before more detail is added. I like using original narrow gauge spikes from the original SR&RL Railroad to weigh down things while the glue dries.
|
|
Below left, the area in the above two photos has been textured with celluclay and painted, and the next sections to get the treatment have had floral foam added and will get the treatment next. Compare the below right photo with the photo of the same area above. The embankments along the track now look like snow has been flung to the sides by the plow. The snow piled to the right is the western side of the parking lot for the depot, which will have been cleared for loading and unloading of teams. The final scenery treatments here will be filling in the track with snow, covering the field to the left and the parking lot to the right with 'snow goop' for a smooth look, and probably some washes and dry-brushing where needed to bring out the contour and hilights of the snow covered ground. I'll do that experimenting in a non-critical area of the scene.
|
|
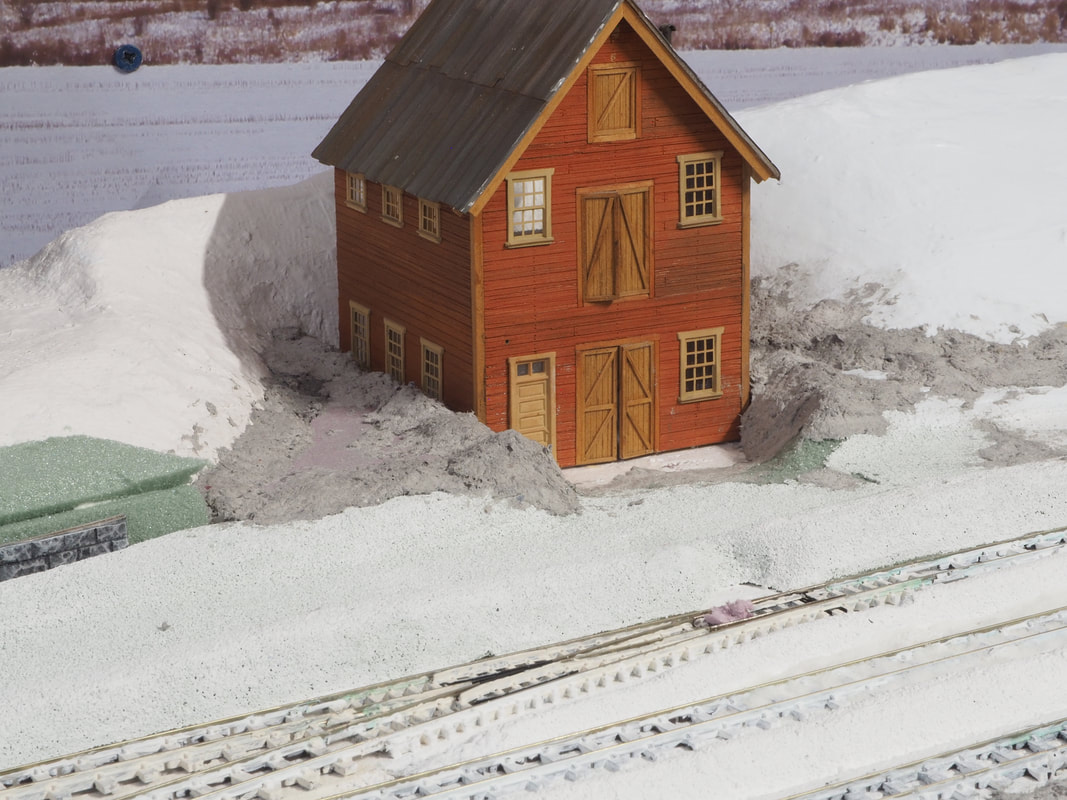
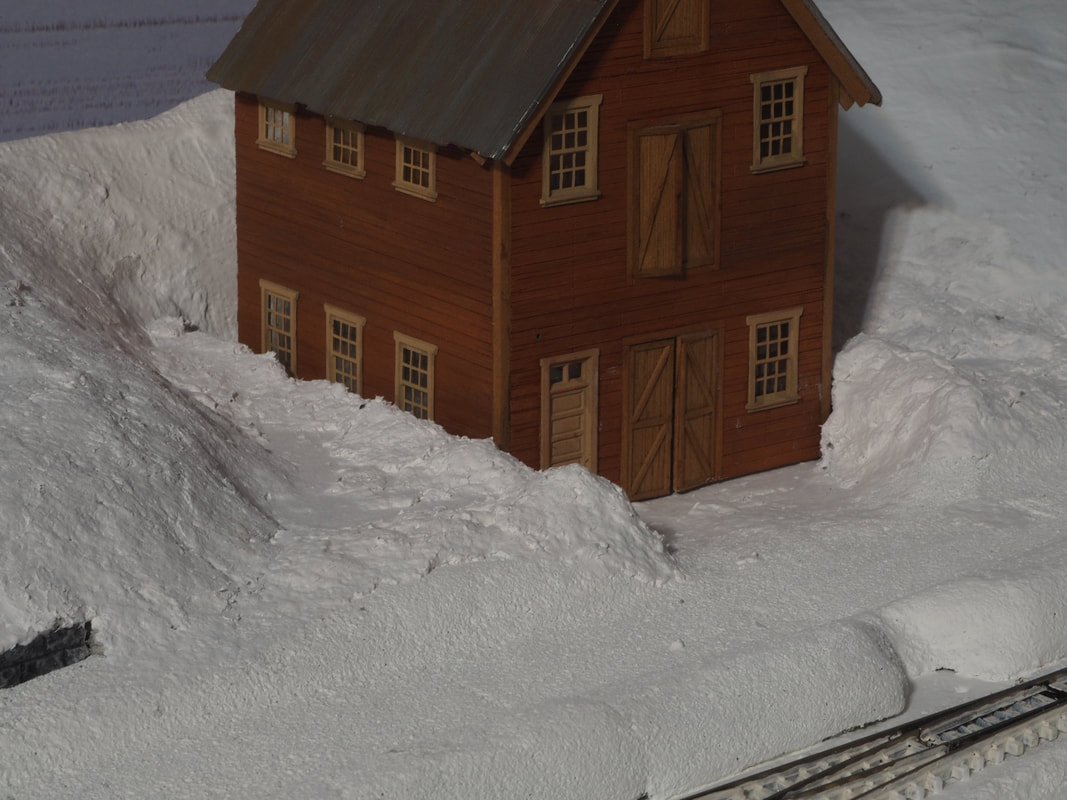
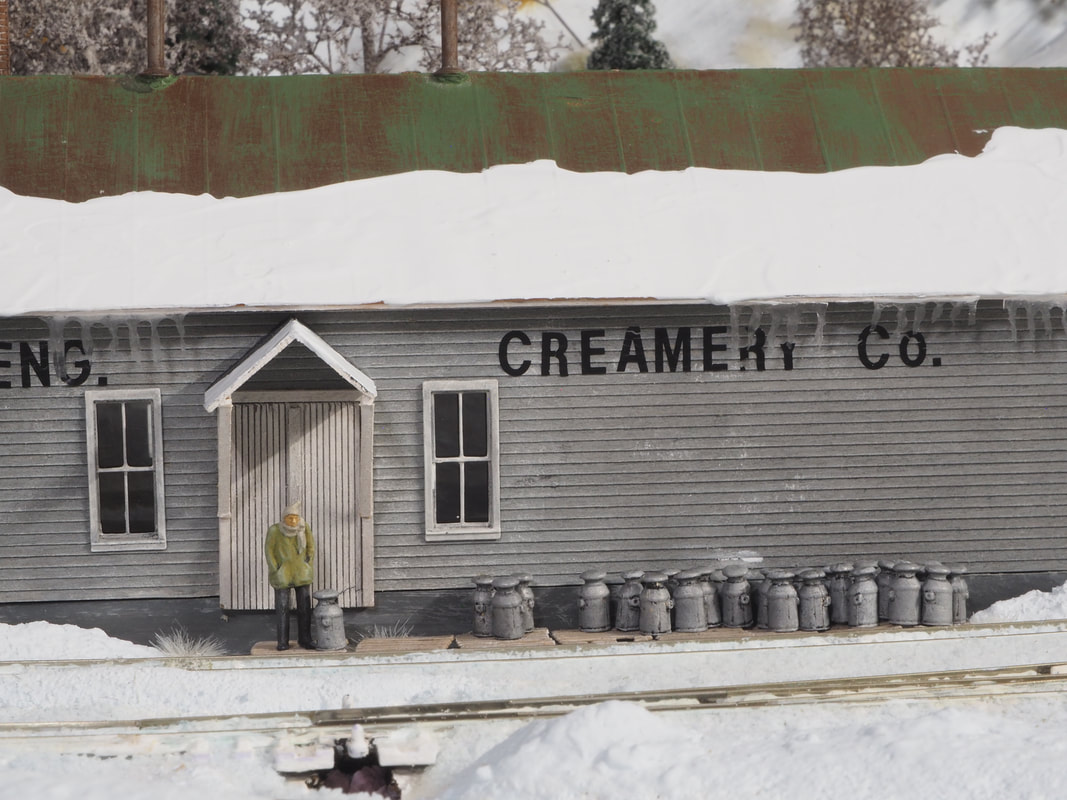
Below left, the apple cannery has had celluclay added to build up the snow that's been shoveled to clear the doors, and build up along the sides of the building where snow has fallen from the roof. When painted below right, it looks very much like the snow at our house when I was a kid after shoveling the driveway and path to our front door. Note that the road in front of the cannery is higher than the level of the building, and is smoother as it has been rolled with a snow roller and not plowed. The embankments along the railroad track and that spot where the switch stand will be will get the same plowed/shoveled treatment.
|
|
Below left, I took this shot so you can see the difference that ballasting the track with the snow powder makes compared to the track with white painted ties. It took too layers of ballasting to get the look I wanted, with just the rails showing above the plowed and flanged track. After the second layer of ballast had dried, the snow powder has a traslucent quality, so I took some of the blue-tinted white acrylic and diluted it to make a wash. This sank down into the dried snow powder and thankfully made the snow powder look like the snow terrain around it and made the ties virtually disappear in the snow.
|
|
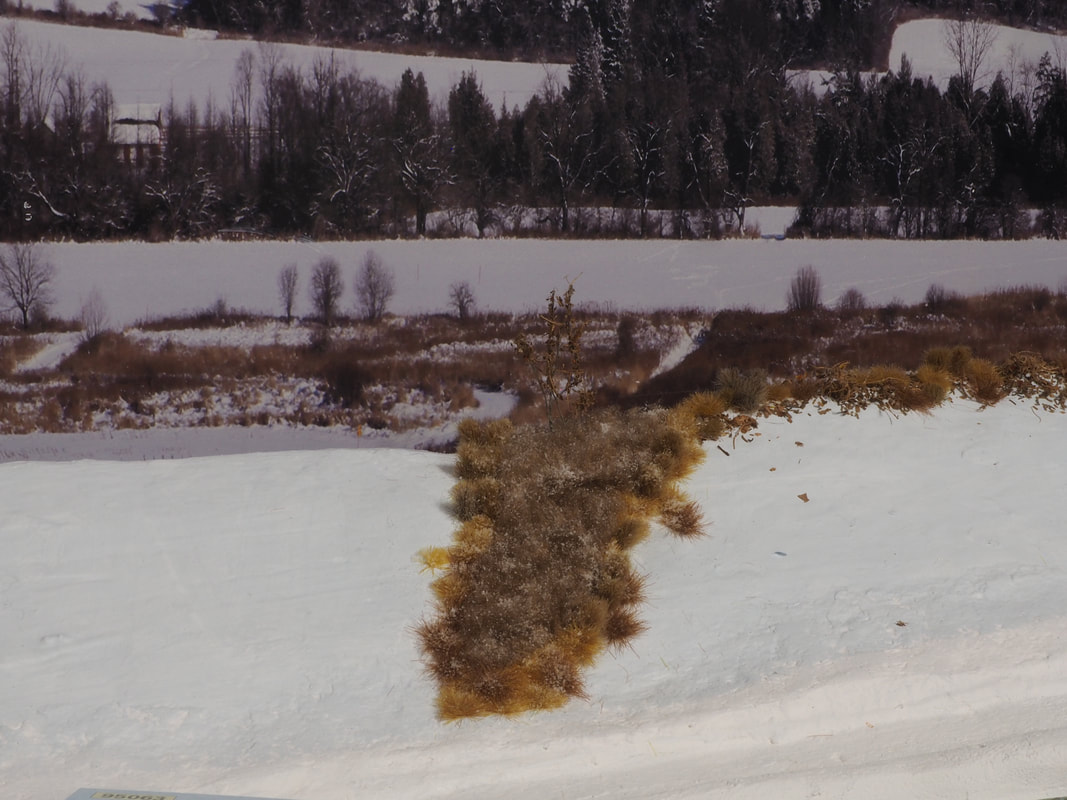
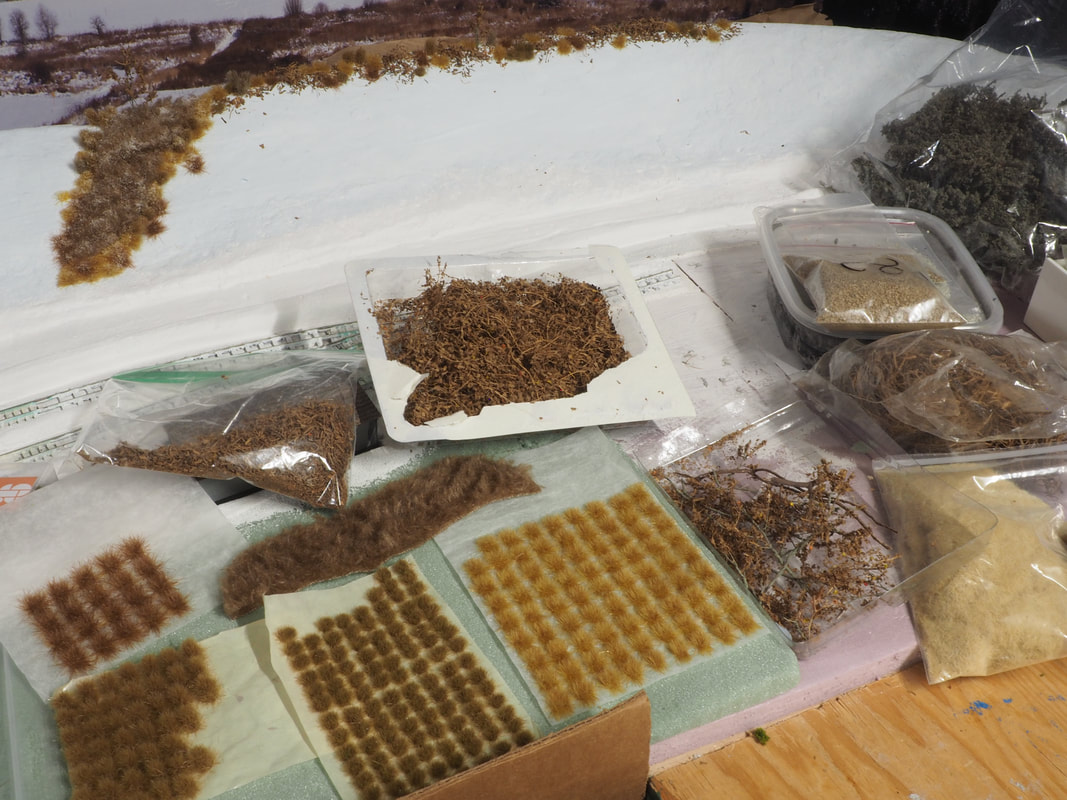
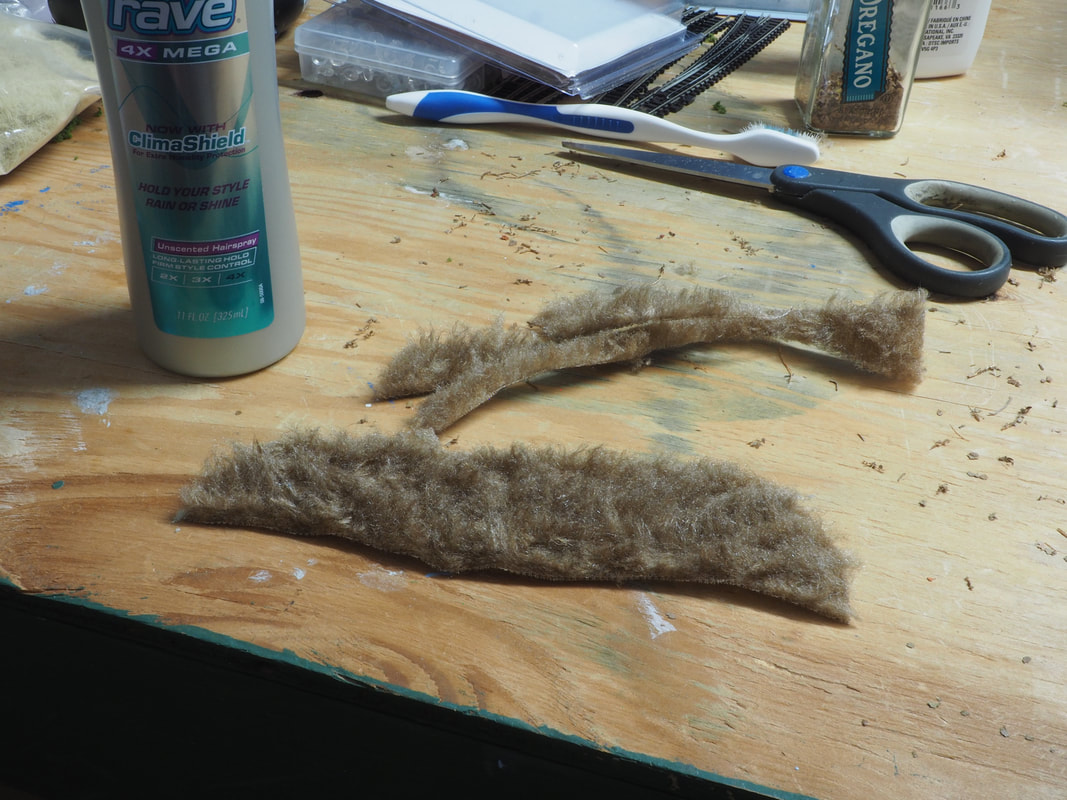
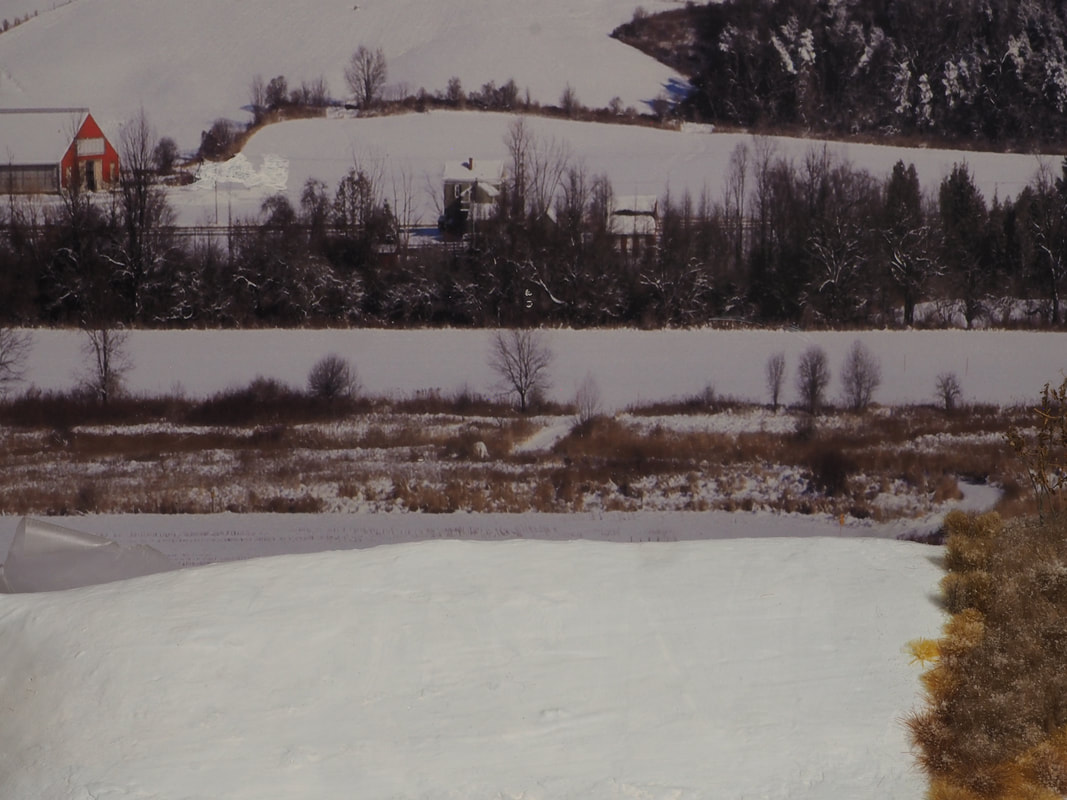
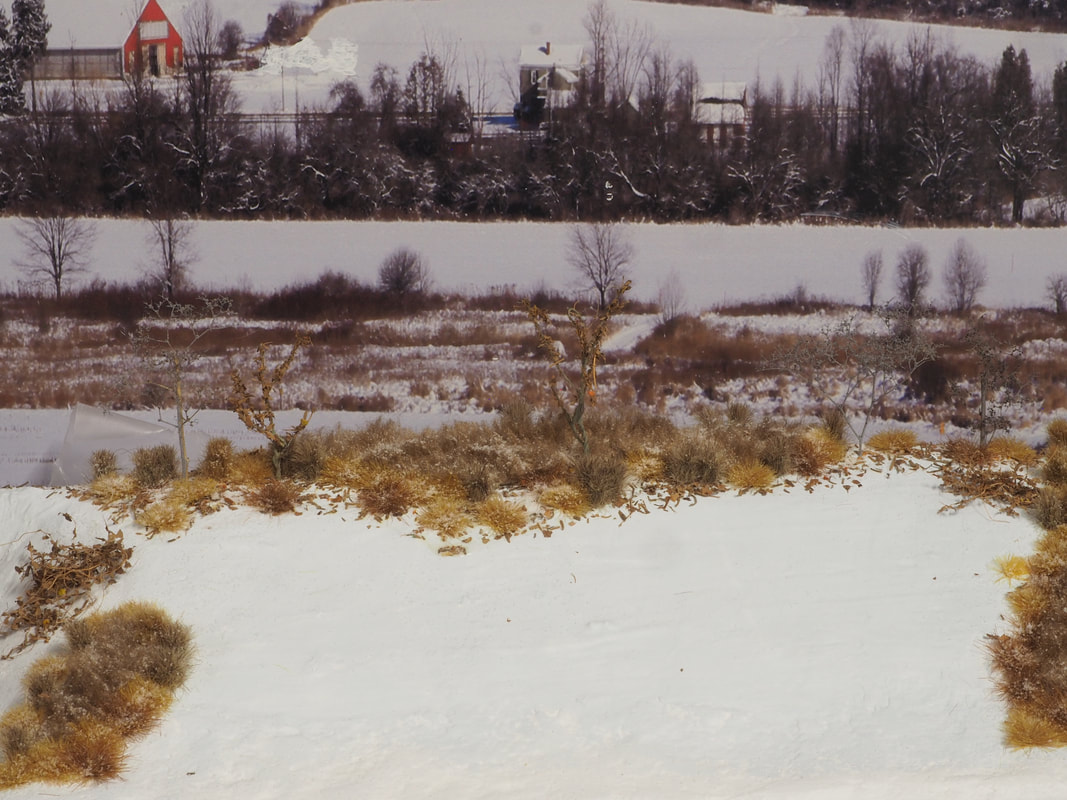
Above right, my first attempt at blending Dyer Hill with the photo backdrop behind it went well. I was wondering how I was going to do this, and I decided to just try to copy the textures and colors of the grassy and brushy areas poking up through the snow on the photo backdrop. It worked in other areas, so why not here as well? Below left I matched the colors of the tufts, branches, vines, and whatnot in my texture supplies to the backdrop as close as possible. Below right are some scraps of craft fur cloth that I stiffend up by spraying them with hair spray and combing them upright with an old toothbrush. The oregano shaker bottle behind the scissors has ground up leaves from the backyard.
|
|
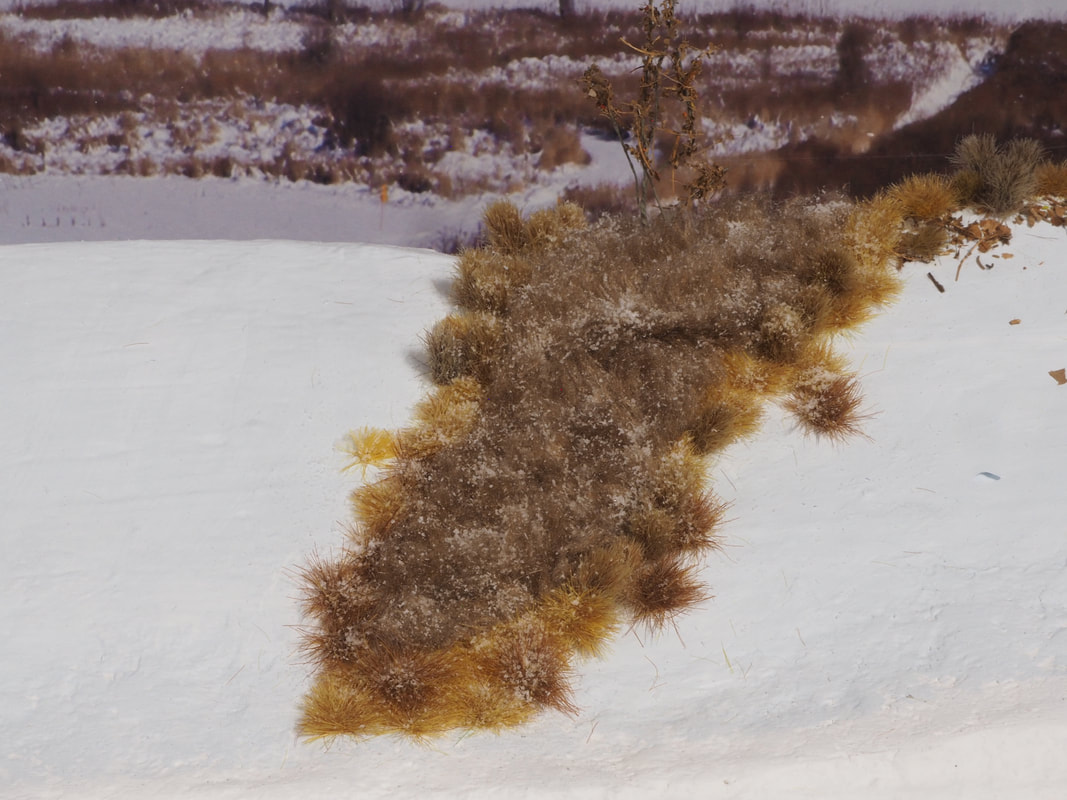
Below left is the next crest of Dyer Hill to get the treatment. Below right is that spot, where first I put some white glue on the snow and spread it out with my finger to cover the area I want. Then while the glue is wet I shake some ground-up leaves on the glue. Then I spread some white glue on the bottom of the craft fur and press it down on top of the ground-up leaves.
|
|
Below left, I then randomly put brown and tan grass tufts around and in the fur to hide the fabric edge and blend the colors and textures together I punch a few holes here and there and stick in some saplings with dead leaves (from JTT) along with a few bare ones made from Supertrees. I then finish it up by sprinkling a light dusting of snow powder on top and give it a good spraying of diluted matte medium to lock everything into place. You can see the dusting of snow powder better in the below right close up photo.
|
|
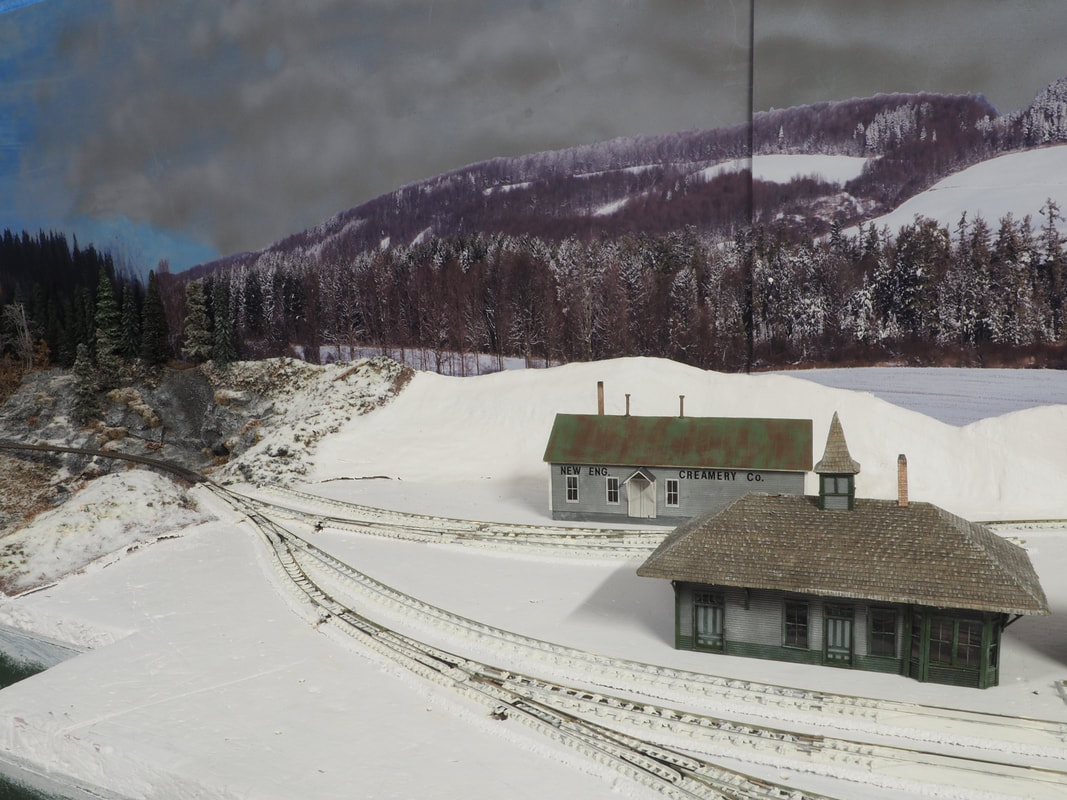
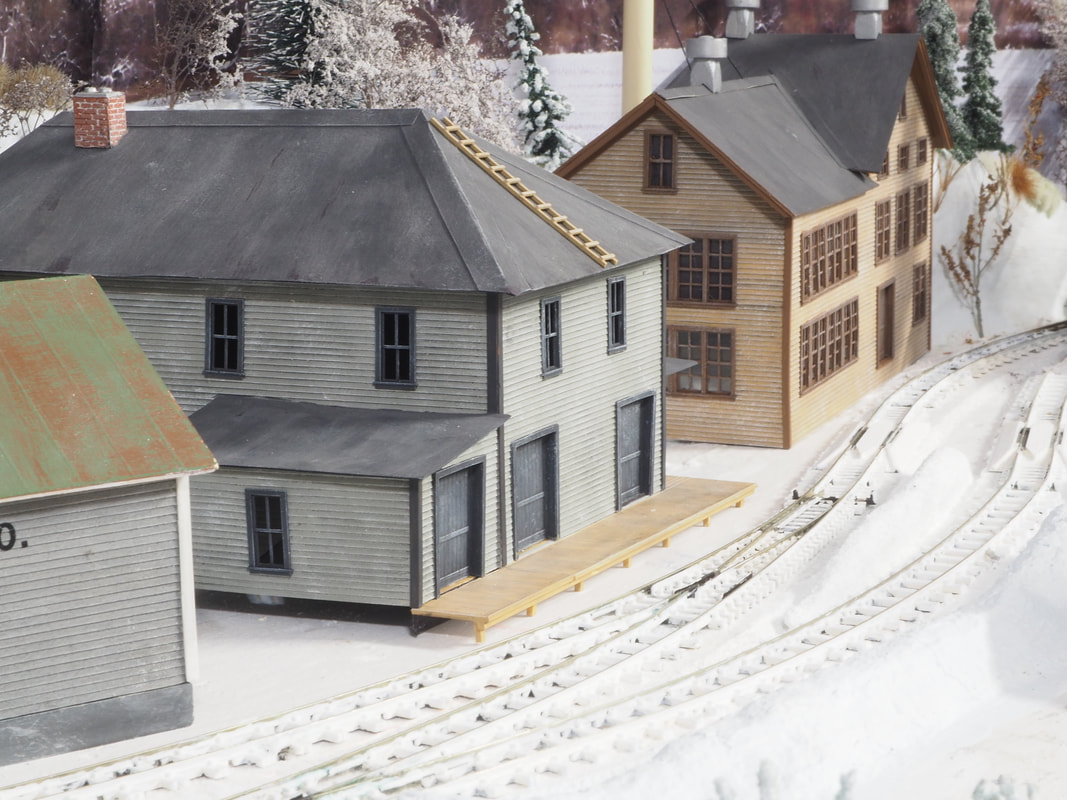
Below left and right, the 3-D scenery is starting to go in from the bank of Porter Brook around the back of the creamery. Notice in the below right photo how the mainline of the Franklin & Megantic branch goes past the cardboard mock up buildings and disappears into the cut behind the the houses on the hill. The cardboard mock ups are of the Dagget & Will store and Forster's toothpick mill. They'll be replaced with scratch built structures later on.
|
|
Below, note how I've tried to make sure the colors and textures of the 3-D scenery I add blend with the photo backdrop behind. The grass tufts and whatnot are mostly the same as the ones noted above, with the addition of some winter grass tufts. The evergreen trees are a mix of JTT snowy evergreens, JTT regular wintergreens with snow powder added, and cheap Christmas decoration evergreens on clearance at Walmart after Christmas. The deciduous trees are Supertrees preserved with floral spray, then spray painted gray, then lightly oversprayed with brown. After that, I spray them with hair spray and add a dusting of snow powder.

|
|
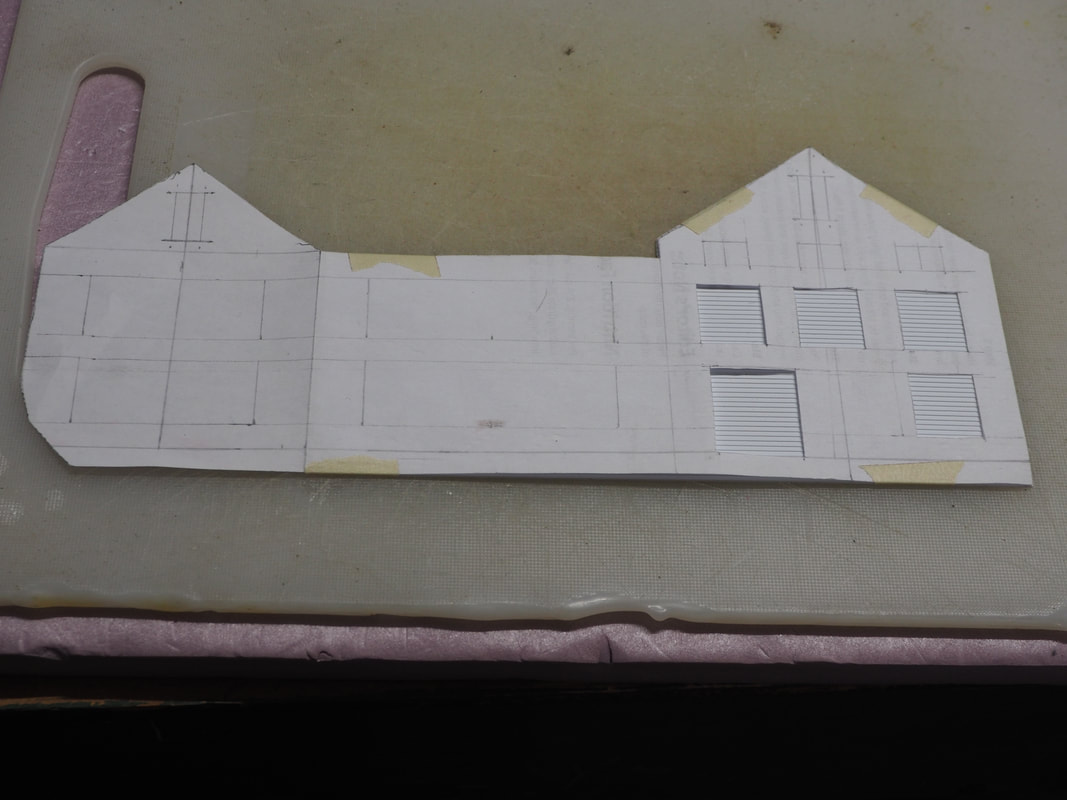
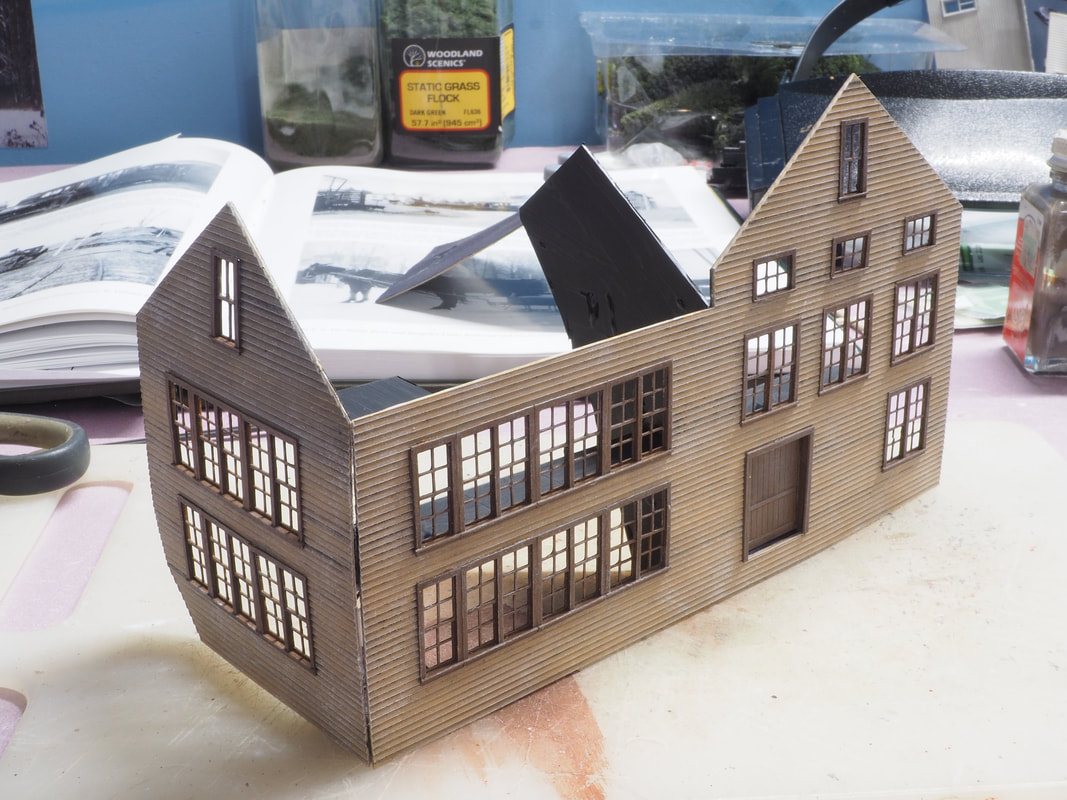
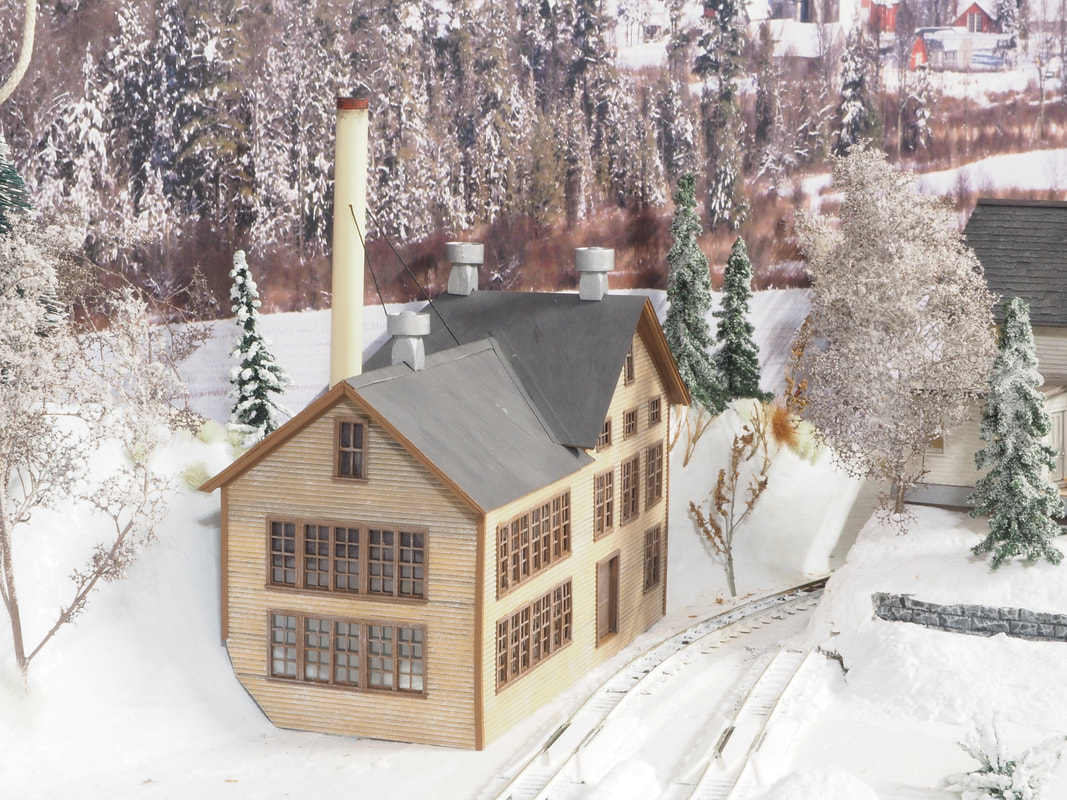
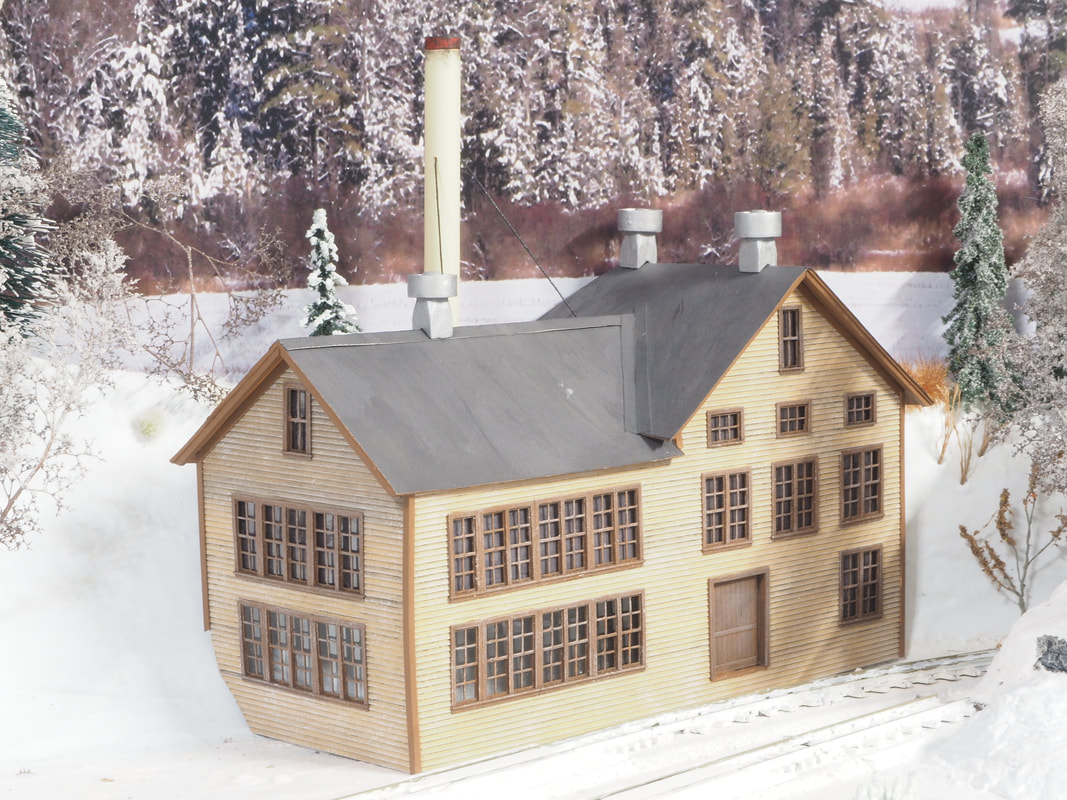
Now comes time to replace the cardboard mock-up structures along the F & M track with something permanent. The first to get the treatment is the Forster Toothpick Mill. I used the mock up to figure out what didn't look right, and adjusted measurements and proportions to better represent the prototype. Then, using the Grandt Line window and door castings to fine tune the measurements, I made a paper template. I then taped the template to Evergreen clapboard siding and cut out the walls and window holes. Then the walls and windows/doors are painted separately and weathered. After the paint is dried, I used Elmers glue stick to thoroughly apply the glue to black construction paper, and press the walls onto the fresh sticky paper. Once dried, I use scissors and a fresh #11 blade to cut the excess paper from the wall edges and window holes. After that, the windows and doors are glued into the walls, and the walls attached to each other.
|
|
With the walls attached to each other, I add the corner trim with Evergreen L angles. The roofing is some mildly thick scrap cardboard from a book mailing envelope I got the other day. I cut out the roof panels, then glue black construction paper to them the same way as the walls. Then I painted the roofing with weathered black paint. The roof vents I made from Evergreen tubing and balsa wood cut and shaped to resemble the roof vents on the mill from photos. The last touch was the smoke stack, also made from Evergreen tubing.
|
|
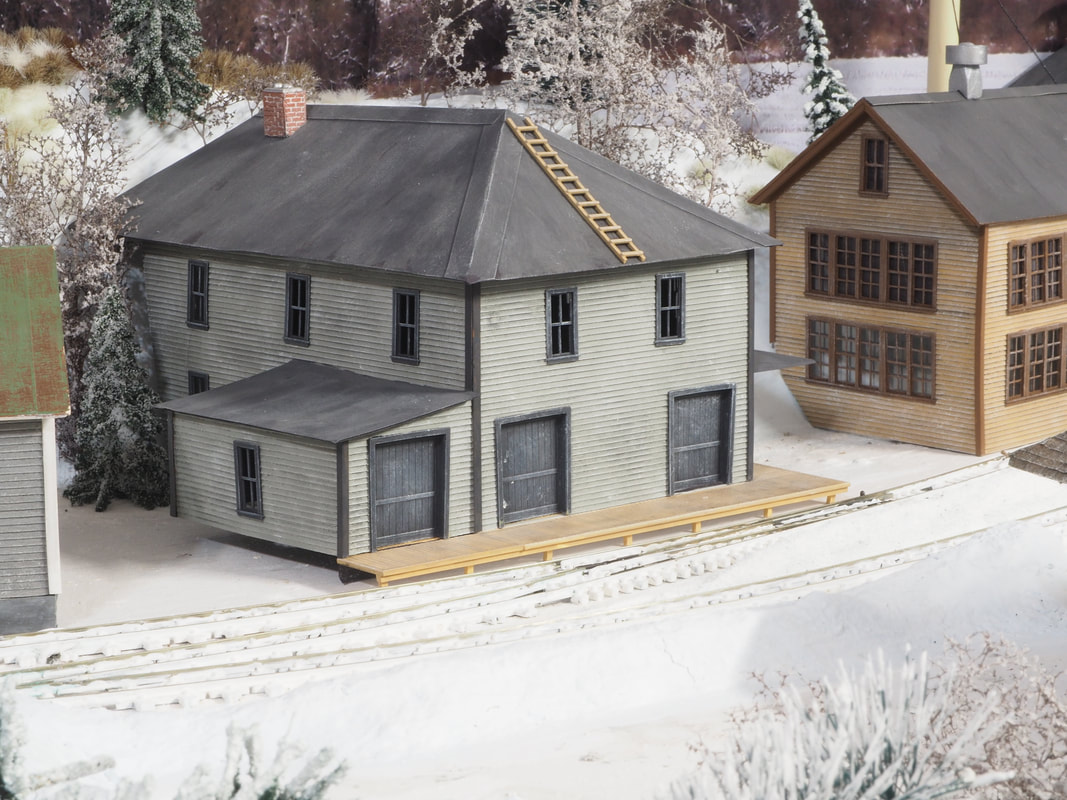
Below left and right is the Dagget & Will store, the largest and most well stocked general store in Strong. The construction of it was the same as the Forster Toothpick Mill above.
|
|
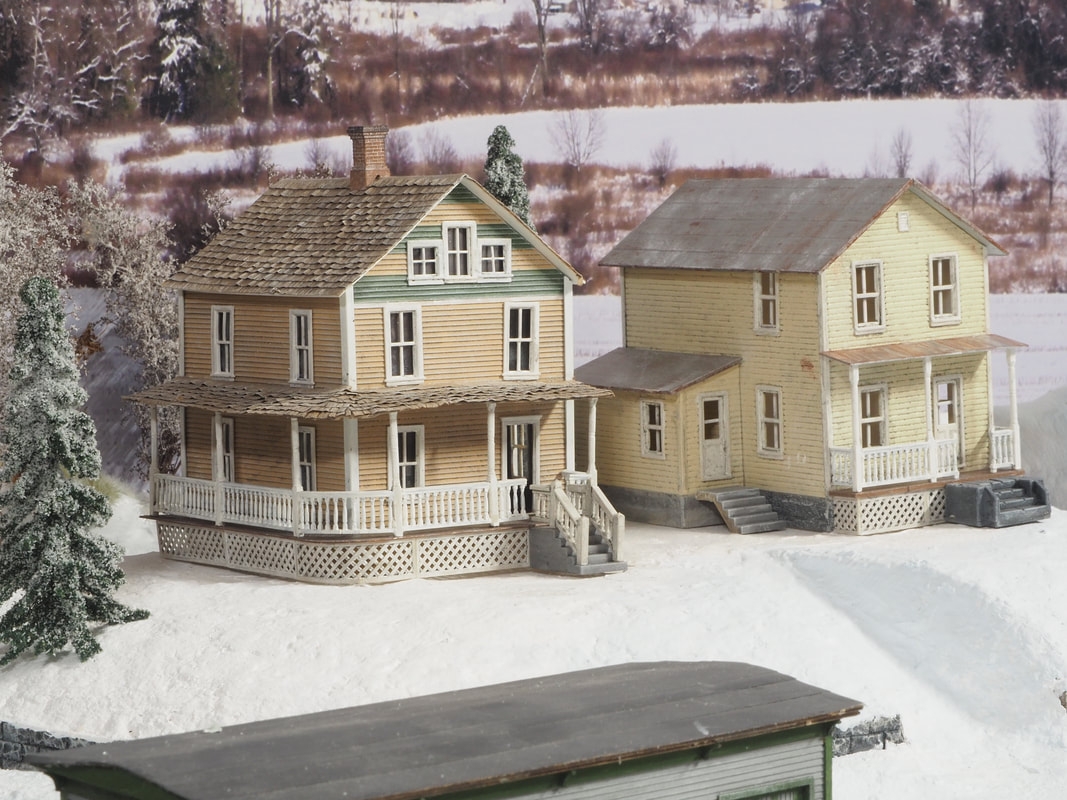
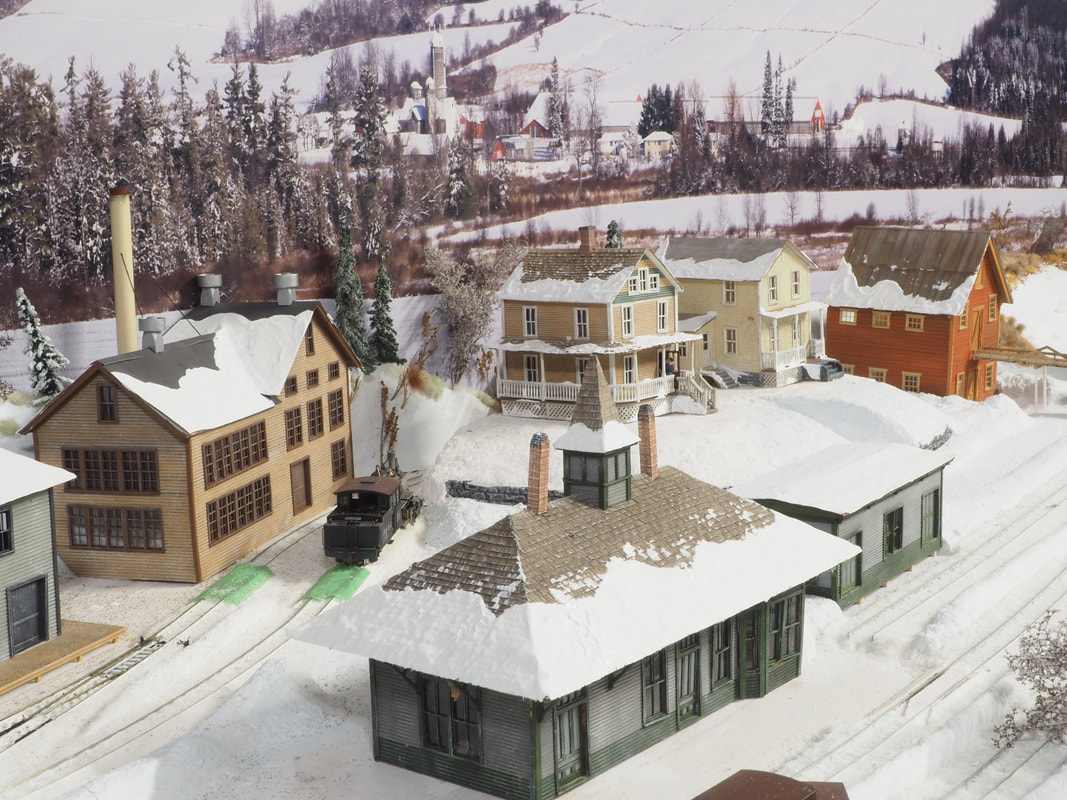
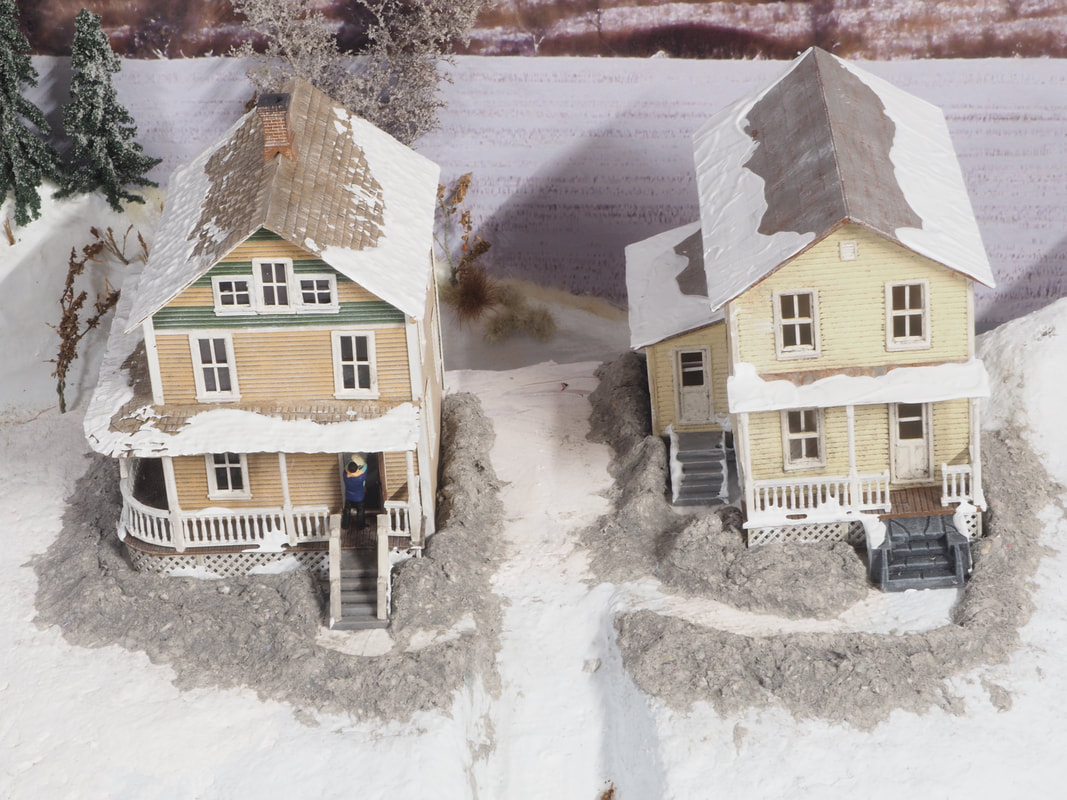
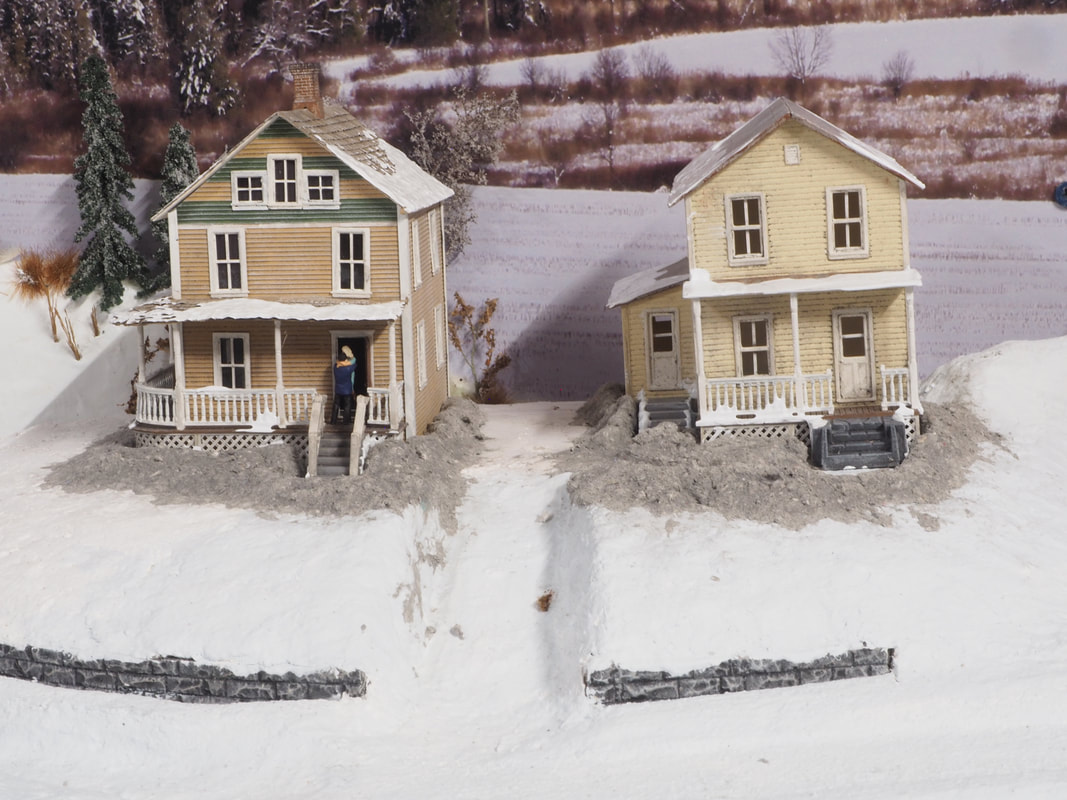
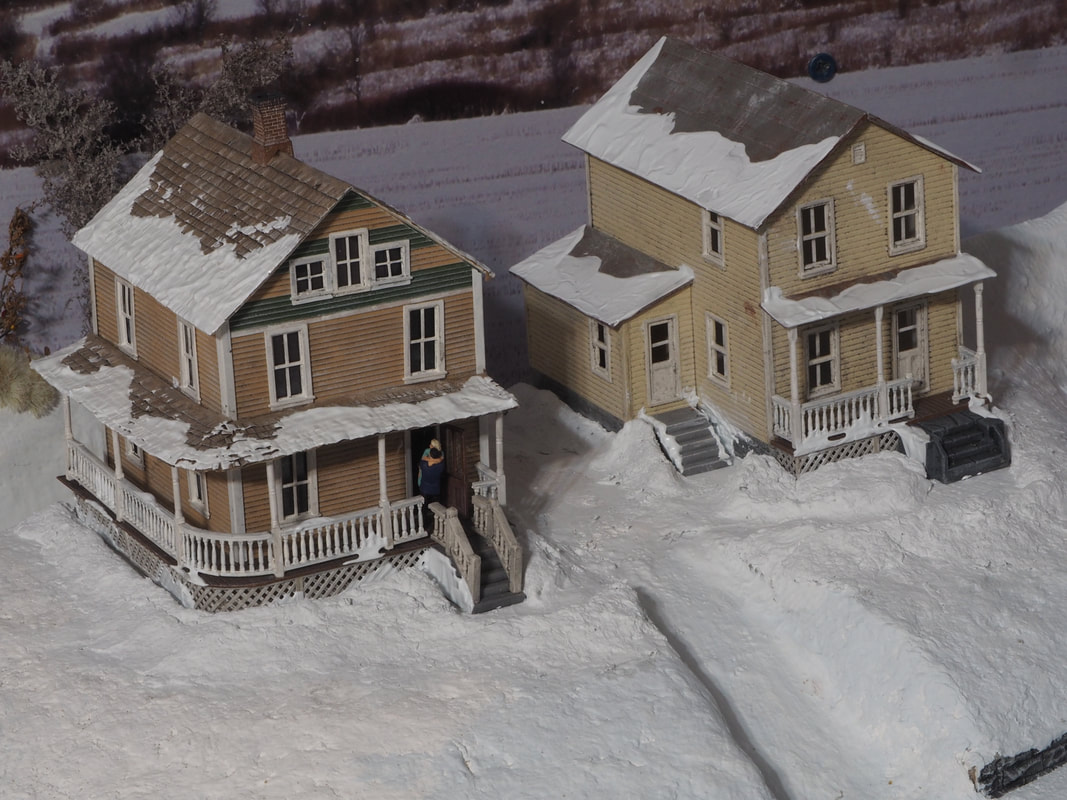
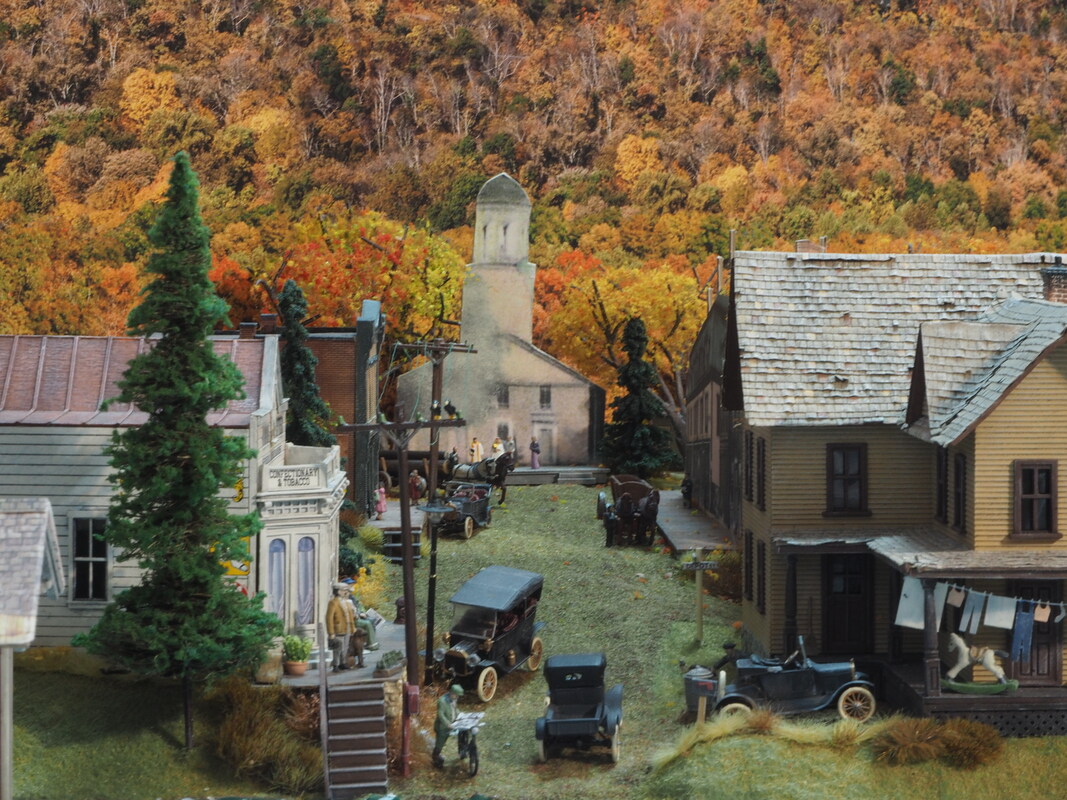
Below left, the 'famous' 'house on the hill', visible in the background in many photos taken around the depot in Strong. I built it using Evergreen clapboard, Grandt Line window, door, lattice, porch rail and column castings, with cardboard roofing and Campell Scale shingles. I could have just put a generic house kit up there, but I had to do it! The other house is a kitbashed structure, using an added porch and stone steps.
|

|
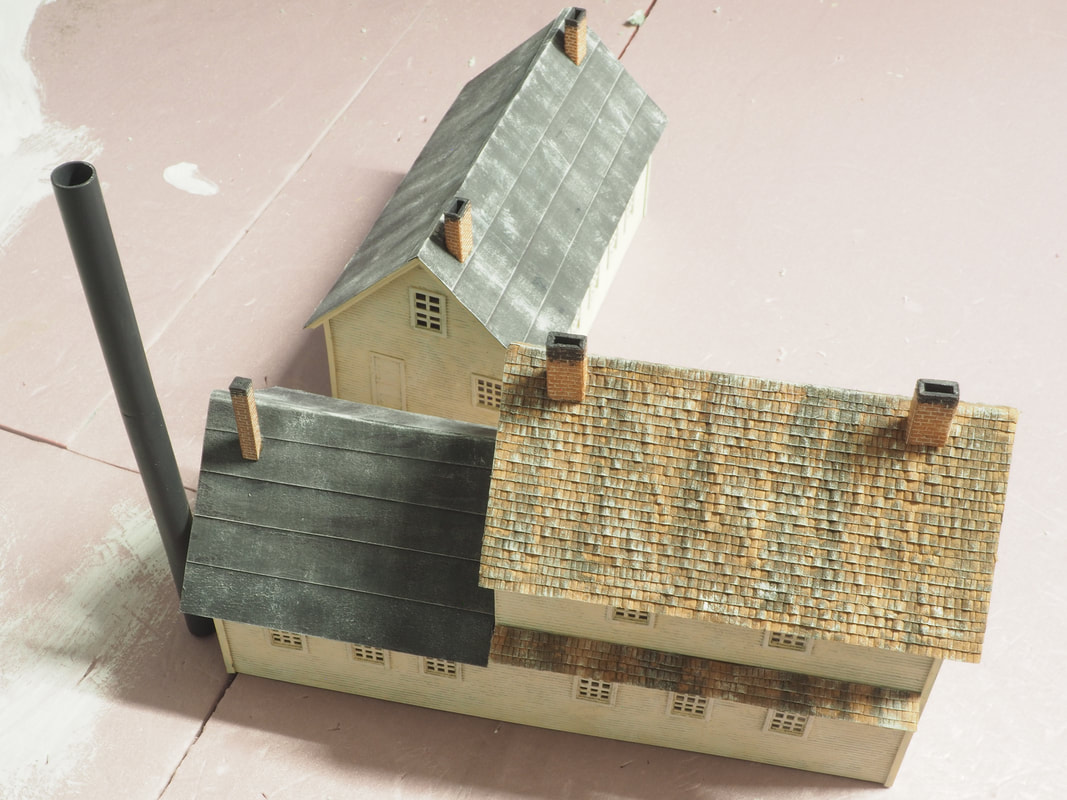
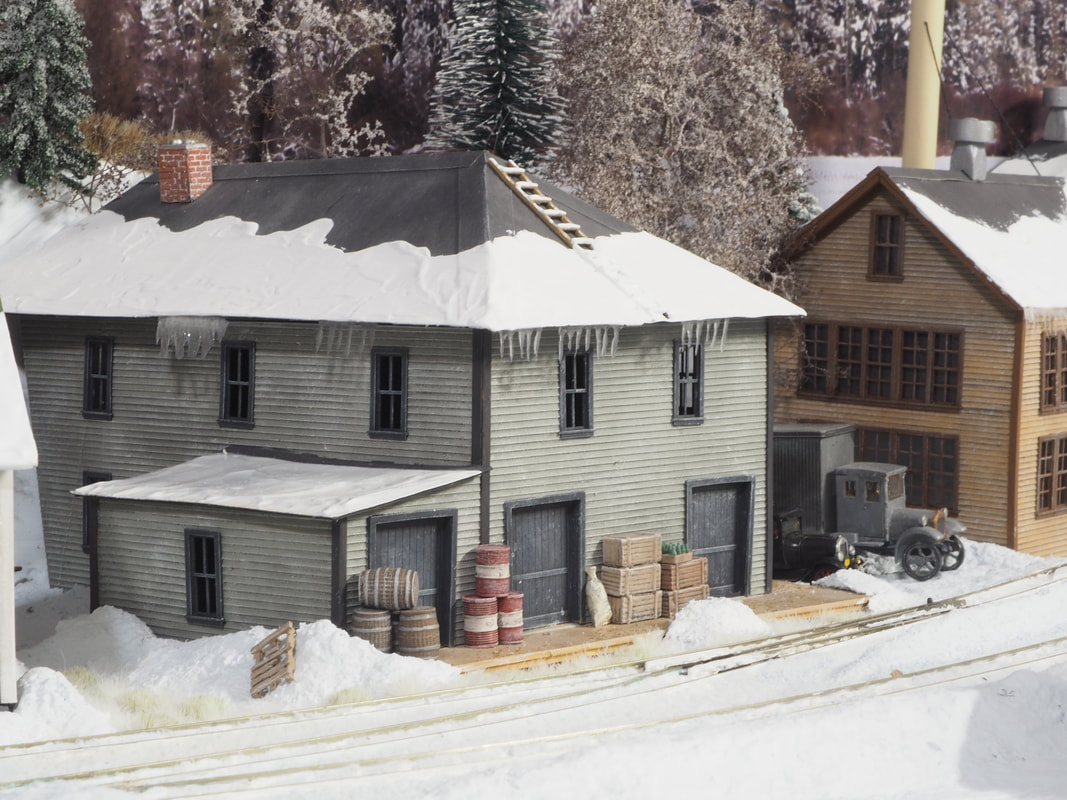
Above right and below left is the Morrill Corn shop (cannery) at the east end of the rail yard. I scratchbuilt it using my usual materials, and since only the walls that you see visible in the photos are visible from the edge of the layout, there is no detail on the non-visible walls. I just have to add a couple of shucking shelters and wooden decking that was located around the interior of the compound.
|
|
Above right and below, I've started experimenting with using Dave Frary's "snow goop" recipe to add snow to the rooves of the structures. I liked my roof work on the buildings as they were, so I decided to try to make them look like we're in between snow storms, and the warmth in the attics has partially made the snow to melt and start sliding down the rooves. My wife said this first coating dried looking more like paint than thick snow, so I'll need to add another layer or two of snow goop to them.
|

|
|
|
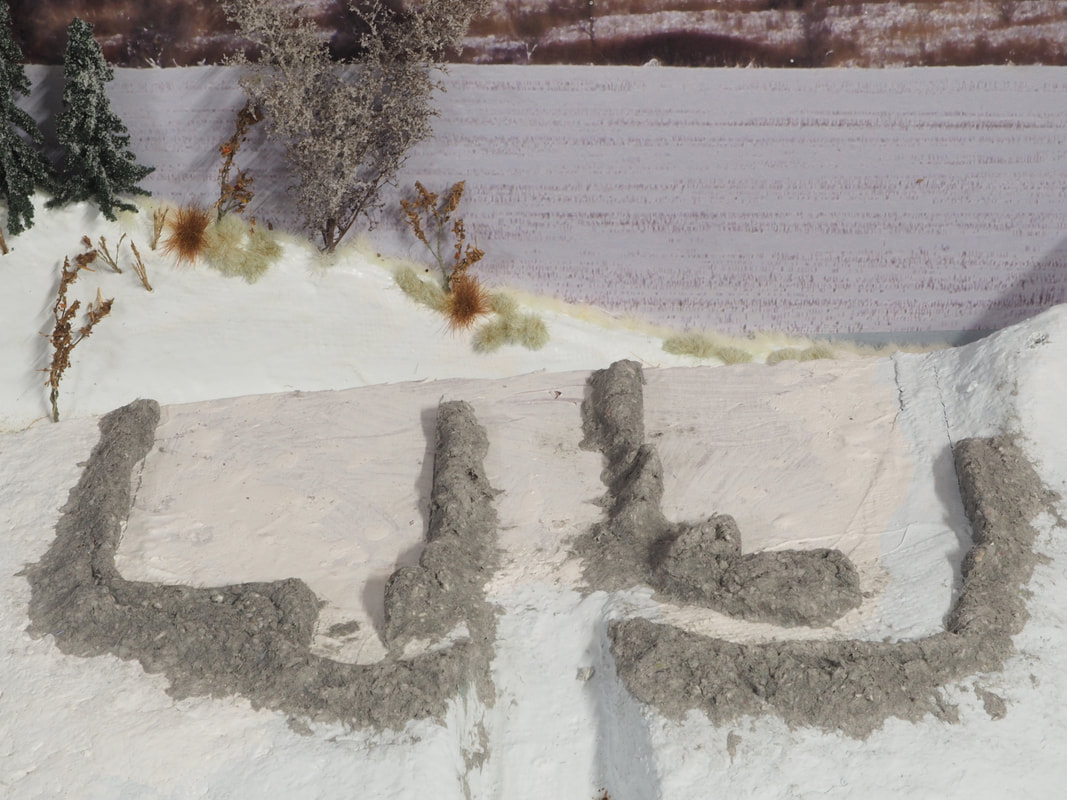
I used celluclay to model the snow piles fallen from the roof, and shoveled off porches, steps, and walkways. First I penciled a line around the base of each building. Then I removed the building and made the piles from celluclay. After that I put the buildings back down to see what areas I needed to adjust. After that I removed the buildings again and then painted the piles. All the structures are getting the same treatment.
|
|
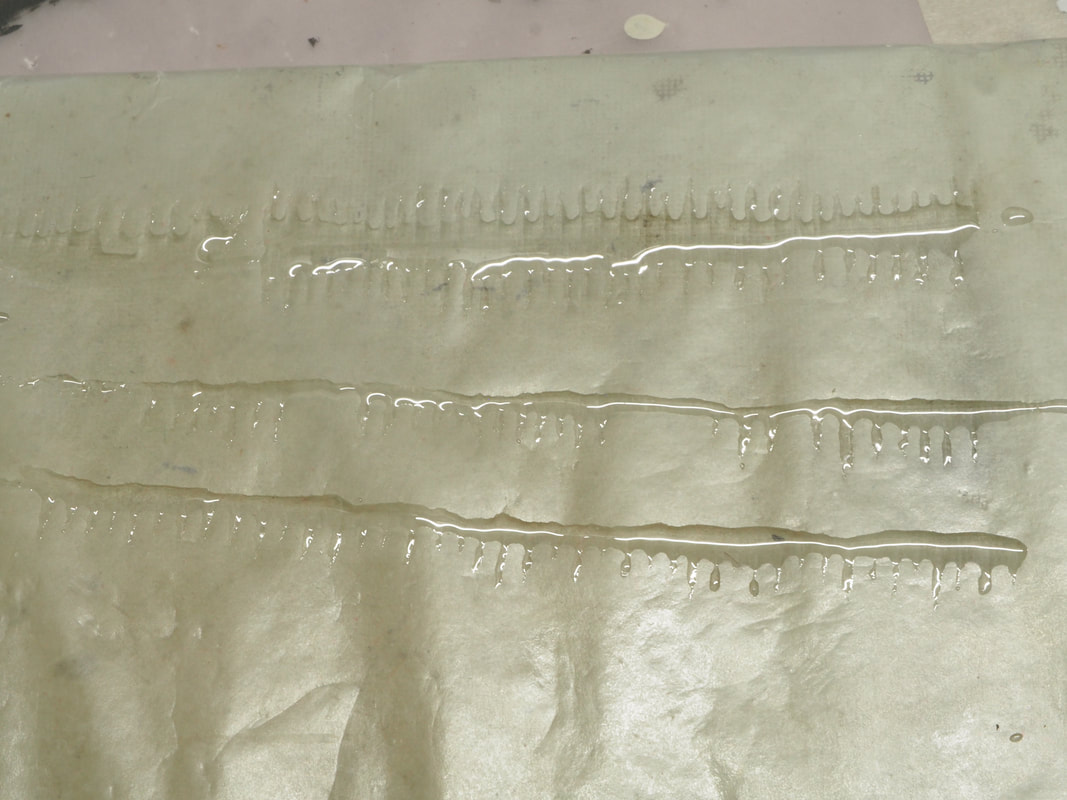
To make icicles, I poured a thin line of 2-part epoxy on wax paper. Then I teased out lines of resin from those lines with a toothpick to make the icicles. Once they're dry, I slice off a section of icicles and glue them to the edge of the roof. All the buildings will get the treatment.
|

|
|
|
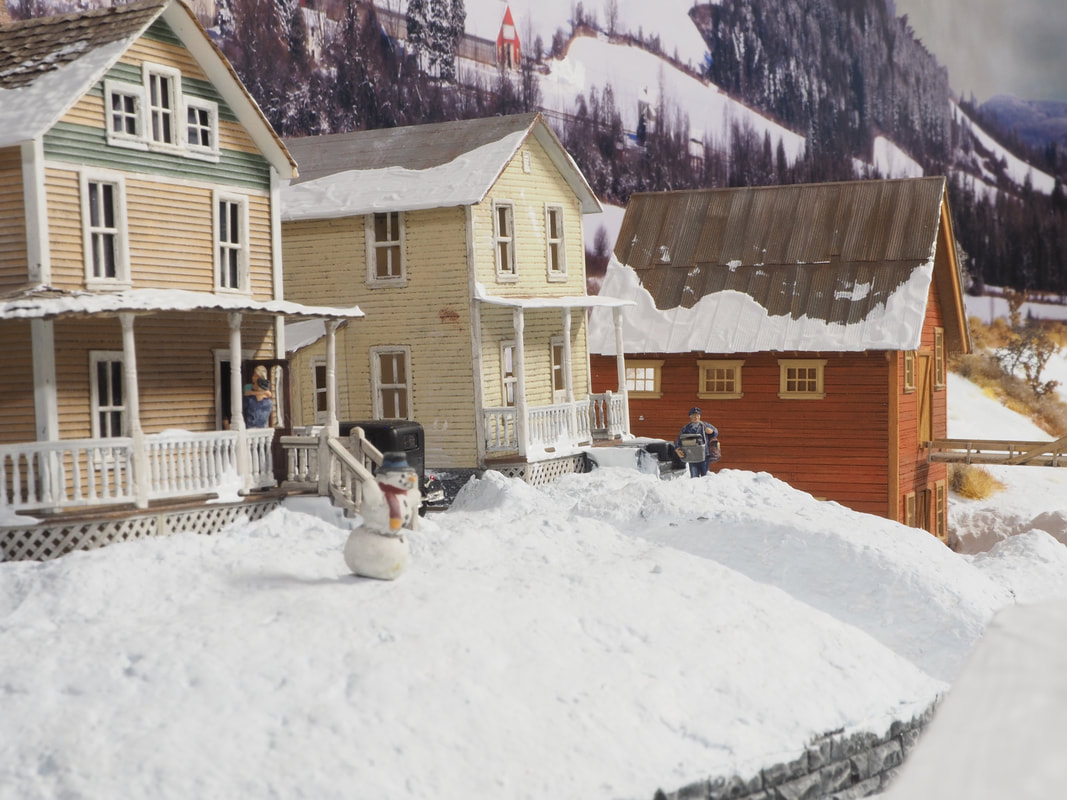
With my usual habit of starting from the rear to the front and left to right, the details are added to the creamery, the Dagget & Will store, and the snowball fight in the foreground. The houses on the hill behind the depot are finished up, with a young lady welcoming her man home, a snowman and mailman delivering mail.
|
|