REEDS STATION
|
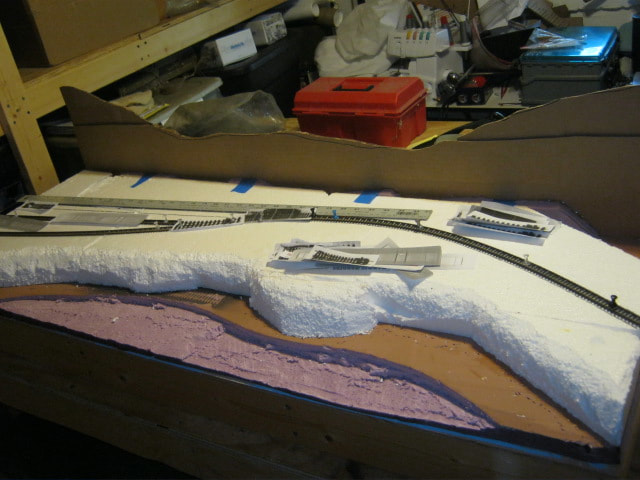
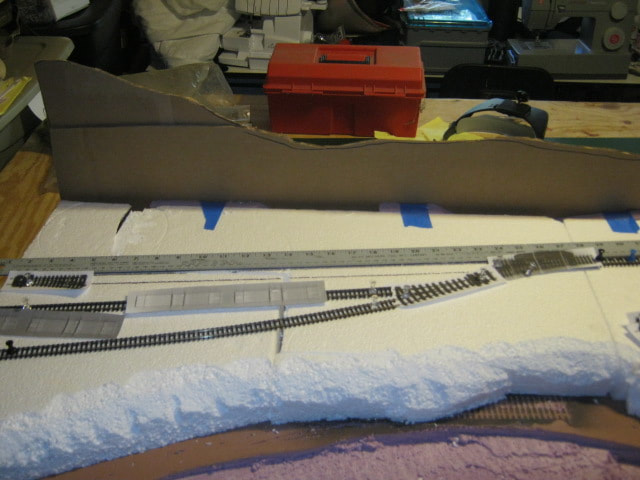
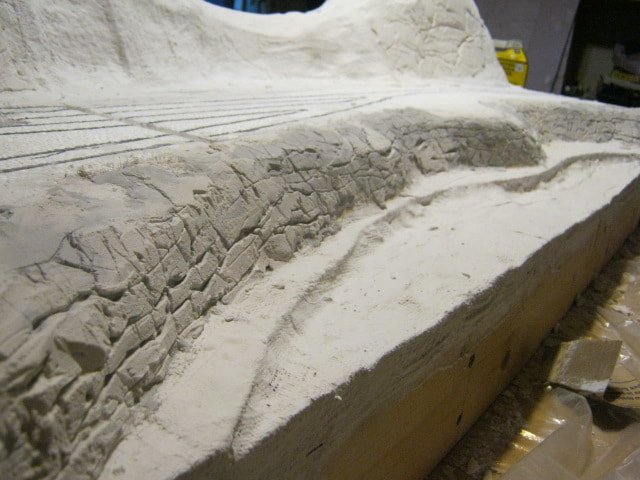
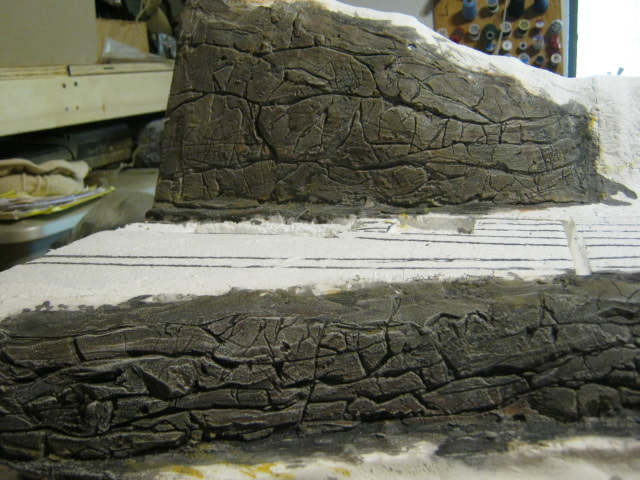
Reeds Station is the first module I built, and I learned A LOT at this first attempt. I also use it now to gauge my improvement, and remind myself of lessons learned so I can incorporate them in new work. One lesson I learned, as seen in these two photos, is don't use bead board foam, or thick styrofoam in general for a base. But....I was using what I had on hand to experiment with.
|
|

|
After studying photos and track plans of the original SR&RL, I decided to model Reeds Station as a first attempt. It had a passing siding off the main line, one spur for loading and unloading. It had a single structure, the station building, hills behind it, a stream in front of it, and a bridge across the stream that went into the village of Reeds. So it had a little of many of the critical elements I would need to use throughout the layout.
|
|
|
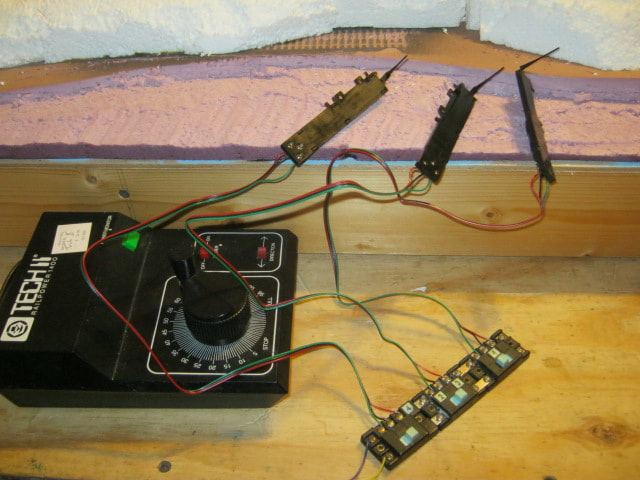
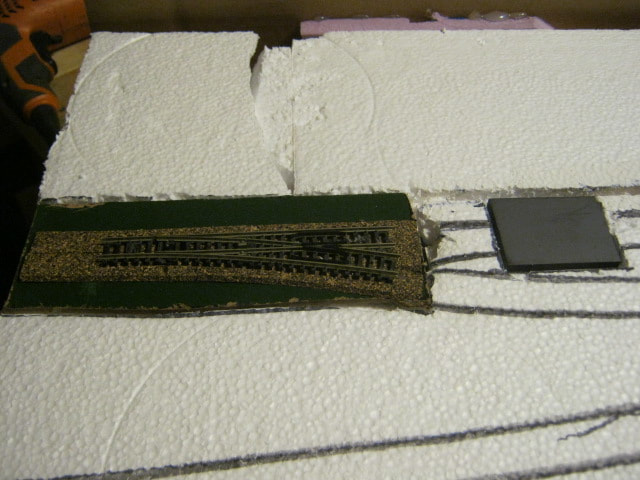
I never had remotely controlled turnouts or automatic uncoupling systems on my childhood layout, so I decided to use them on this layout. My friend Rip, who frequently checks on progress, now uses the same term I use all the time; I don't want the :hand of God" coming down into the layout to switch tracks. For now, I'm embedding permanent magnets to uncouple, and using inexpensive Atlas switch machines to see if I like the whole system better than doing it manually.
|
|
|
I put together the switch machines pre-fabbed on masonite already linked to the turnout on cork roadbed, as a whole assembly, and then embedded them into the styrofoam. I learned after burning out my first switch machine before the module was even done that whatever I do, I need to be able to easily swap out switch machines from below the layout in the future.
|
|
|
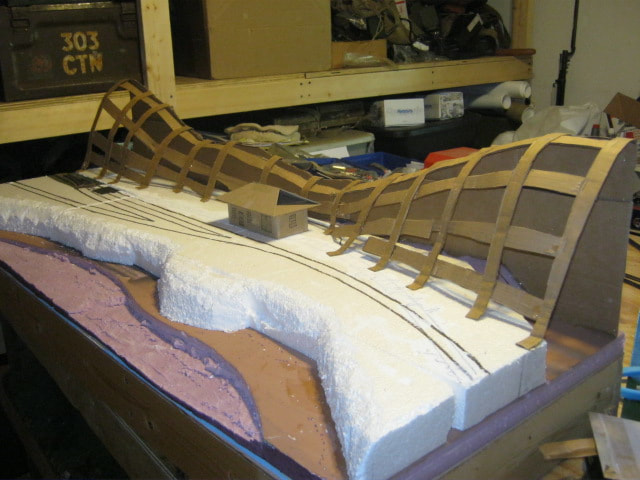
I first carved the stream bed out of the foam base, then attached a cardboard backing to the base with the outline of the hill. To that I attached a cardboard strip skeleton to add the plaster cloth to to shape the hill. Crumpled newspaper was stuffed behind the skeleton to help shape the hill, and then pulled out after the plaster was dry. One idea I incorporated was making sure there was enough space inside the hill to run hidden track if needed in the future.
|
|
|
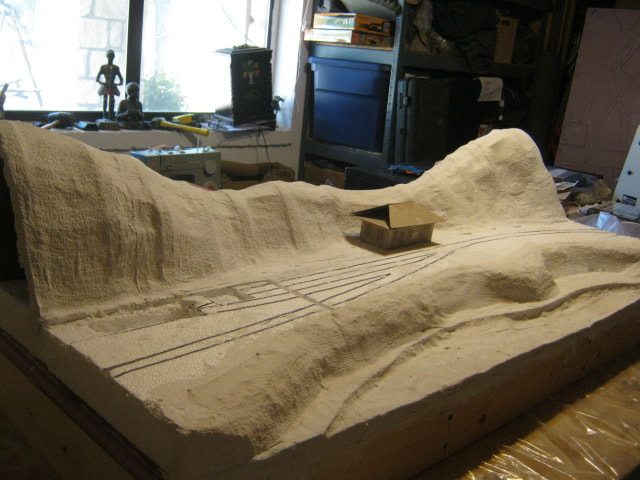
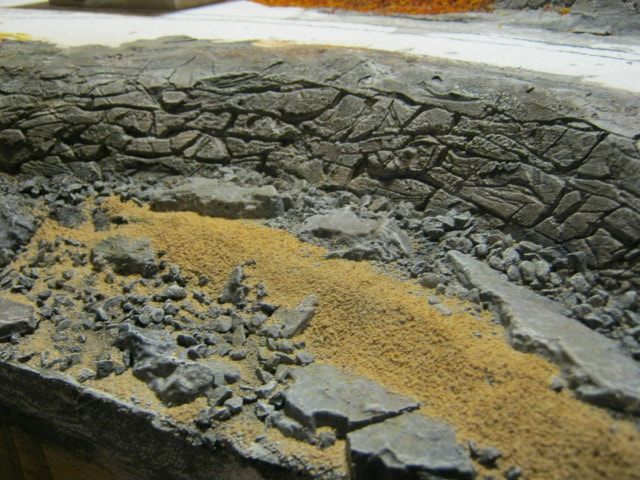
Hydrocal plaster was smeared on to the stream embankment and the hill, and then I carved out the granite that is everywhere in western Maine. This is my second experience with carving rock from plaster. I'm getting better each time. I cast rocks from a Woodland Scenics learner kit for the stream bed, and added regolith from small pebbles with paint washes to match the plaster granite.
|
|
|
Ballast was spread and shaped to simulate the sand bars in the stream and bonded with Scenic Cement. I mixed various colors of ground foam to cover the ground to make it look like the bed of a forest covered in Autumn leaves. I then added trees and bushes from Woodland Scenics kits and Bachmann, as well as lychen and twigs and whatnot. I then built a 'dam' to contain the Realistic Water product when I poured it into the stream.
|
|
|
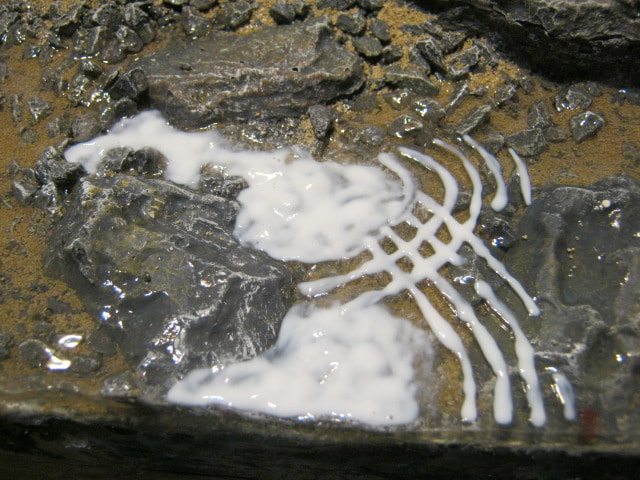
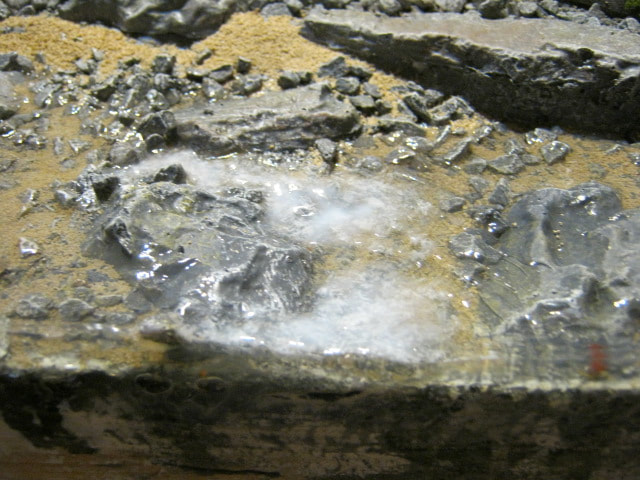
This is my first attempt using Woodland Scenics 'water' products. BIG learning curve. After pouring several layers of 'water', I then used their Water Effects to build up a bit of rapids at a small drop, and ripples leading away from the rapids. I dry brushed the rapids with white acrylic, and then put on another layer or two of water effects to give the rapids more texture.
|
|
|
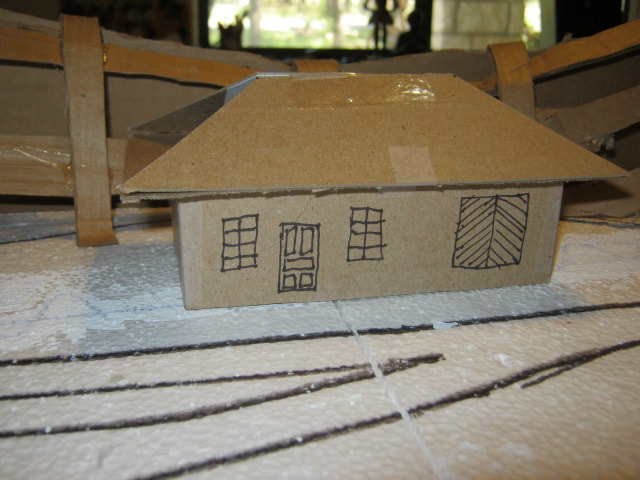
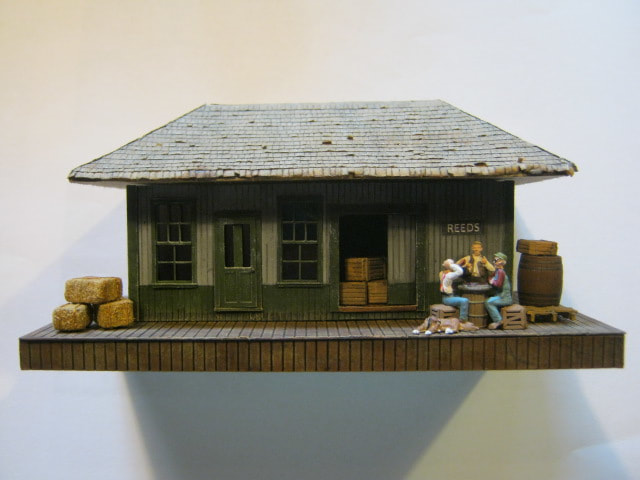
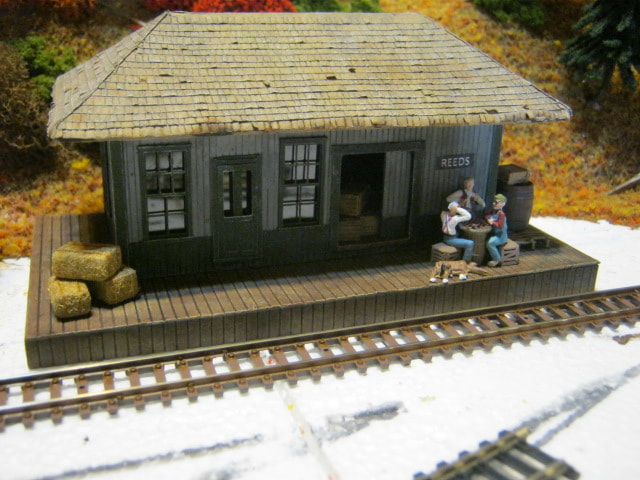
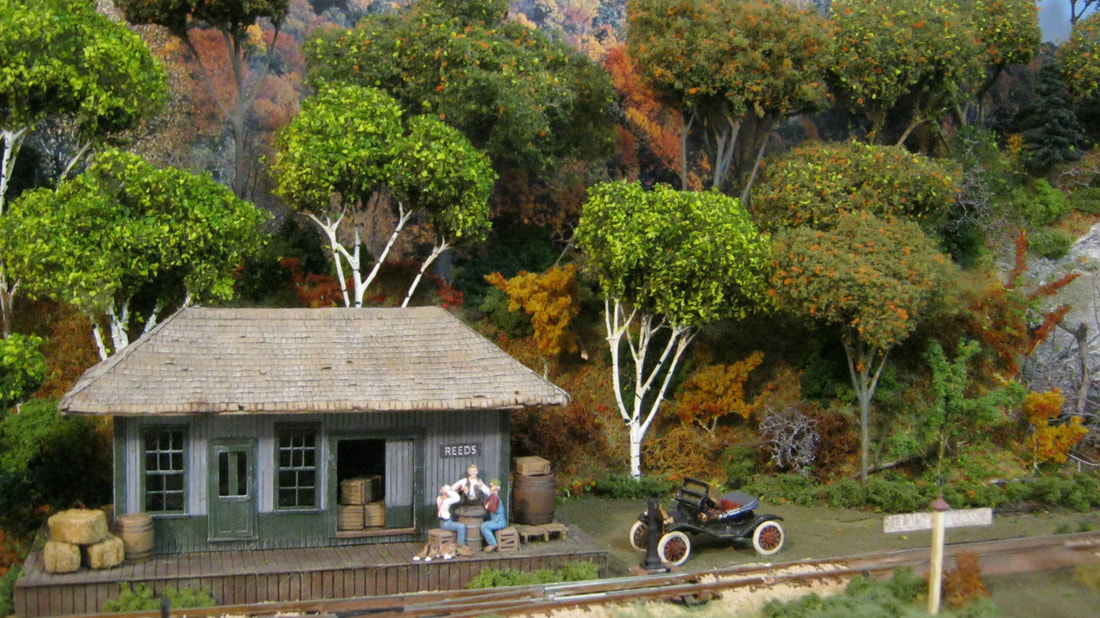
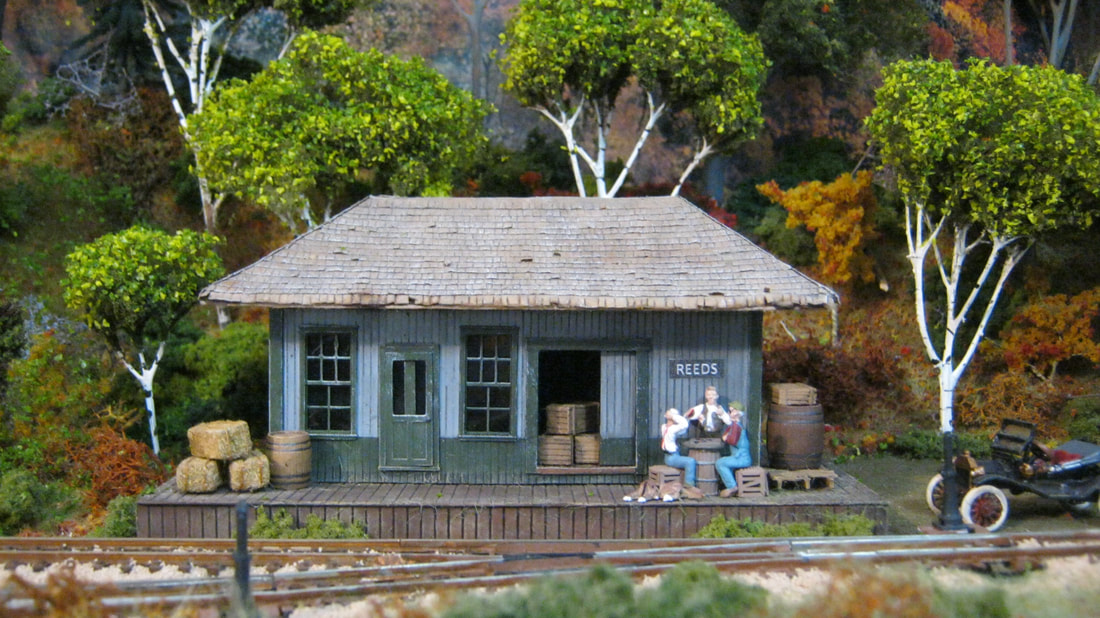
I scratch built Reeds Station, using line drawings and photos out of my library for reference. I put a full-dimension cardboard mock-up on the module while planning, and ended up reducing the dimensions of the actual model because the mock-up didn't fit the scene well, and just looked too big. The station is made of Evergreen Plastic stock, cardboard, Campbell shingles, and Grandt Line castings.
|

|
|
|
|
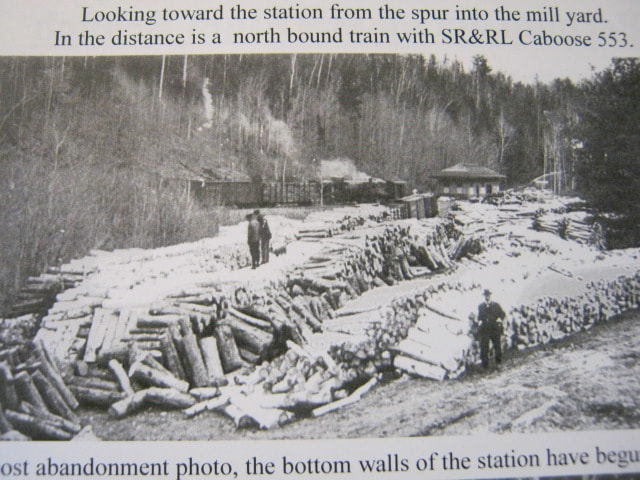
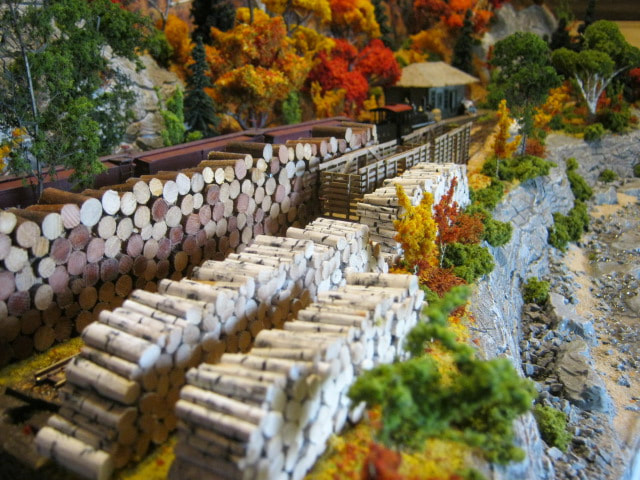
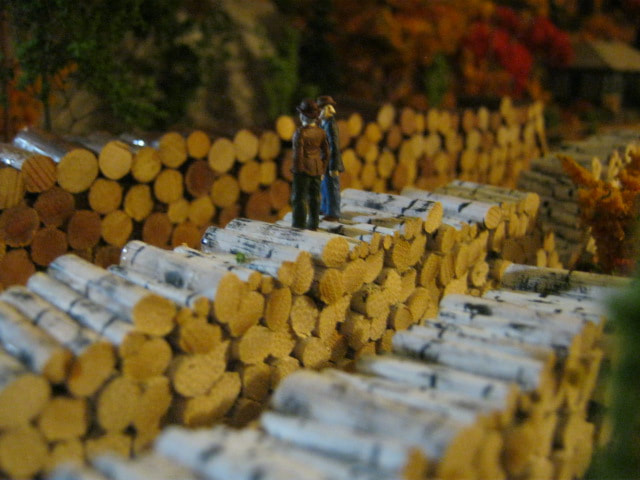
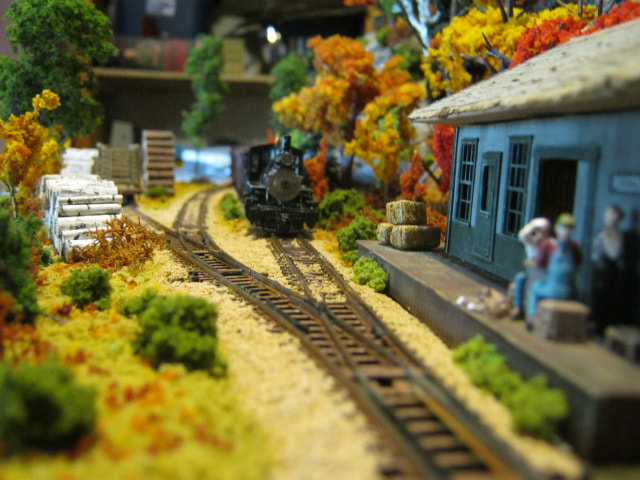
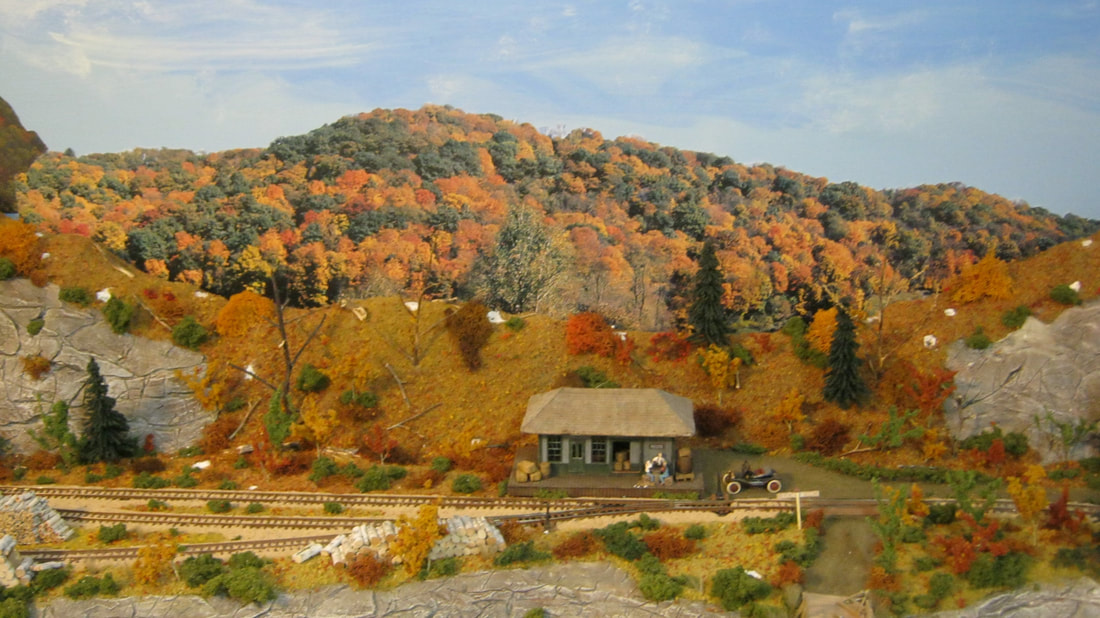
The above left photo is of the actual Reeds Station and yard, and the above right is my attempt to re-create the scene. After this photo, I removed a layer of logs from the rear pile so the trains are more visible, and at the suggestion of my friend Rip, added the two guys on top of the pile from the photo.
|
|
|
I learned several rough lessons about ballasting N gauge track while trying to keep bonding agent out of the points, and from seeping down through the hole for the throw bar and into the switch machine below. I also learned that it's better to paint the rails to weather them after the ballast is done, not before laying the track.
|
|
|
The photo backdrop was glue-sticked to masonite, and then I used acrylic blue and white and mixed them as I went with the brush, to blend the ends of the 3' wide photo sky with the brown masonite backing. I had the photo ahead of time, so I shaped the hills high at the ends and used taller trees to help hide the joints between the photo and the masonite.
|
|
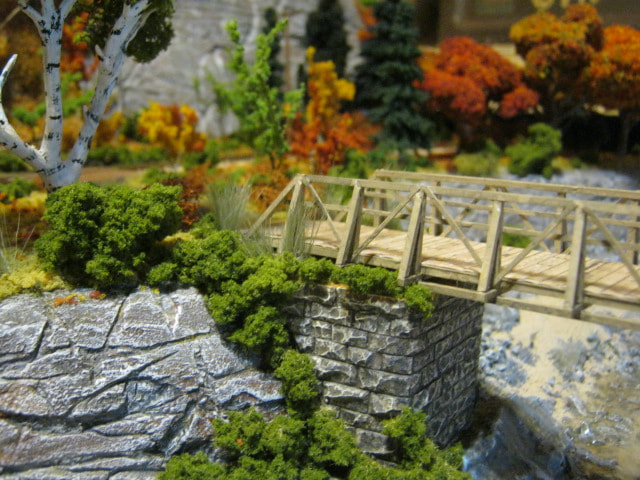
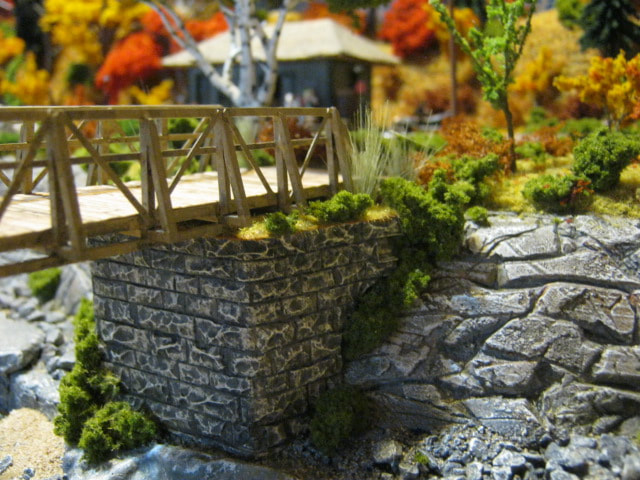
I used Chooch flexible self-adhesive stone wall material and cardboard to shape and make the bridge abutment. The bridge was scratchbuilt using Evergreen plastic stock and Faller wooden board paper. The bridge design was taken as best I could from the one distant photo I have of the actual bridge across the stream into the village of Reeds.
|
|
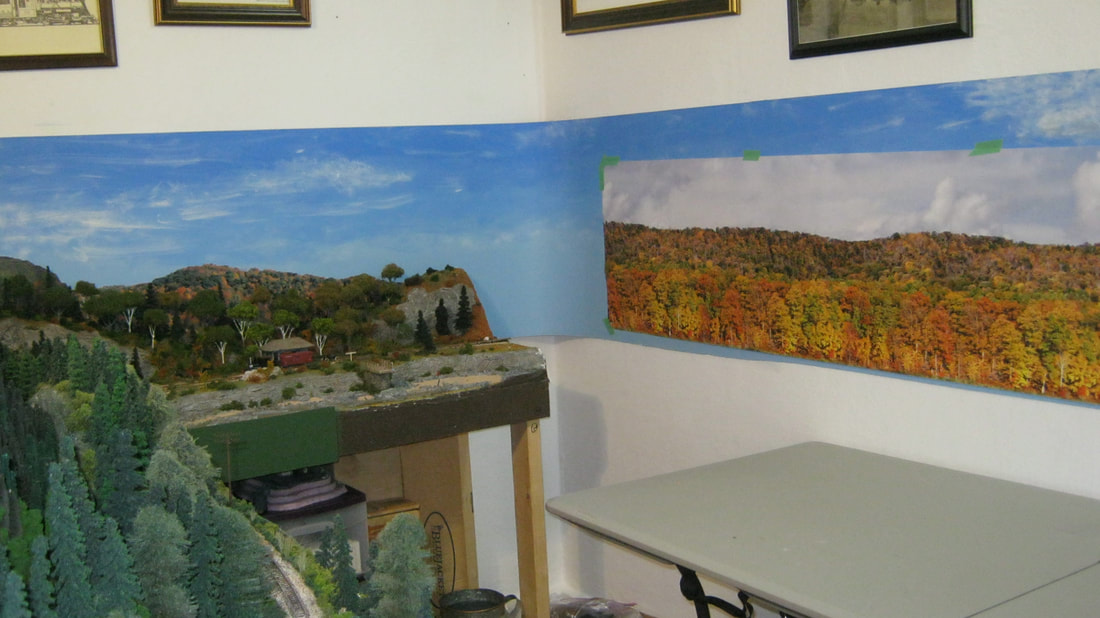
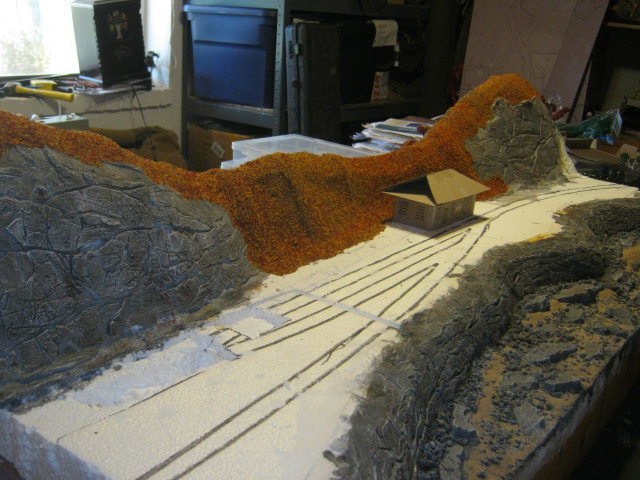
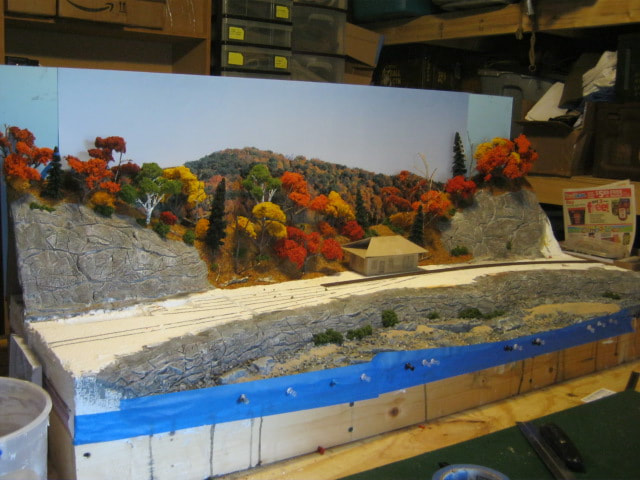
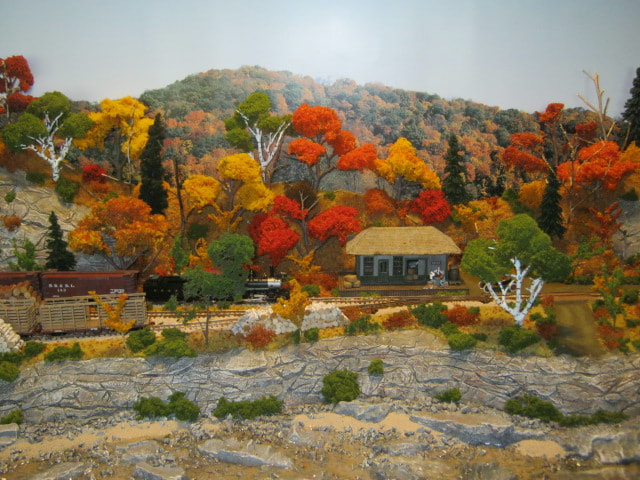
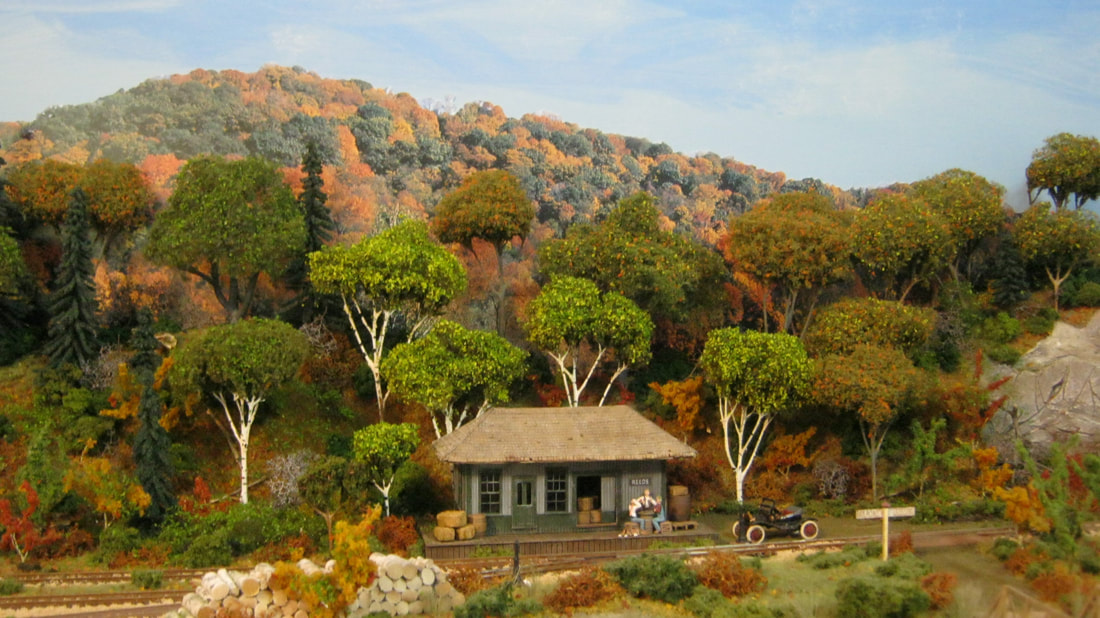
Above, two years and nine months after the previous photos were taken, Reeds, the first module I built, is finally being integrated into the rest of the layout. After finishing up Sluice Hill to the left, which blended into the left side of the Reeds module, most of the original trees I made were pulled out to make room for a new group of trees. Reeds will be a transition between the summer foliage of Sluice Hill and the full-blown colorful fall foliage of the Phillips module.
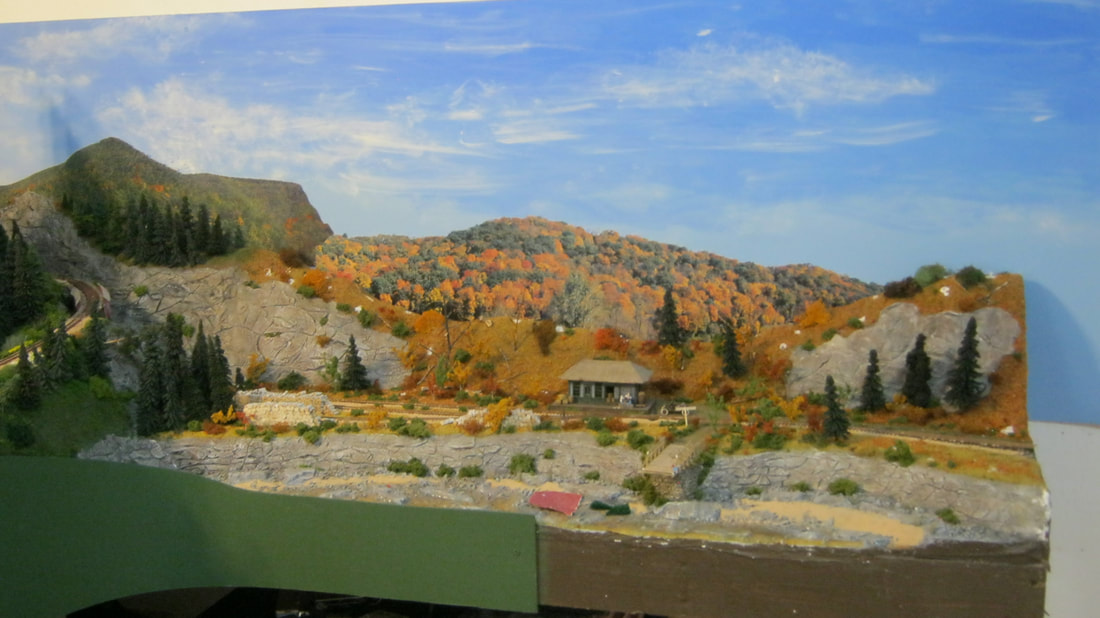
The photographic sky on the back drop was cut off along the top of the trees, and the photographic trees were glued onto the painted sky on the masonite. When I first put the two photo backdrops together, I wasn't happy with the trimming of the hill I had done to the left, being too steep, so I trimmed more of that prominent angle away that you see above to round it off more.
The photographic sky on the back drop was cut off along the top of the trees, and the photographic trees were glued onto the painted sky on the masonite. When I first put the two photo backdrops together, I wasn't happy with the trimming of the hill I had done to the left, being too steep, so I trimmed more of that prominent angle away that you see above to round it off more.
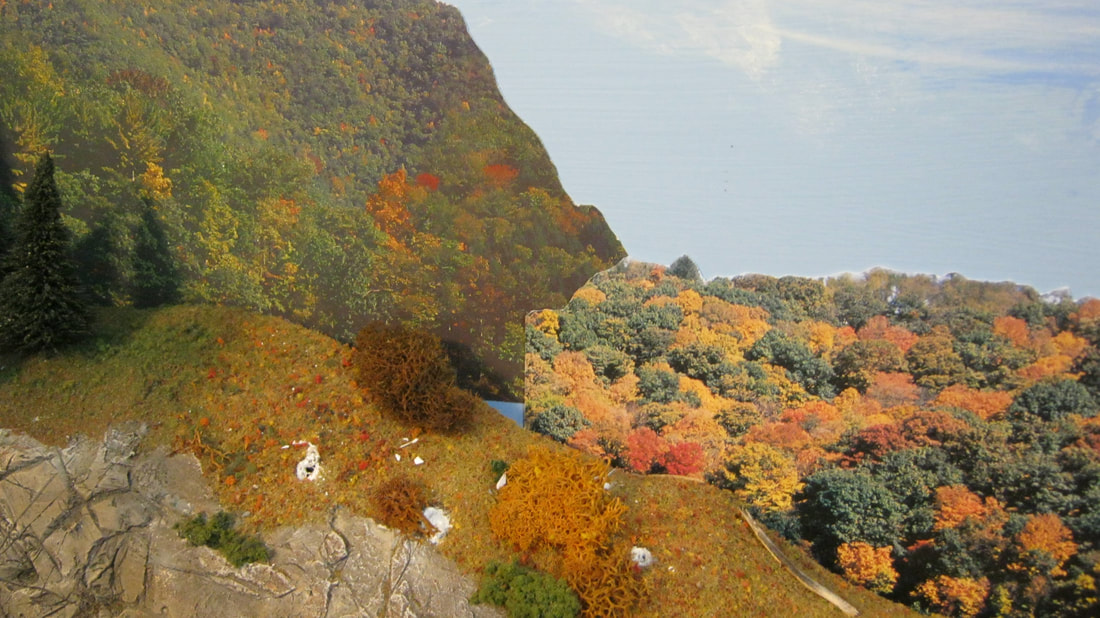
Above, the two photographic hills have been blended together, and the joint will be hidden behind the 3D trees and undergrowth in front of it.
Above, the ground cover got a thin layer of light green flocking "static grass" to tone down the original ground cover that was very yellow and tan, to help simulate the transition of the scenery from summer to fall. The goal is to blend the colors of the foreground scenery with the colors of the photo backdrop so that the transition looks more natural, and make the ground cover green enough to look natural with the scenery to the left, and yellow/brown enough to blend with the scenery to the right.
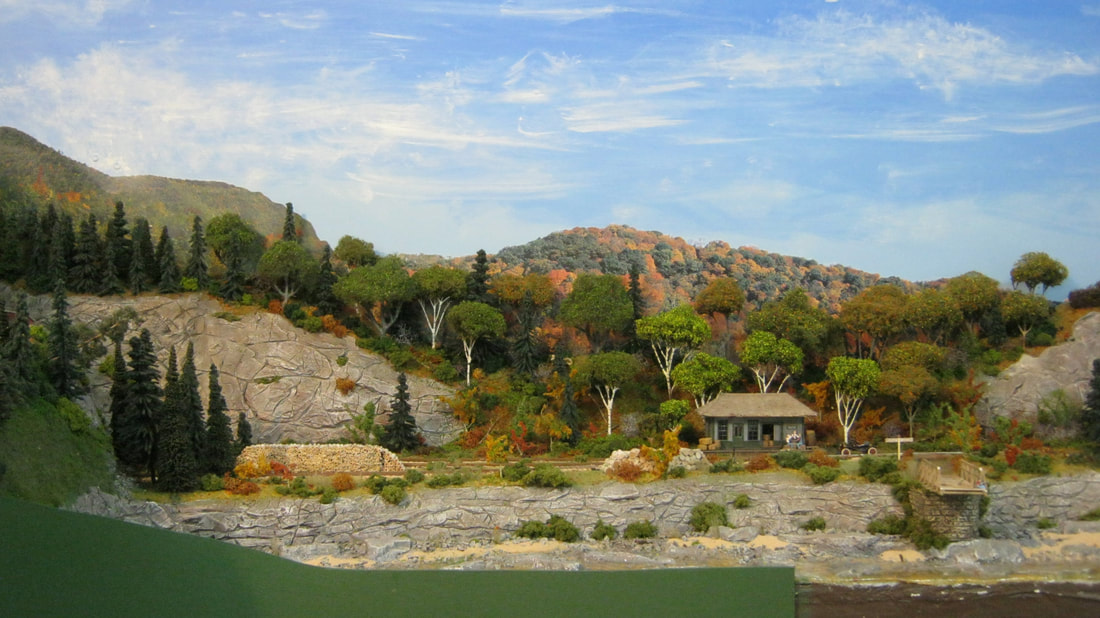
Above, although not completed, which won't happen until the scenery to the right of the Reeds module is in place, the majority of the new foliage is done. The hill to the left in the background is now more rounded to look like a more natural topography, and the small patches of brown/tan/orange foliage on the left photo hill is a good transition to the right photo hill, that is mostly green with a mix of yellow, orange and red foliage, part way through the transition from summer to fall.
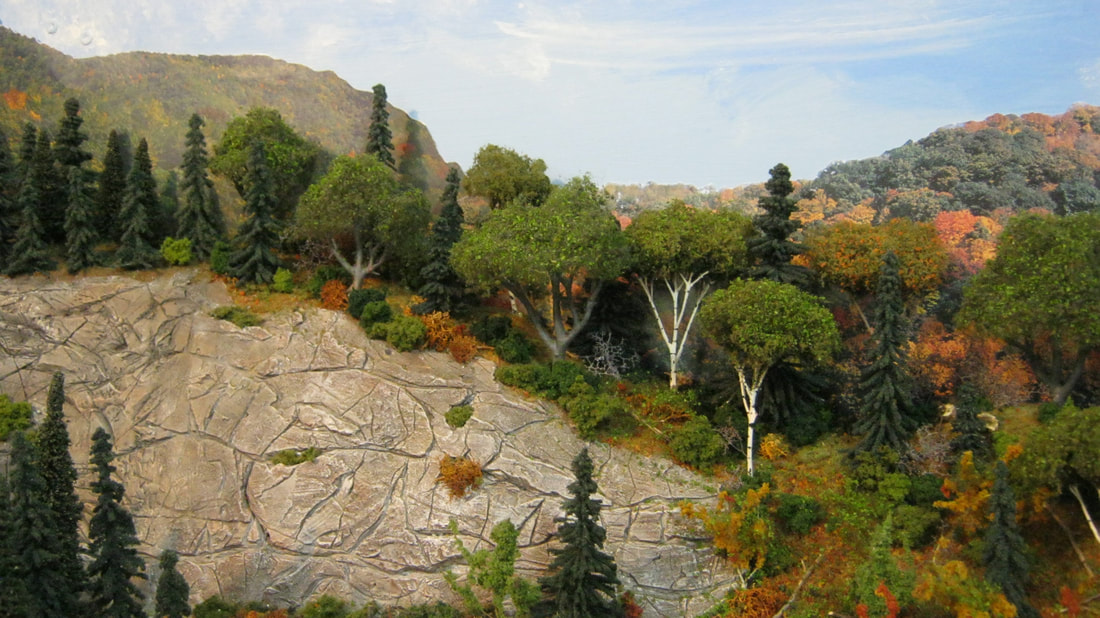
The 3D foliage in front now transitions from green to the left, to a light mixing of mostly green, with some yellow and orange starting to show up in the middle, and gradually adding more yellow and orange to the right.
The 3D foliage in front now transitions from green to the left, to a light mixing of mostly green, with some yellow and orange starting to show up in the middle, and gradually adding more yellow and orange to the right.
Below, the backdrop for Phillips, with its beautiful fall colors, is taped up just to eyeball the next steps in expanding the layout to the right beyond Reeds. I'll explain the plan for that on the Phillips page. For now, here for Reeds, the next step will be blending the 3D scenery of Reeds around that empty corner to naturally transition with the scenery for Phillips.