PORTER BROOK
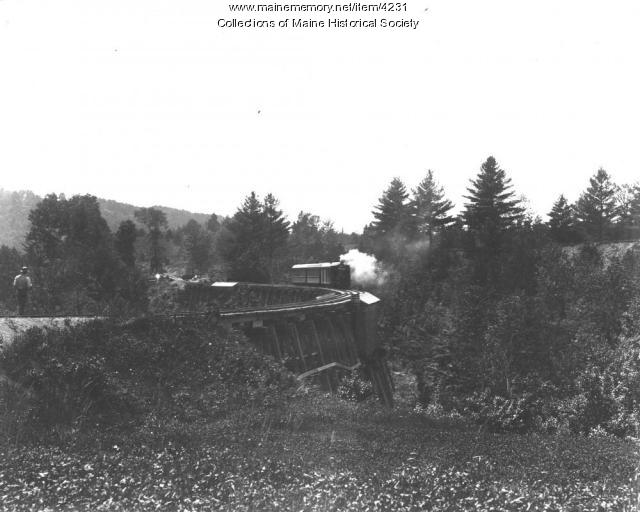
I was going to include Porter Brook / Porter Brook Trestle (later known as Valley Brook) in the page for Strong, but I think it's going to be an interesting feature and build in itself to warrant its own page. The prototype trestle started out as a wooden trestle spanning the whole valley, and later the grade was filled and the gap over the brook spanned with a girder panel bridge. I prefer it as the early wooden trestle, so that's what I'm modeling.
|
|
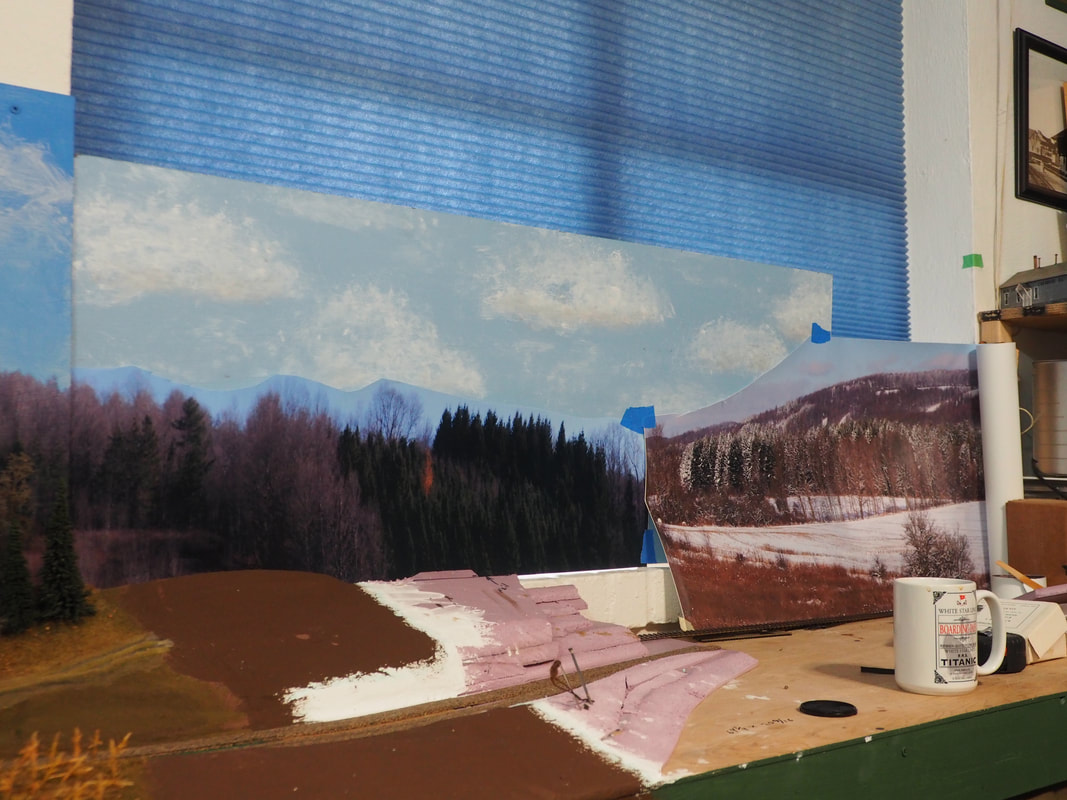
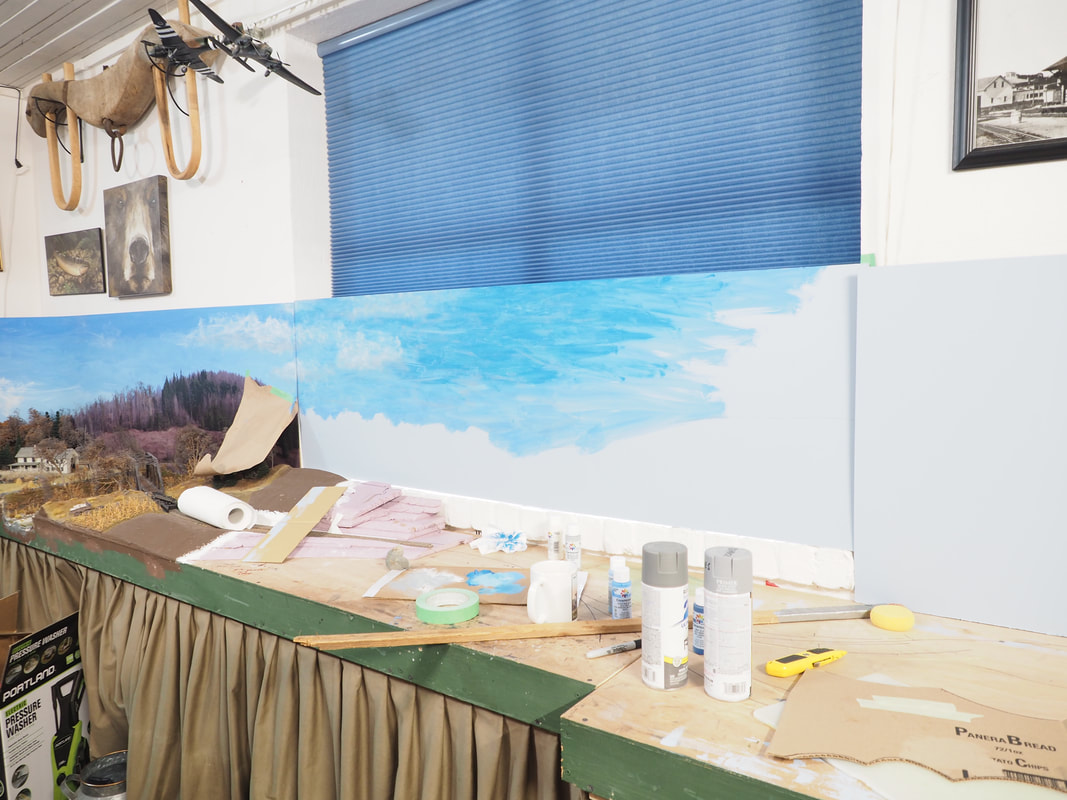
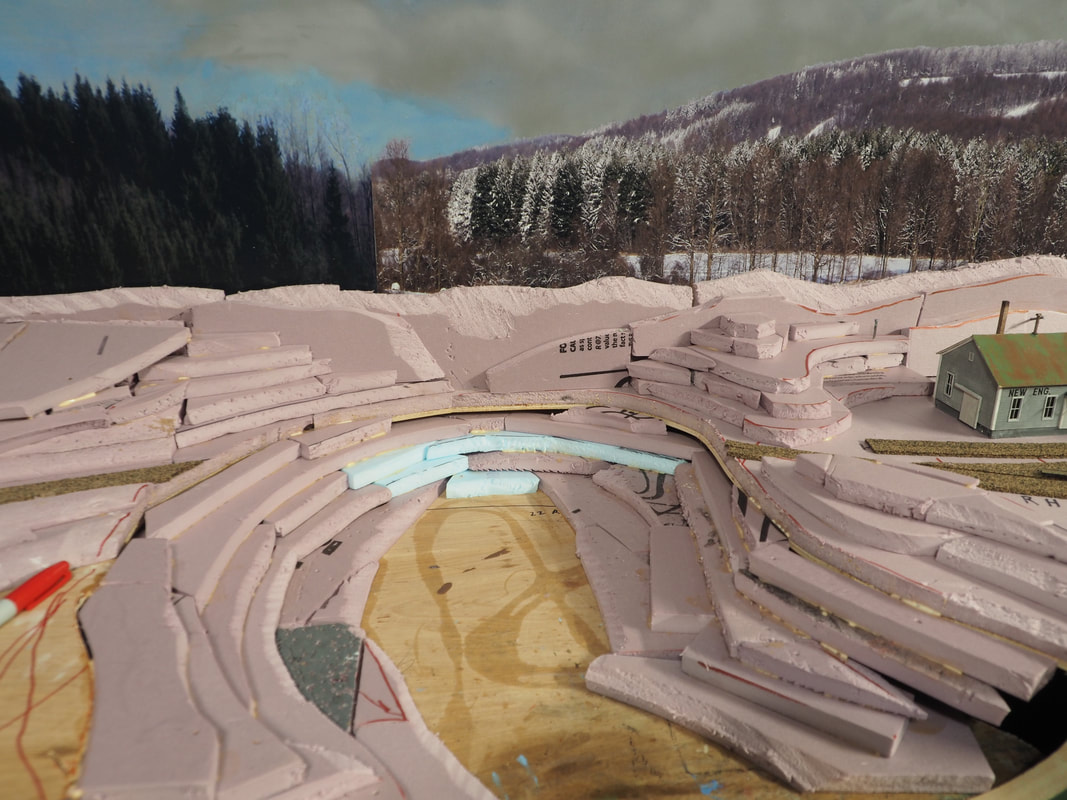
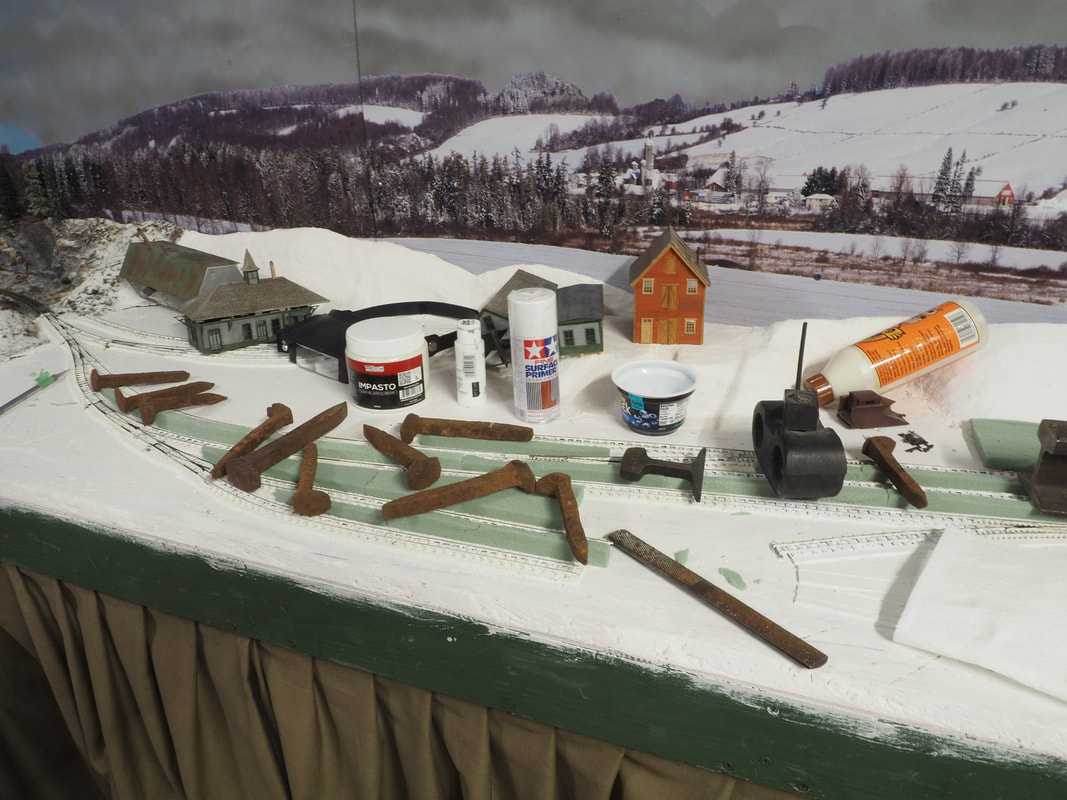
Above left and right, the future site of Porter Brook on the layout. The center of the feature will be roughly where the coffee cup and tape measure are sitting on the benchwork. The two portions of photo backdrop taped to the piece of painted sky are helping to visualize how the scene will come together. Porter Brook is where the scenery will transition from late Fall to early Winter, which explains the two different seasons on the photo backdrops.
|
|
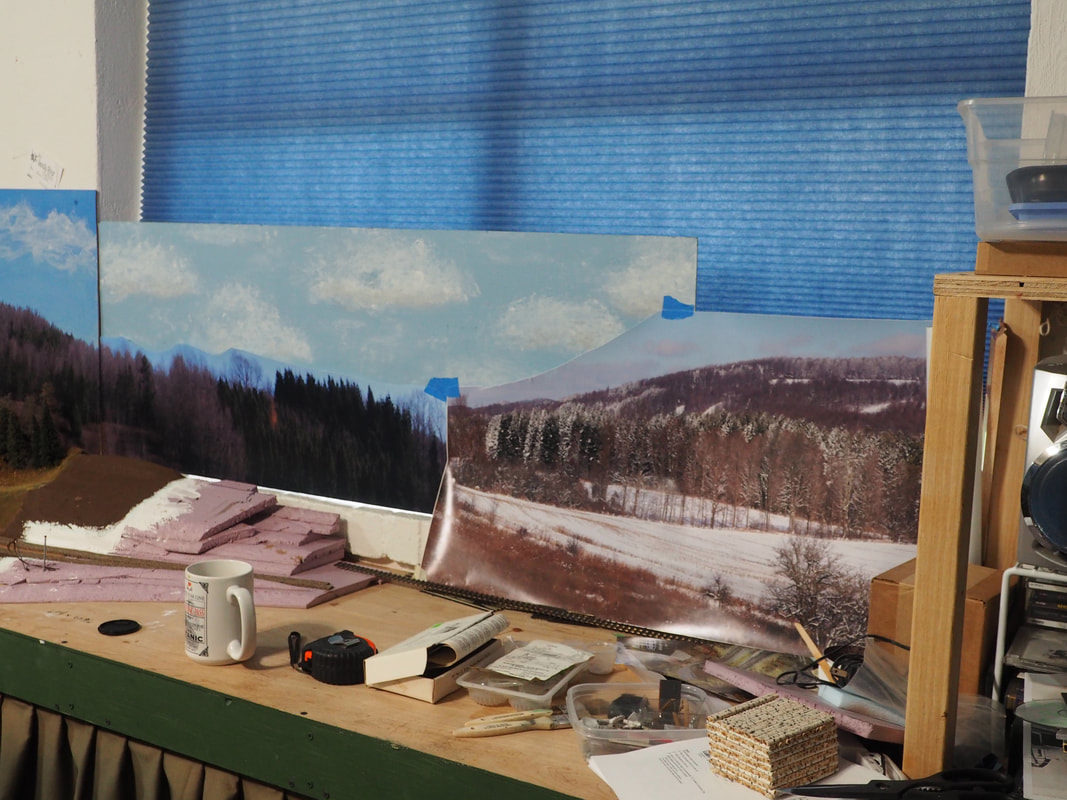
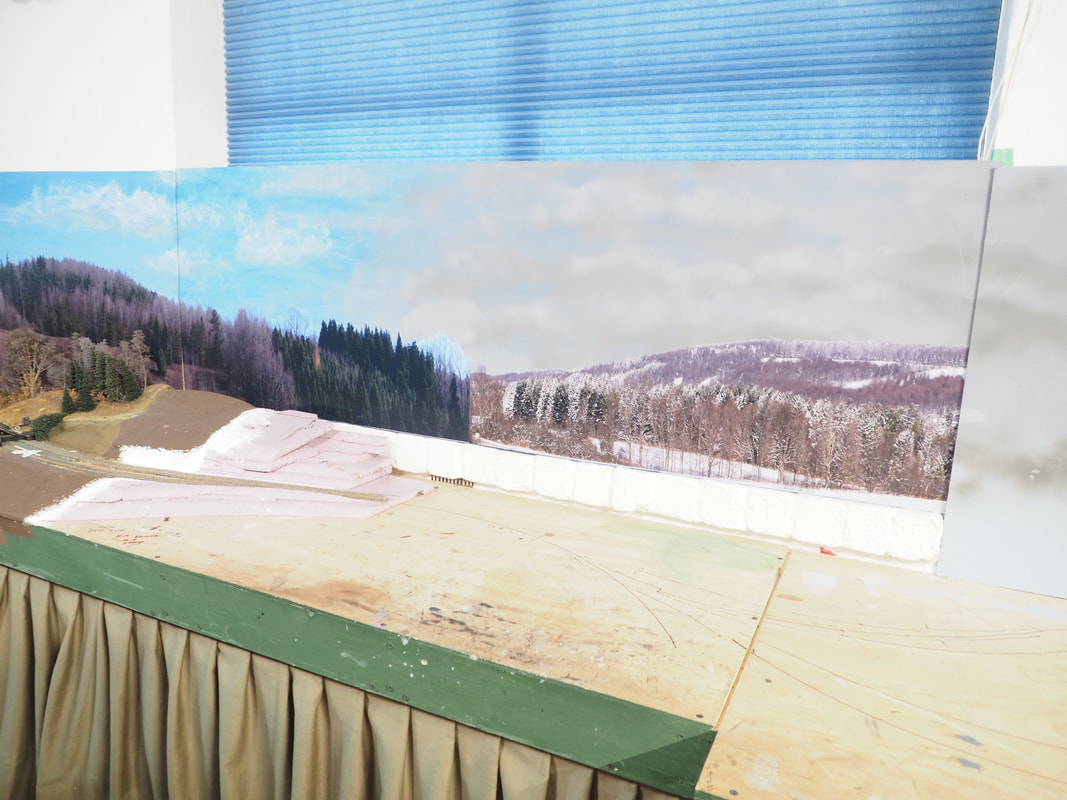
Above left and right, the removable panel backdrop to cover the windows has been cut, painted, and the photo backdrops applied. To accentuate the transition from late Fall to early Winter, the cloud cover transitions from sunny/partly cloudy to gray overcast.
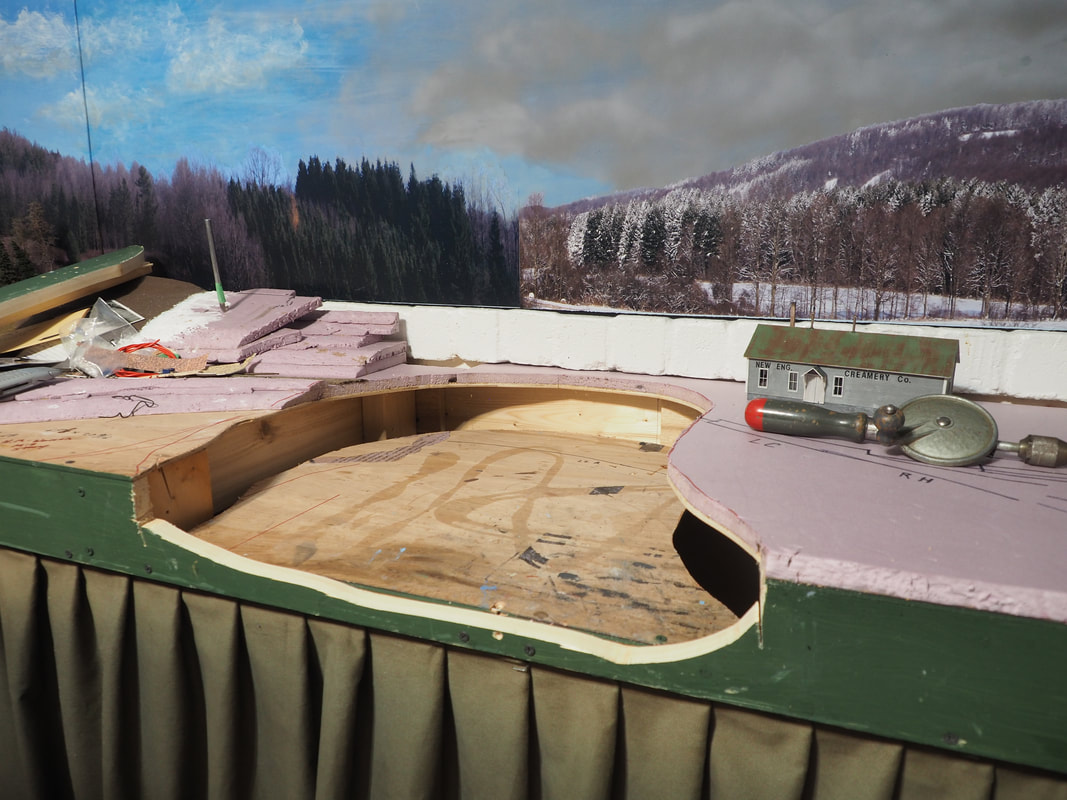
Below left, the valley floor of Porter Brook has been cut out of the benchwork, and lowered down and screwed in place to build the valley.
Below left, the valley floor of Porter Brook has been cut out of the benchwork, and lowered down and screwed in place to build the valley.
|
|
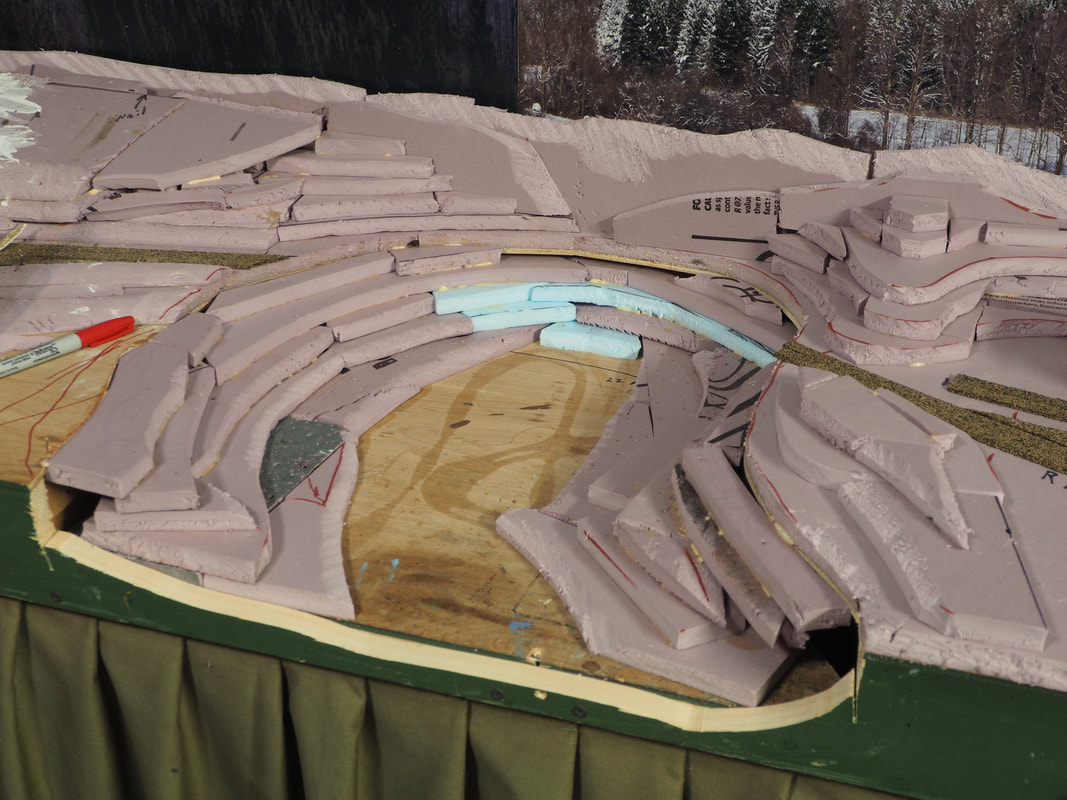
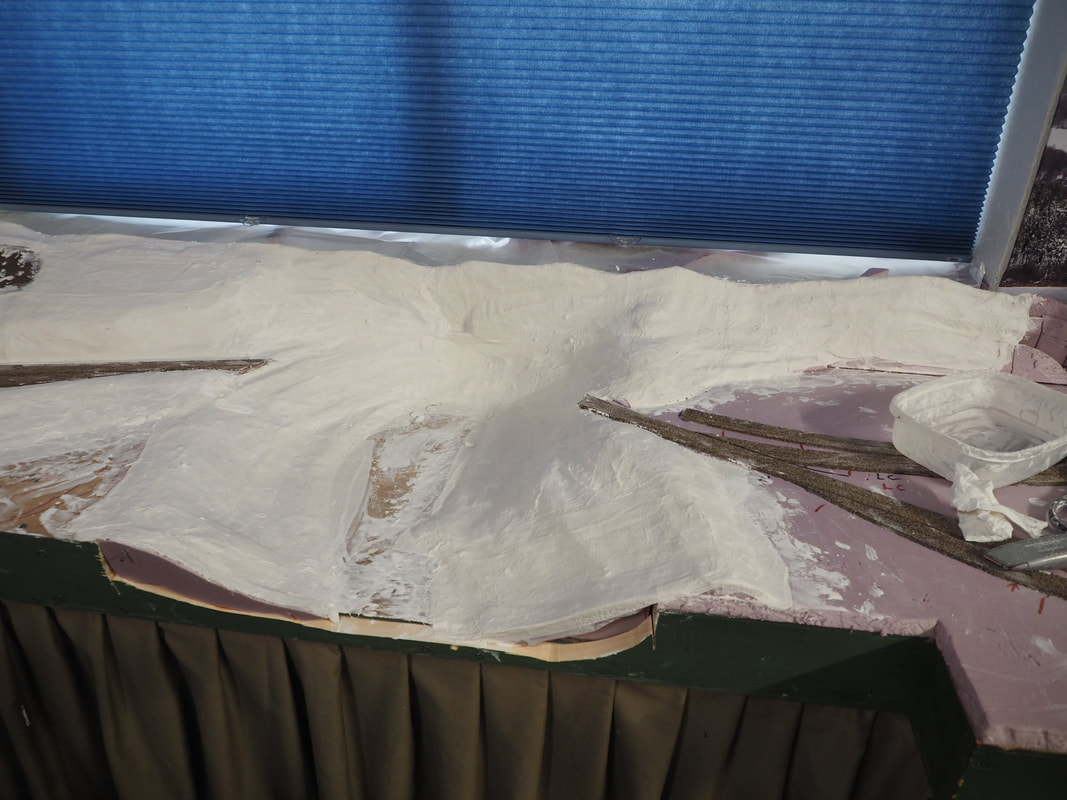
Above right and below left, the topography of Porter Brook is being built up with scrap foam board. I never throw this stuff out until there's nothing but slivers and crumbs left. Note that the foam board terrain is built up high enough to hide the window sill behind the benchwork, so some drastic work will be required to make the contour of the terrain believable.
Below right, after the edges of the foam board have been shaved off to make slopes with a utility knife and steak knife, the foam is covered with plaster cloth to get the basic shape of the terrain.
Below right, after the edges of the foam board have been shaved off to make slopes with a utility knife and steak knife, the foam is covered with plaster cloth to get the basic shape of the terrain.
|
|
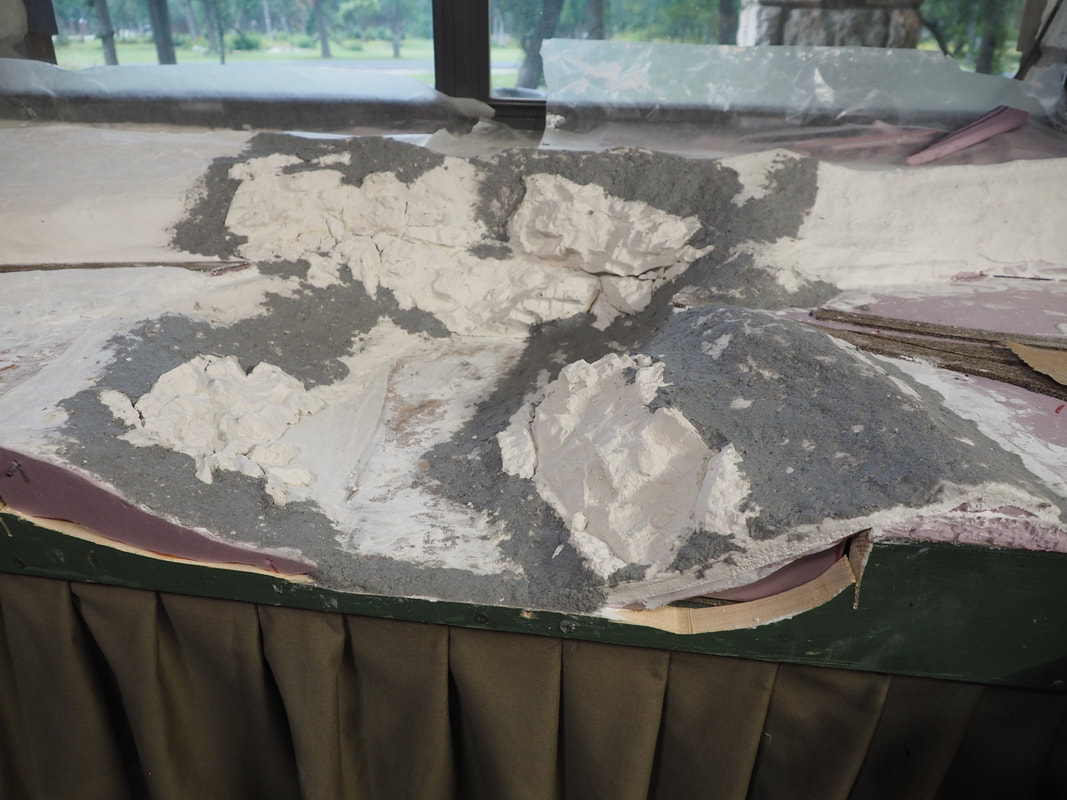
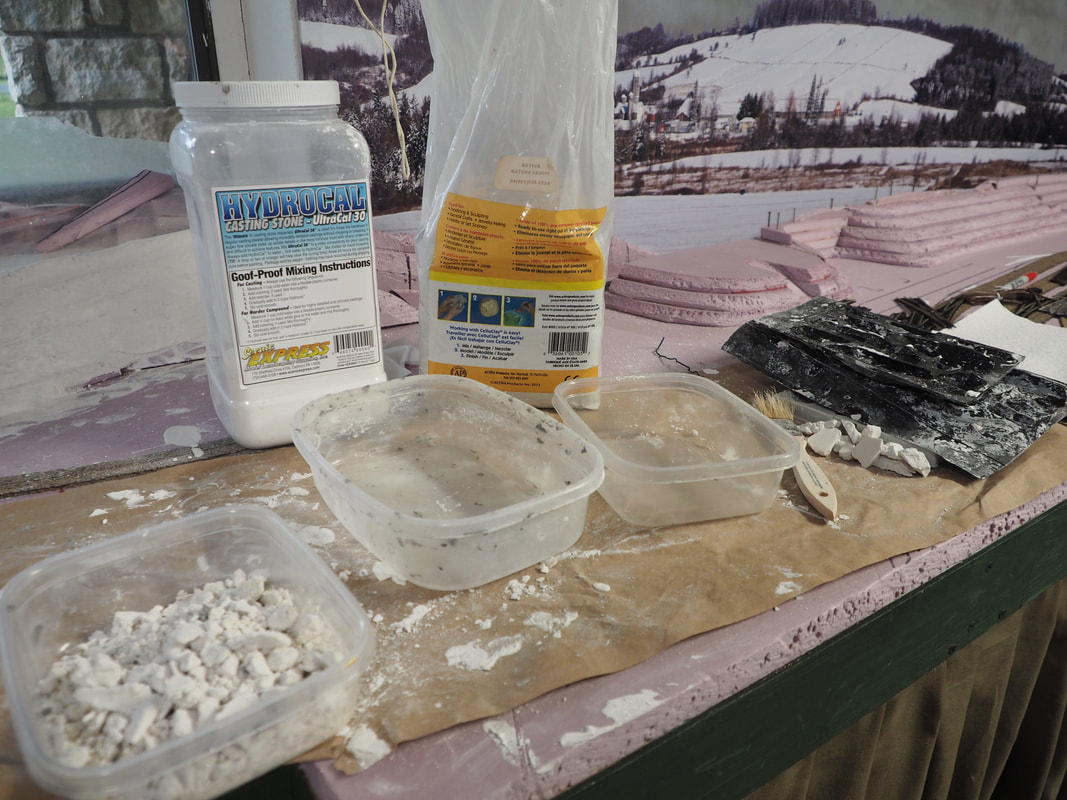
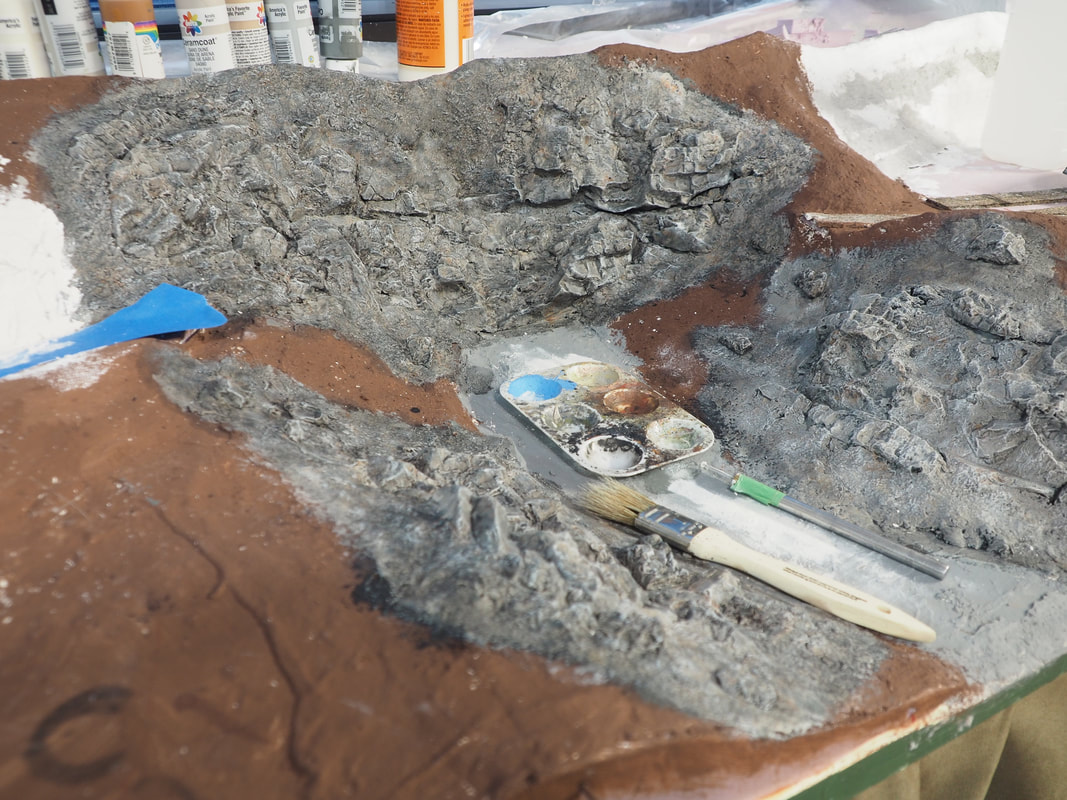
Below left, rubber rock molds from Woodland Scenics are filled with wet plaster, and then the molds are pushed against the terrain while the plaster dries. When it's dry, which doesn't take long, the mold is carefully pried off the dried plaster, leaving rock faces on the plaster cloth. The final shaping of the slopes and blending of the rock into the surrounding terrain is done with celluclay. Below right are the tools of the trade of this, the messiest part of layout building (at least for me anyway). Empty sandwich meat tubs, Hydrocal plaster, Celluclay, rubber molds, paint brushes and popsicle sticks for mixing the plaster. The tub to the left has broken scraps of plaster from the rock molds that will be colored and added to the scenery as loose rock.
|
|
Below left, an experiment that seemed like a good idea at the time, even though the method I had been using to color rock worked perfectly fine. I thought if I painted it black first, instead of doing washes of diluted acrylics, the shadows in the cracks would look better, and I could damp brush and dry brush the layers of color to finish the rock over it. Well, I completely repainted it twice, and then finally painted the whole thing a coat of light gray and went with washes the way I had been doing it. Lots of time spent, but not wasted, exploring new techniques. I don't mind redoing anything until I like the results.

|
|
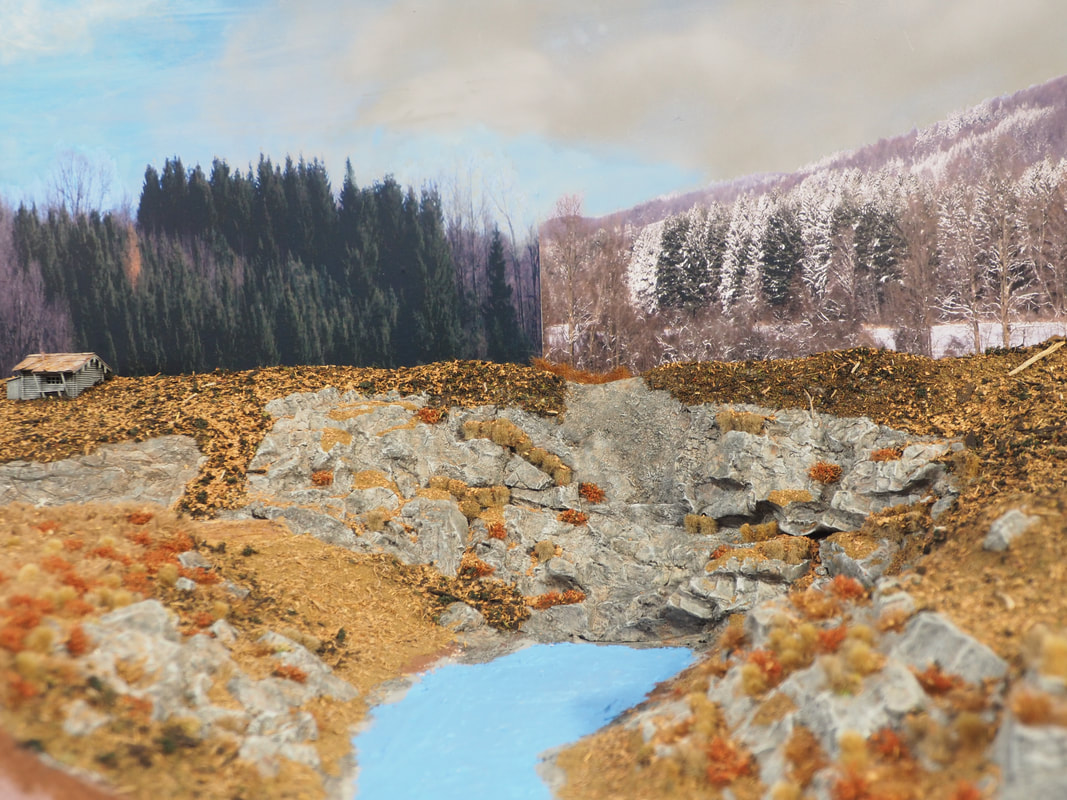
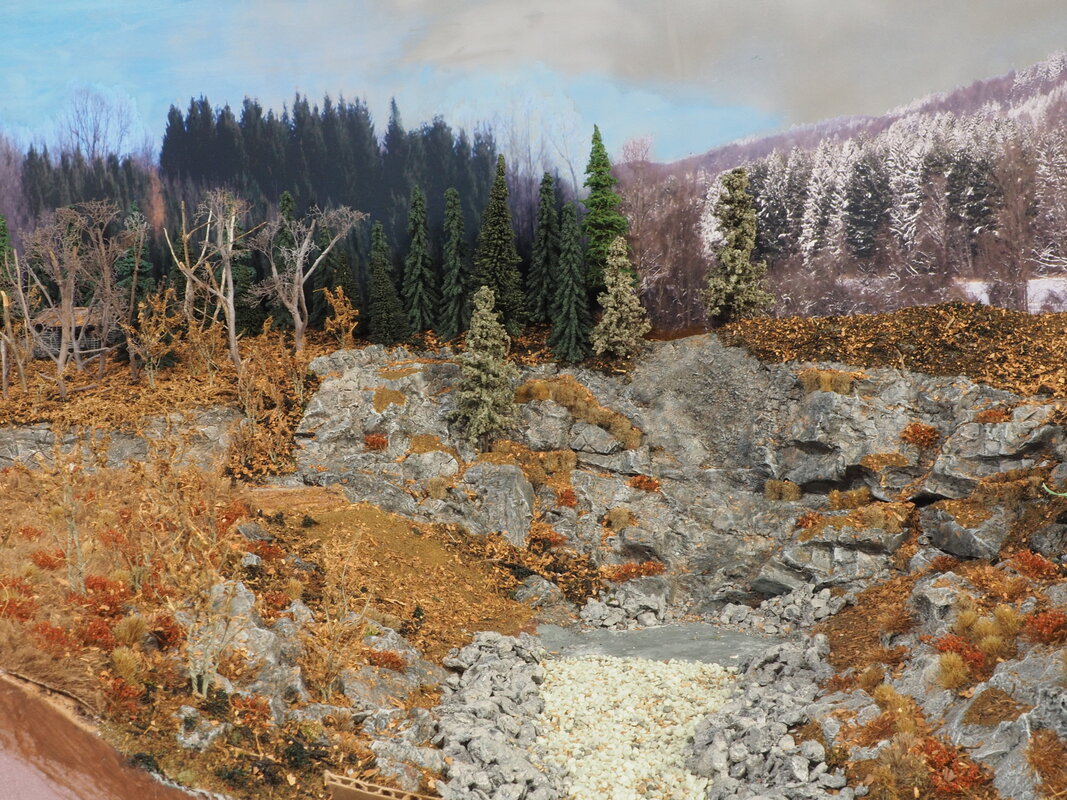
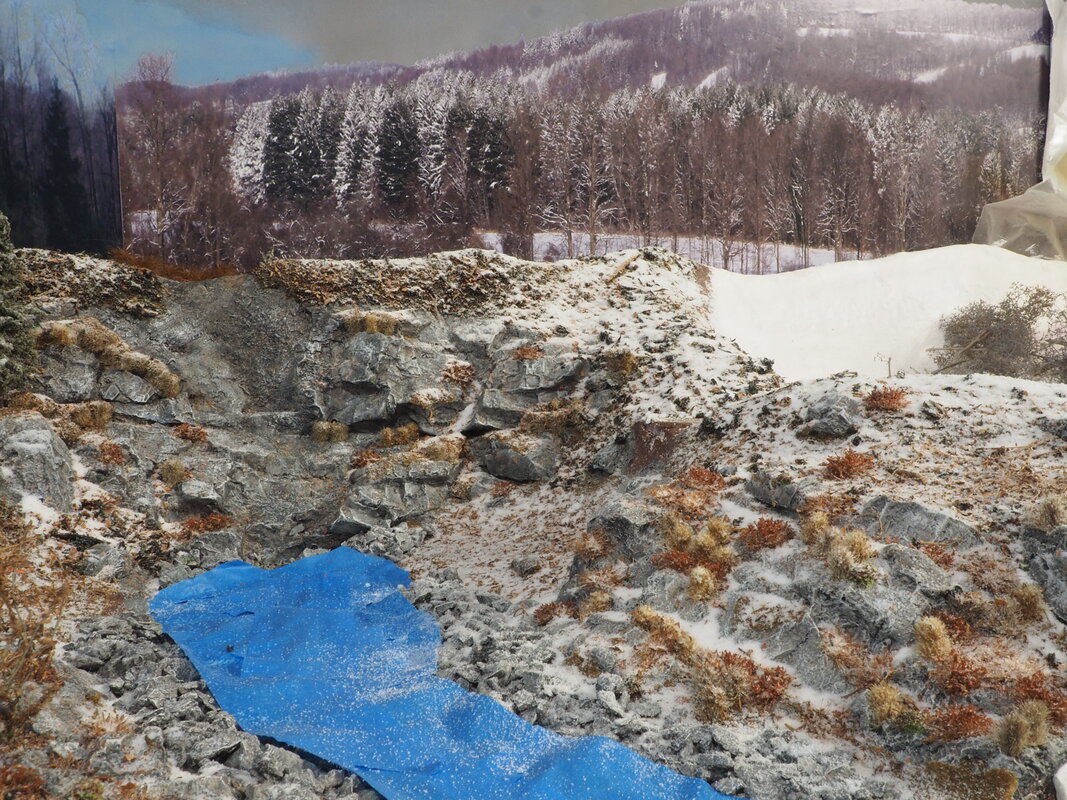
Below left, I did my usual blue painting of the brook bottom to visualize the outcome better. Then I added ground cover, various grass tufts, bushes, and ground up leaves from the backyard to cover the basic terrain. Below right, trees have been added to blend the left half of the terrain to the photo backdrop, and rocks and talus have been added to the sides and bottom of the brook. Twisted wire tree saplings with dead leaves have also been added. The waterfall at the back of the valley will be added before the trestle is put in place. The spots on the river banks and bottom have been left relatively bare and will be finished after the trestle bent footings have been installed. After the trestle is in, then the scenery will be finished, light snow added and lastly 'water' added.
|
|
Ok, never having done winter scenery before, and wanting as smooth a transtition as possible from late Fall to Winter, I had to take a pretty big leap of faith. I knew what I wanted it to look like, the way I remember it when I was a kid. The first snowfalls usually were light and didn't cover everything, and if they did, alot of it usually melted before the next snowfall.
To transition, I sprayed the layout on both sides of the brook with wet water and then diluted matte medium. Then I sprinkled Woodland Scenics snow straight from the shaker jar, lightly into the field on the left side of the brook, working my way to the right. Then I took stock, and sprinkled it a little heavier, then worked my way from left to right getting heavier as I went.
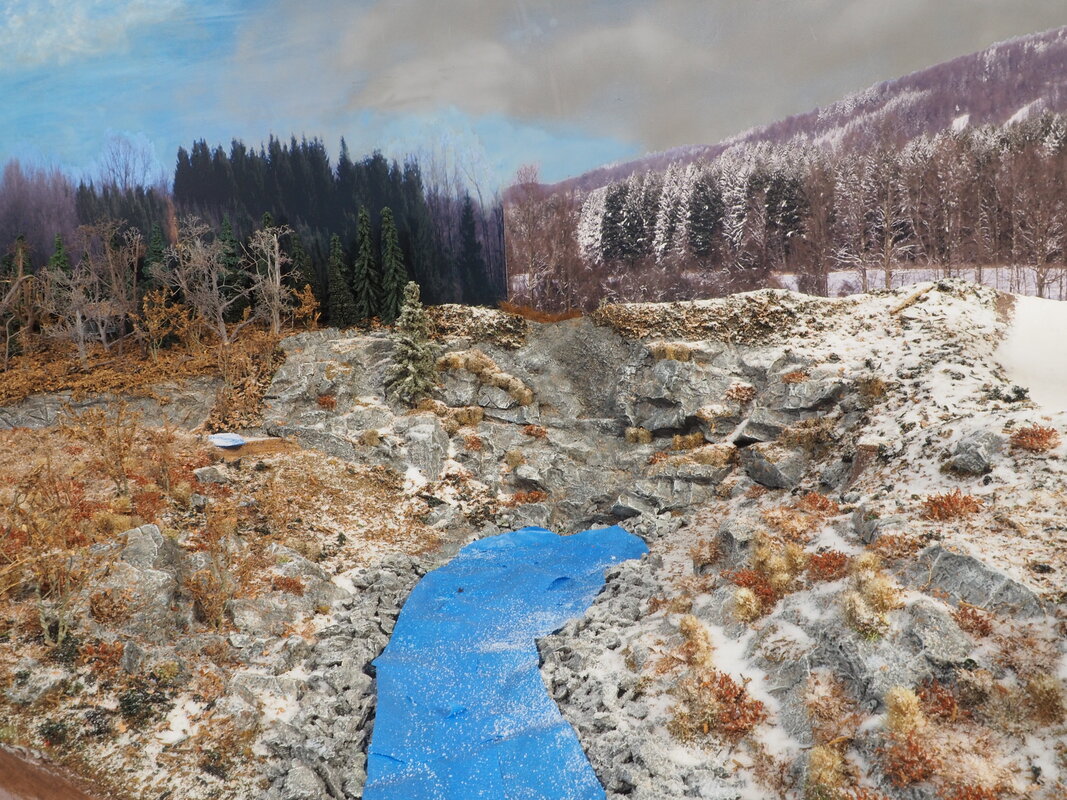
Below left and right, I covered the brook bottom with painters tape to keep the snow off of it, which would show up under the resin when I pour the stream. Note the obvious joint in the photo backdrop from the no-snow woods to the snowy woods. Also note in the right photo, the bare white patch on the right. That's just a bare spot of plaster cloth at the moment that will be worked on later.
To transition, I sprayed the layout on both sides of the brook with wet water and then diluted matte medium. Then I sprinkled Woodland Scenics snow straight from the shaker jar, lightly into the field on the left side of the brook, working my way to the right. Then I took stock, and sprinkled it a little heavier, then worked my way from left to right getting heavier as I went.
Below left and right, I covered the brook bottom with painters tape to keep the snow off of it, which would show up under the resin when I pour the stream. Note the obvious joint in the photo backdrop from the no-snow woods to the snowy woods. Also note in the right photo, the bare white patch on the right. That's just a bare spot of plaster cloth at the moment that will be worked on later.
|
|
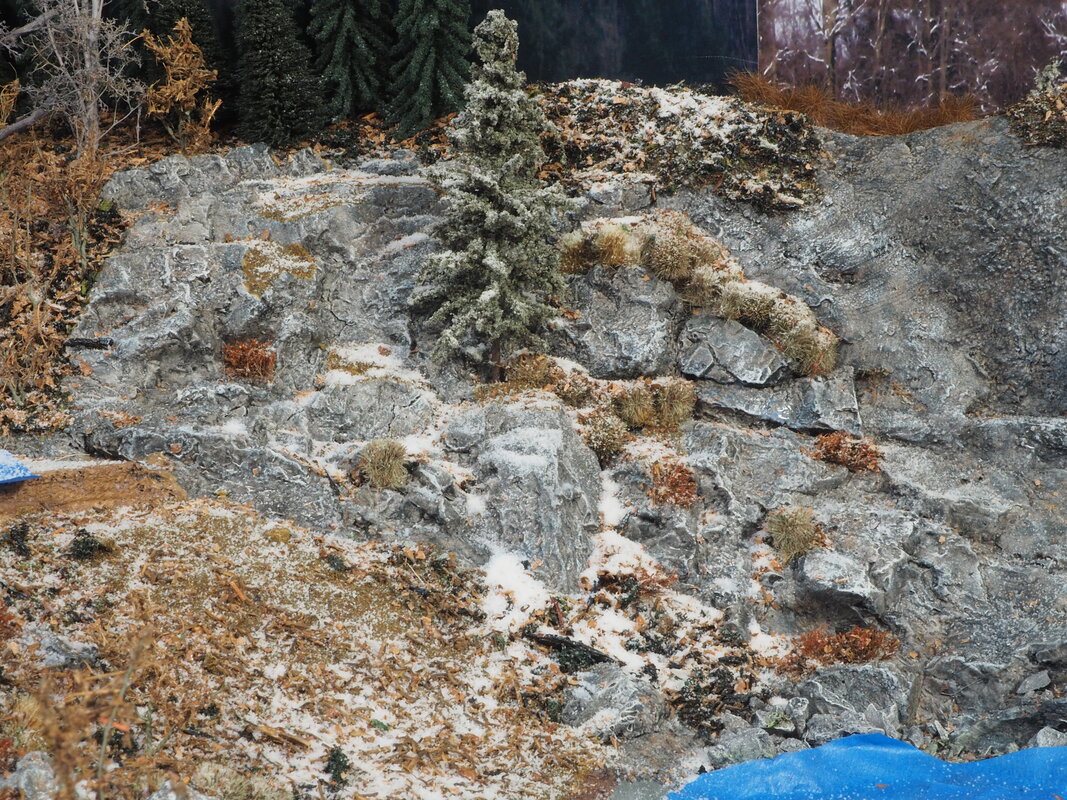
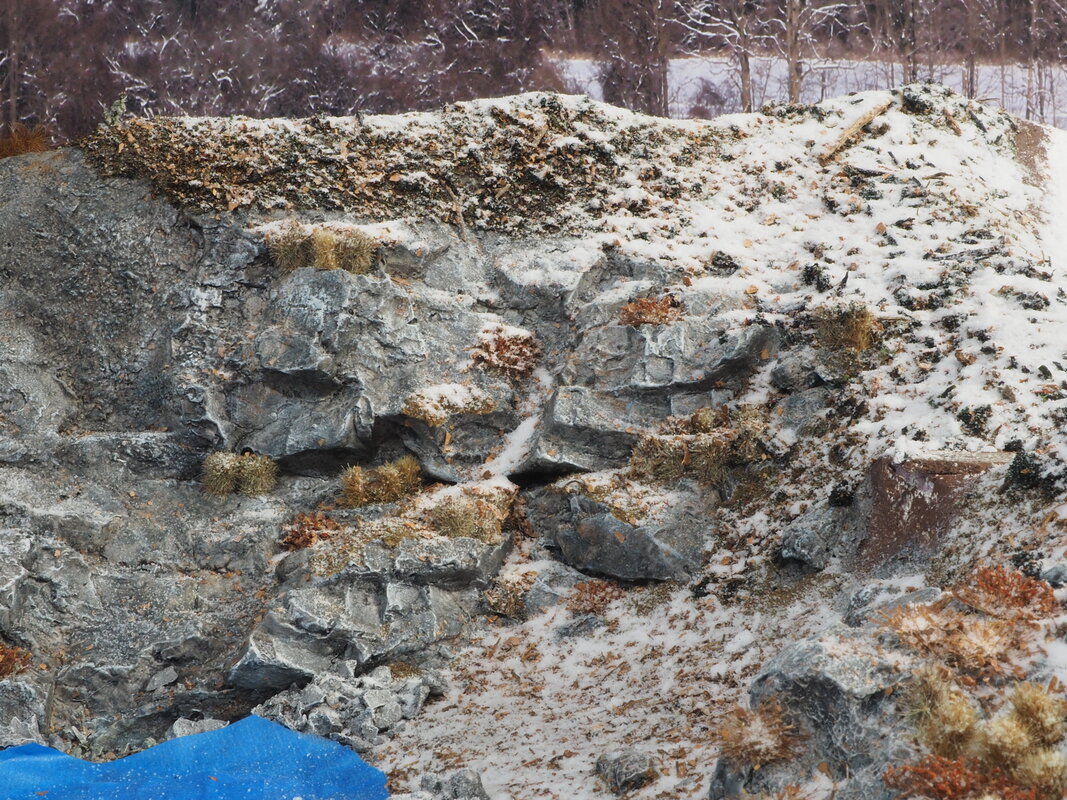
Below left and right are close-ups of the light snow cover. Once I was happy with the level of snow, I sealed everything with a good dose of diluted matte medium. I used a really fine misting sprayer for this, held up high away from the scenery as I did it, otherwise the spray would blast the snow all over the place and also make it ball into clumps. Trial and error here until I was satisfied.
|
|
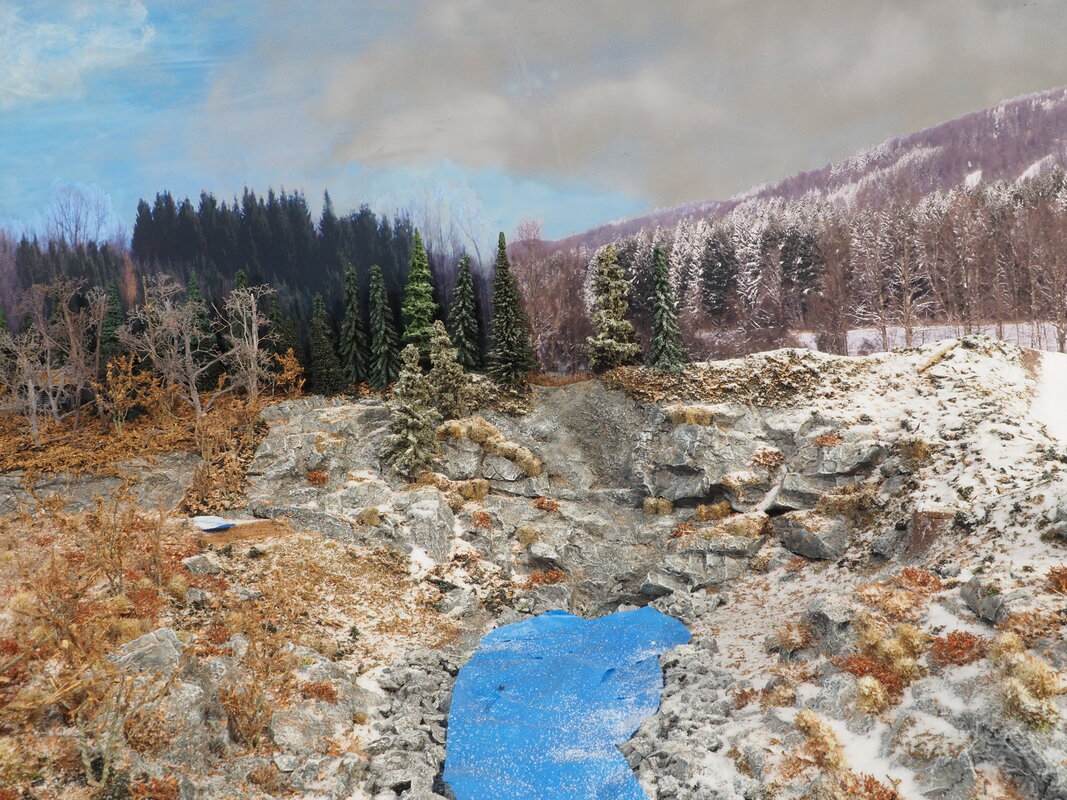
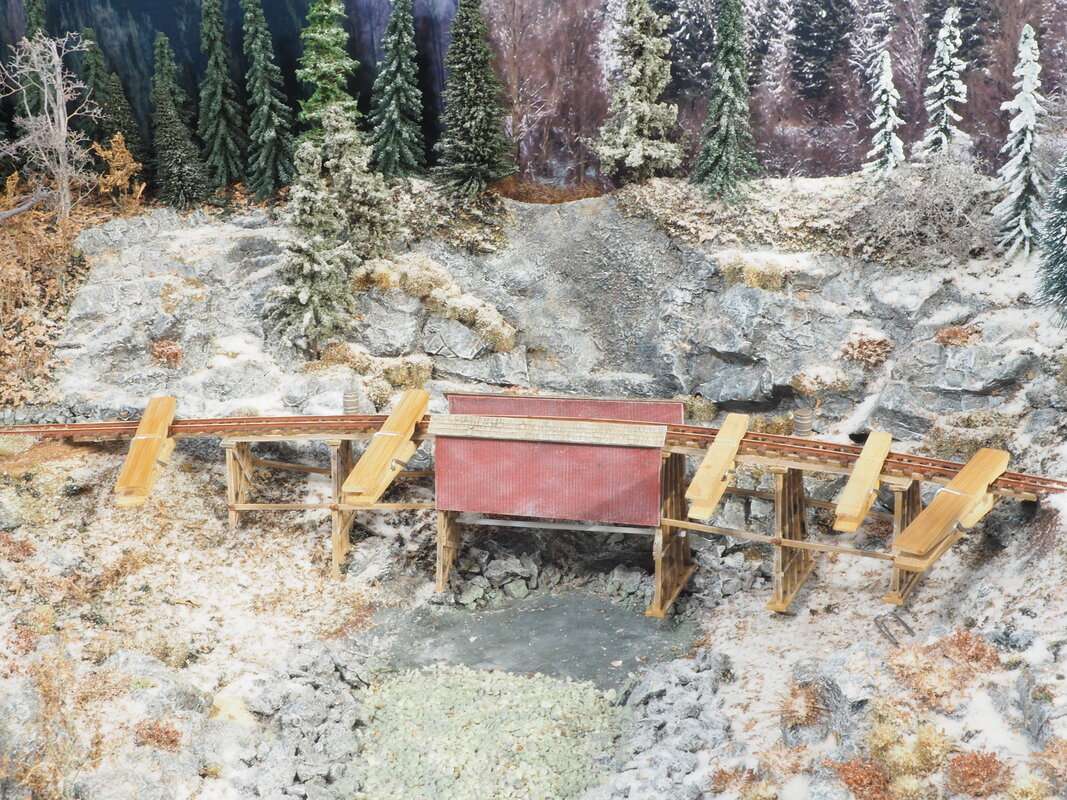
Below, the scene is ready to add the waterfall, the trestle bridge, the brook, and then finally add more trees to the scene. Notice from top to bottom, to help blend them together, some of the gray winter sky has been extended into the blue fall sky, and the blue has been extended into the winter gray. The evergreens to the left descend down to the point where the winter hills to the right also descend down, where the 'valley that the brook is coming from' creates the middle low ground. A tall evergreen with the back branches cut off until it's flat is put up against the seam in the photo backdrops to hide it from viewing from front, left and right. The evergreen 3-D trees to the left of the joint have a light cover of snow, but not so much to make them look out of place with the bare evergreens behind. The trees to the right have a little more snow, but not too much. The colors of the trees have been carefully selected to blend with the colors of the scenery backdrop behind them, with a little color variation to help bring the photo from the back into the scenery in the front. The snow cover on the ground to the left is light, pulling some of the winter into the left side, but not so much that the bare trees on the photo behind look out of place, and heavier on the right, but still with bare patches to pull some of the fall toward the winter side. In short, overlapping the seasons for a smoother transition.
I'm happy with the scene so far. The thing here is believable blending, and to help the illusion, the distraction from what you don't want to be noticed, which is the change of seasons, will be the trains crossing the trestle from one season to the other. Any angle I take shots from with a camera in this scene, will probably be believable. We'll see.
I'm happy with the scene so far. The thing here is believable blending, and to help the illusion, the distraction from what you don't want to be noticed, which is the change of seasons, will be the trains crossing the trestle from one season to the other. Any angle I take shots from with a camera in this scene, will probably be believable. We'll see.

|

|
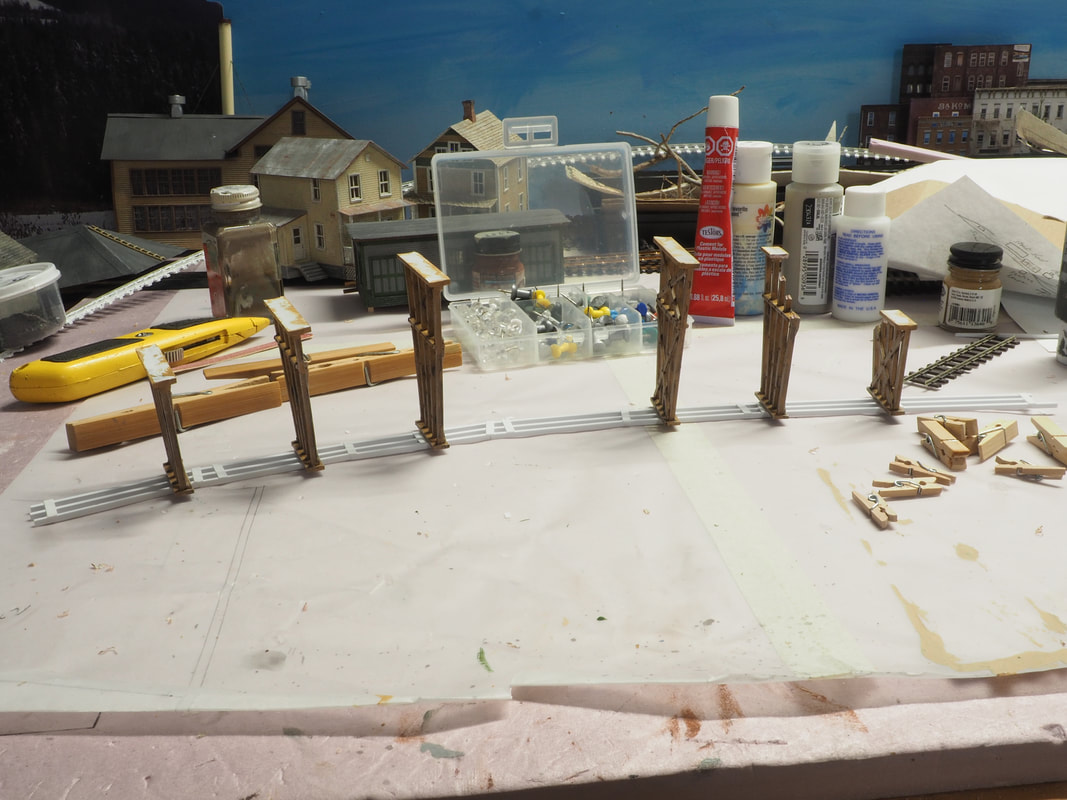
Above left, some trestle bents I got cheap at a train show have been painted and weathered for the bridge. Above right, the outline of the track has been marked on some scrap cardboard to begin making the bridge deck. Below left, the bridge deck is being constructed from Evergreen styrene rectangular stock, with some temporary scrap glued across it to hold the shape while the bridge is being put together. The push pins are holding the cardboard template down to make sure the deck stays completely flat while the glue dries. Below right, the bridge deck is temporarily held in place to make cuts necessary for the bents to conform to the shape of the valley. The clothes pins are holding everything in place while adjustments are made.
|
|
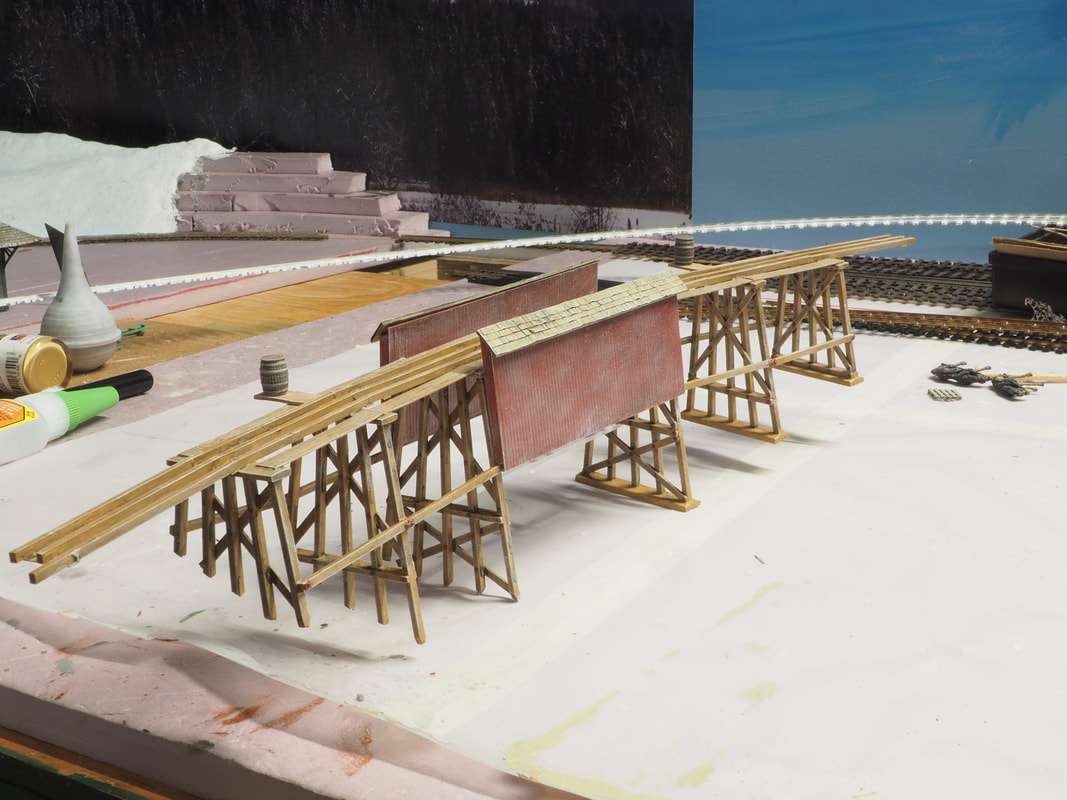
Below left, the bents are now glued to the deck. Below right, the completed bridge is now ready to go permanently onto the layout.
|
|
Below left, the bridge is slid under the track, and held tight to the track with clothes pins while superglue is applied to the back sides of the track ties and bridge decking. Below right, with the bridge now firmly in place, the foundations for the bents can be made and put in place, abutments made and put in place, and the walkways on the bridge extended to the abutments.
|

|
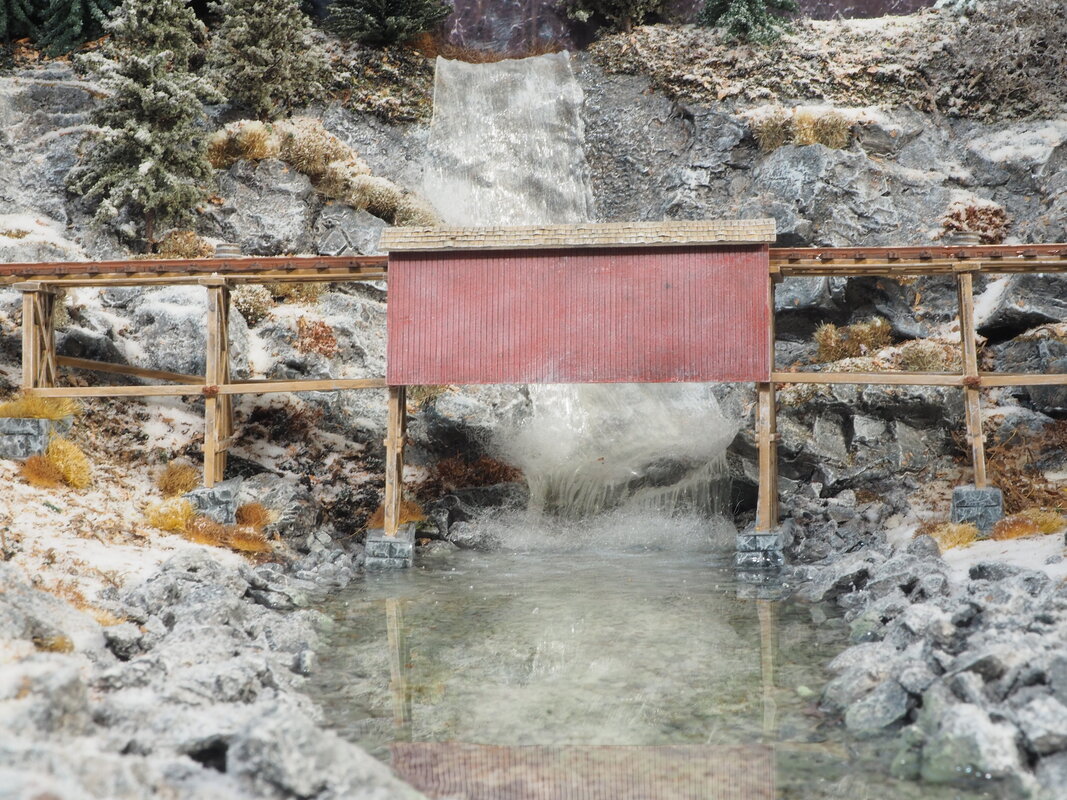
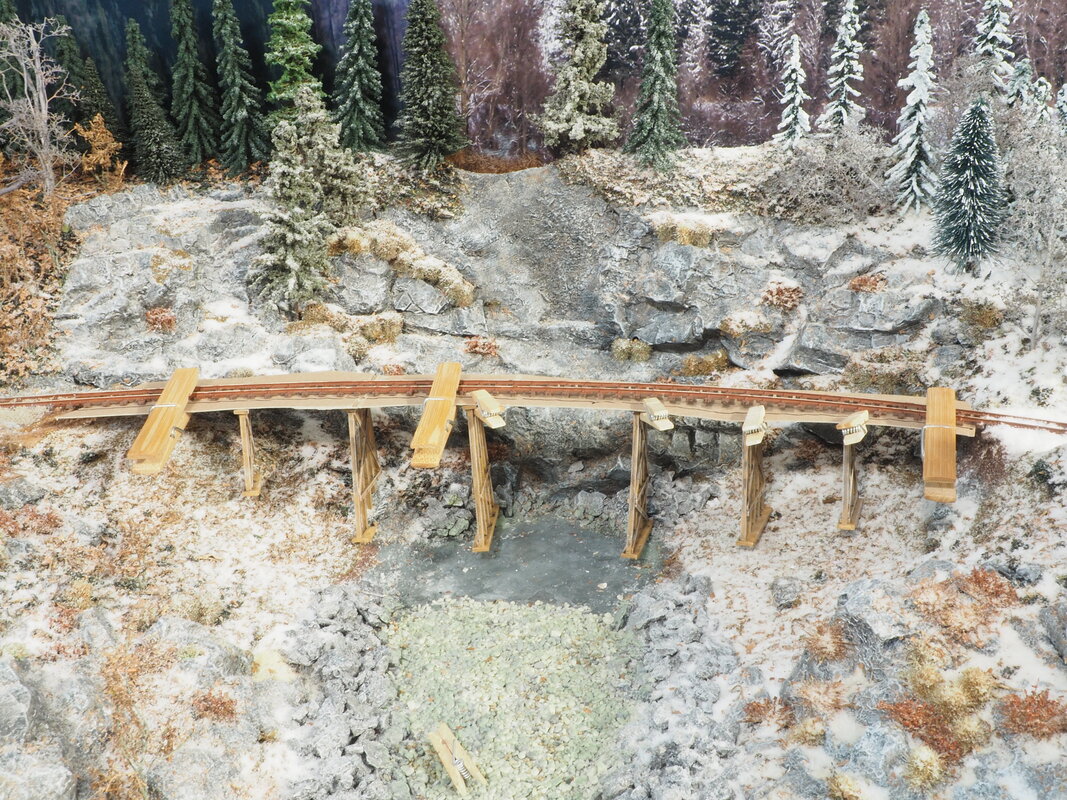
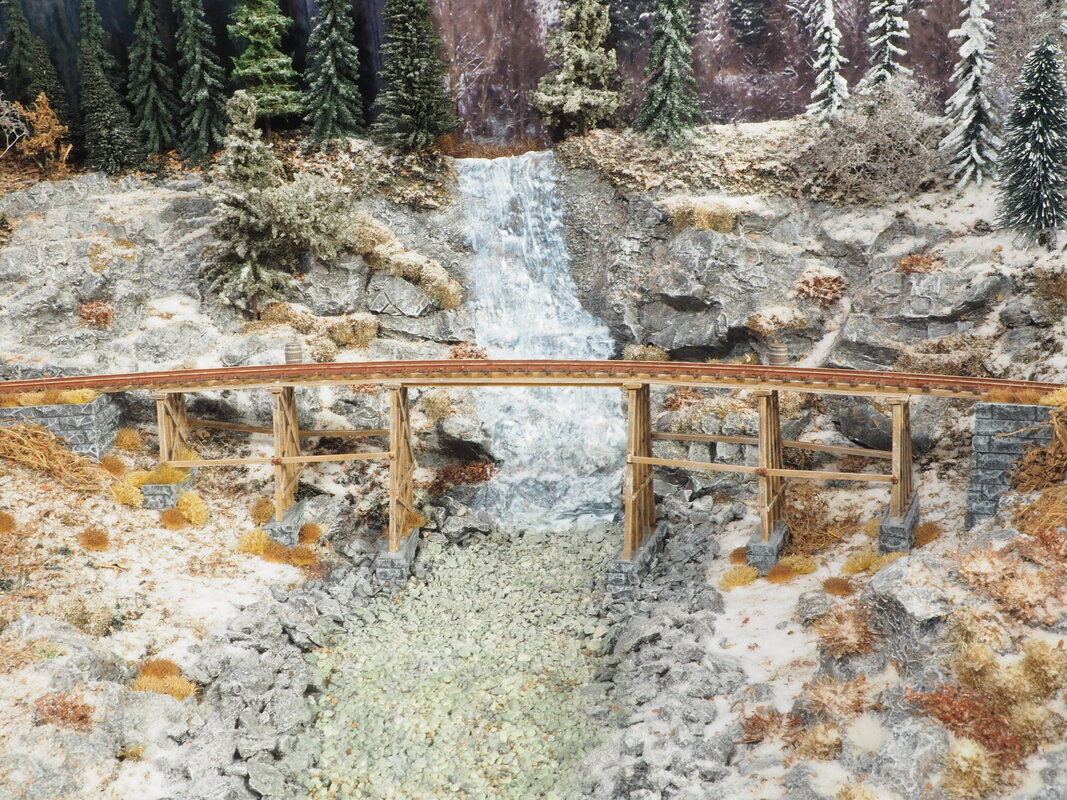
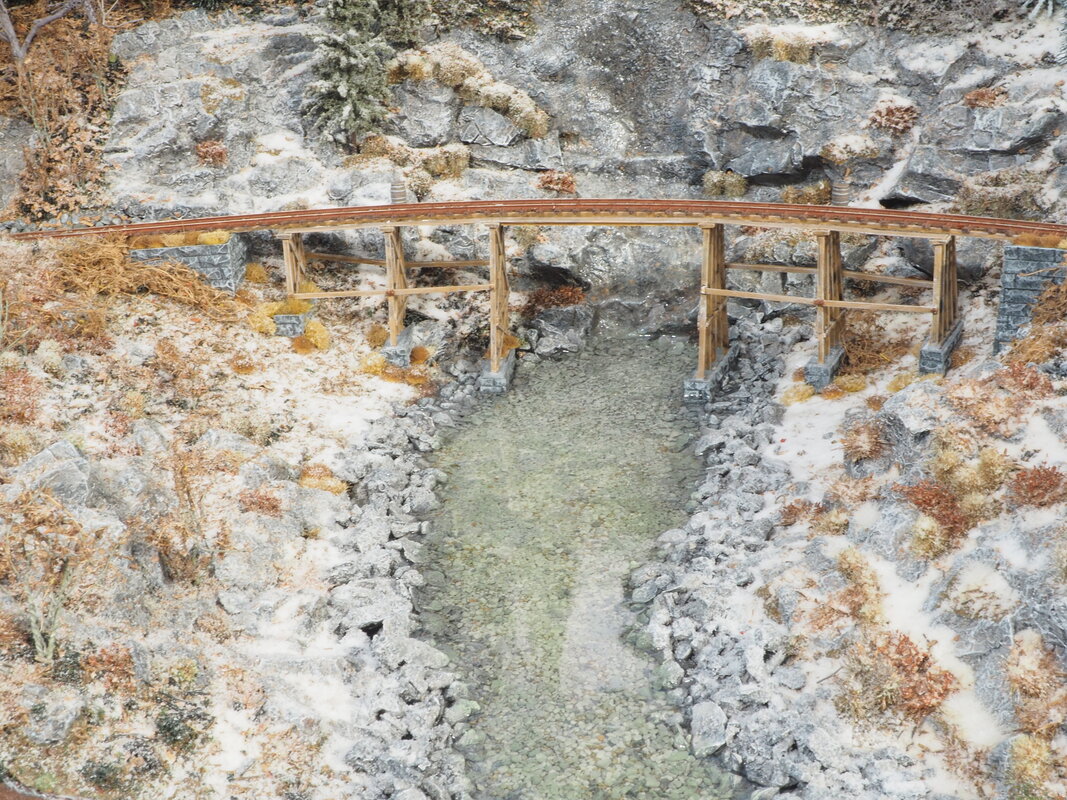
Below left, the stone footings for the trestle bents have been added, and with that done, the bed of the brook is now finished with talus added and weathered. The covered part of the bridge has been removed to make working on the waterfall and brook easier. Two coats of Vallejo Diorama FX Water Texture has been brushed onto the rock where the waterfall will be to make sure the rock itself looks wet. Below right, three 1/8" layers of Alumilite 2-part epoxy have been poured into the bed of the brook.
|
|
|
|
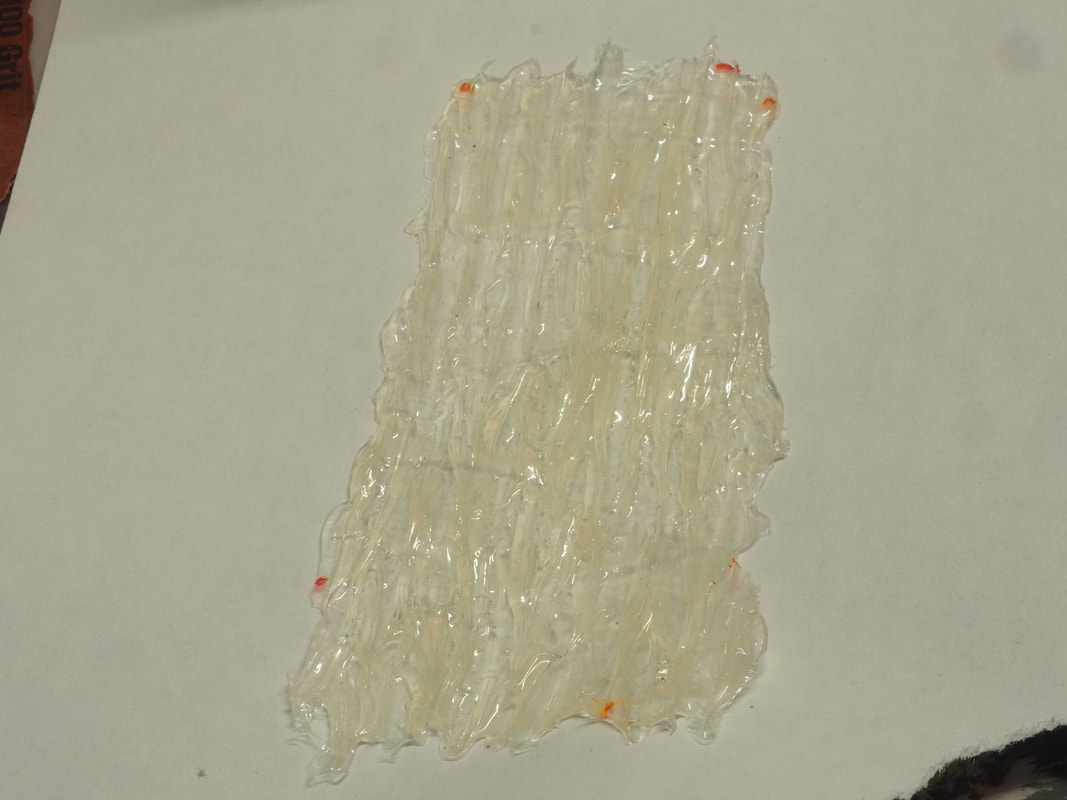
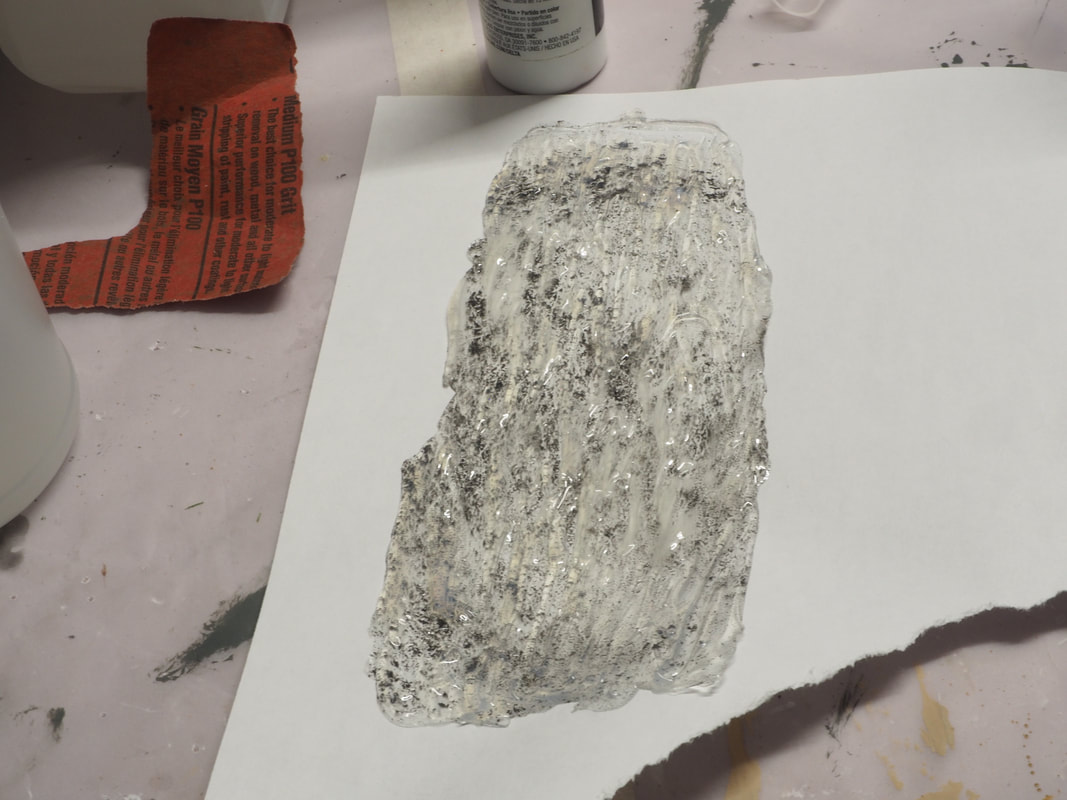
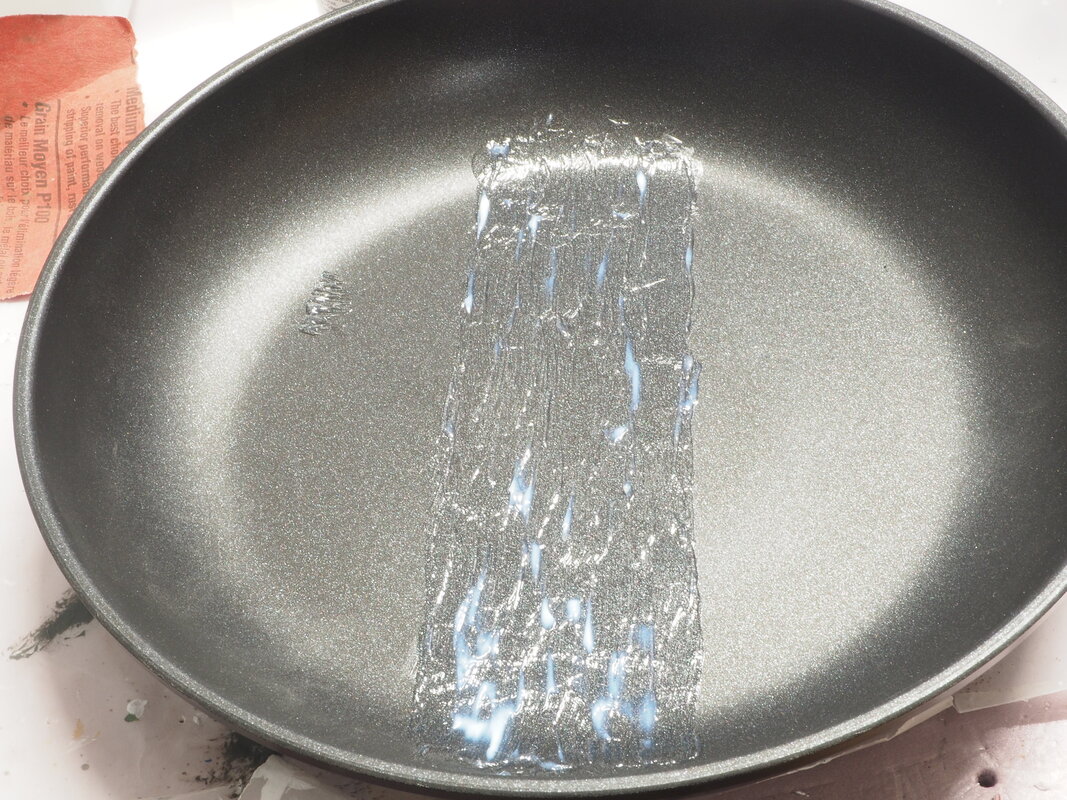
Other than the tiny waterfall on the layout at Sluice Hill, this is my first attempt at a full-blown waterfall. I had some old Woodland Scenics Water Effects, and spread about an 1/8" thick smear of it on wax paper, and then troweled grooves into it with the edge of a popsicle stick. Well, it dried cloudy and yellowish, and lines from the wax paper wrinkling under it showed up, (upper left photo) so that one went in the trash. Upper right, the next attempt, with a fresh jar of the Vallejo stuff. and applied to one of my wife's discarded non-stick pans, ended up taking the non-stick stuff off the pan when I removed it. So that one's in the trash. Below left, I bought a $4.87 frying pan from Walmart, and instead of a thick application, brushing it on in thin layers seems so far to be a better way to do it. We'll see.
|
|
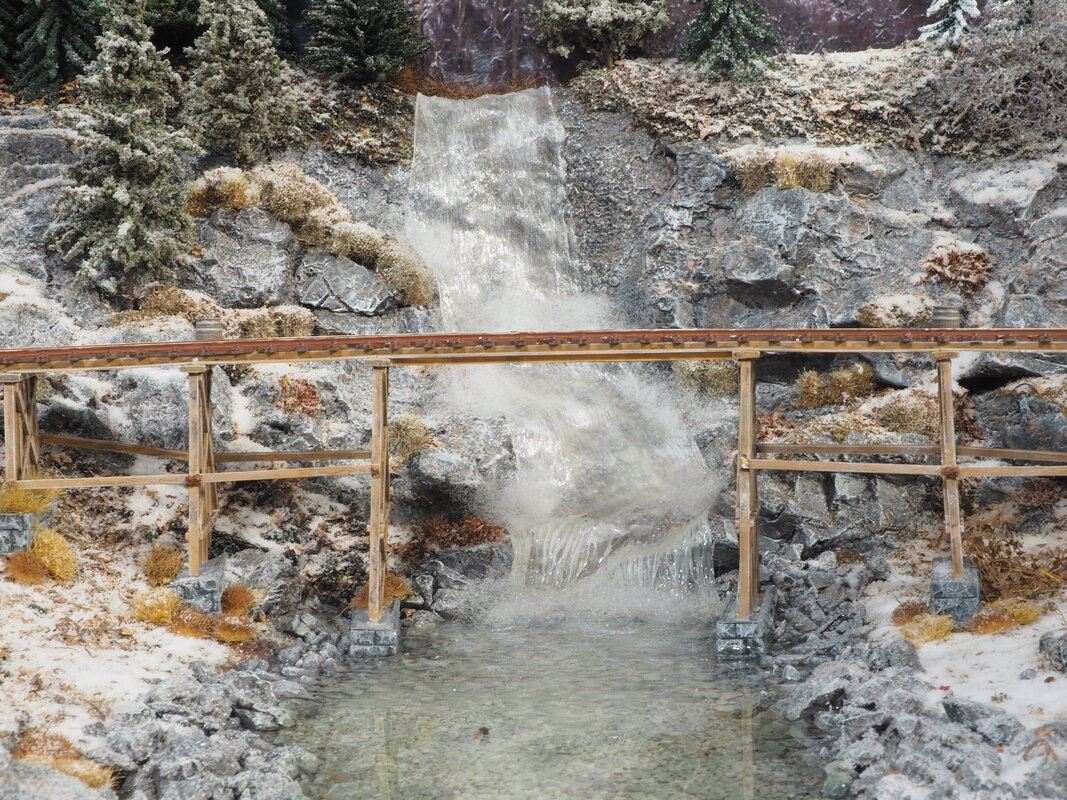
Upper right, the waterfalls is now in place and completed. After several days of several coats of Vallejo Water Texture per day in the frying pan, I got the effect I was looking for. On removing it from the pan, with nothing sticking to it, I formed it onto the rock, making some cuts here and there to get the right fit. Once that was in, I used some clear tacky glue to hold it in place. After that, I dry-brushed it with some bright white acrylic paint, and then glued some pillow stuffing on places where the falling water slams into the rock below for that splaching/misting effect.
At the bottom of the falls where it continues downstream under the bridge, I stippled a few layers of the Vallejo Water Texture to simulate rough water, then streaked some of it downstream below that until the water calms down into a meandering stream.
At the bottom of the falls where it continues downstream under the bridge, I stippled a few layers of the Vallejo Water Texture to simulate rough water, then streaked some of it downstream below that until the water calms down into a meandering stream.