RANGELEY
|
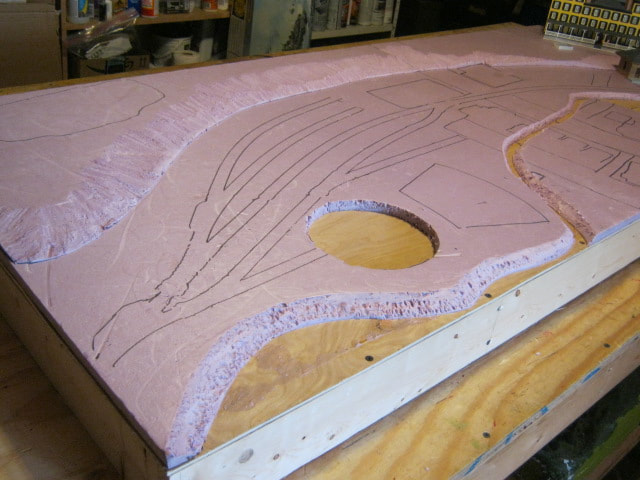
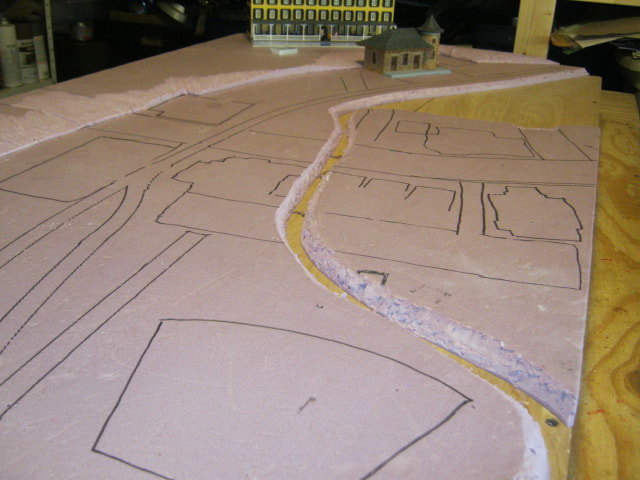
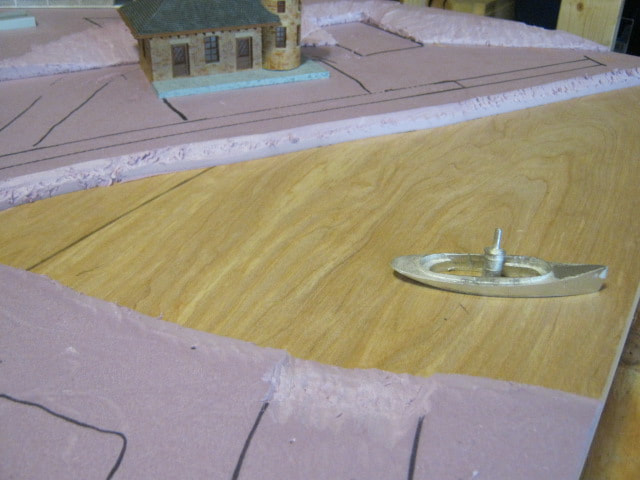
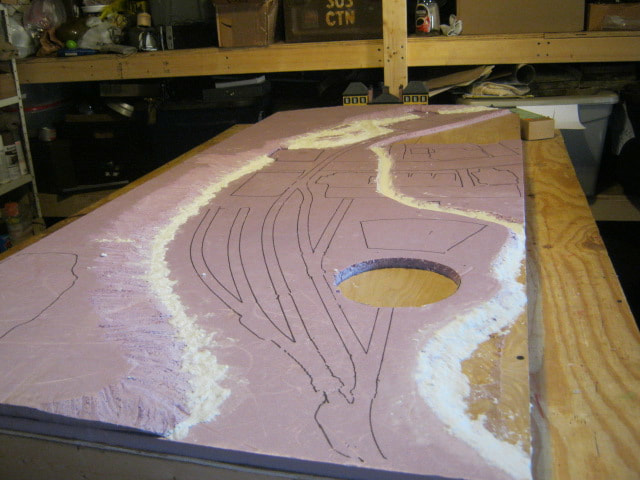
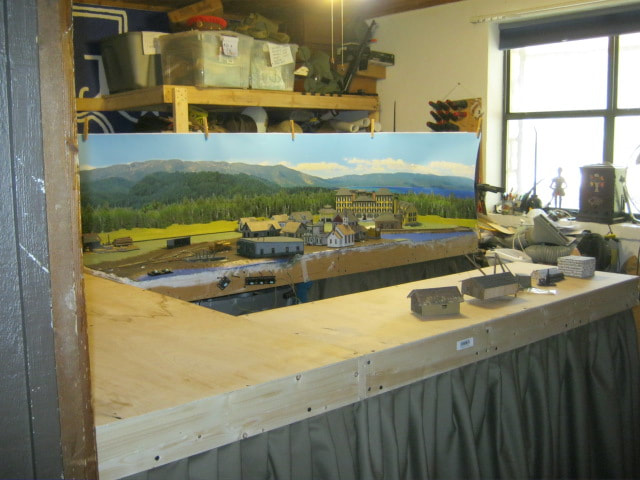
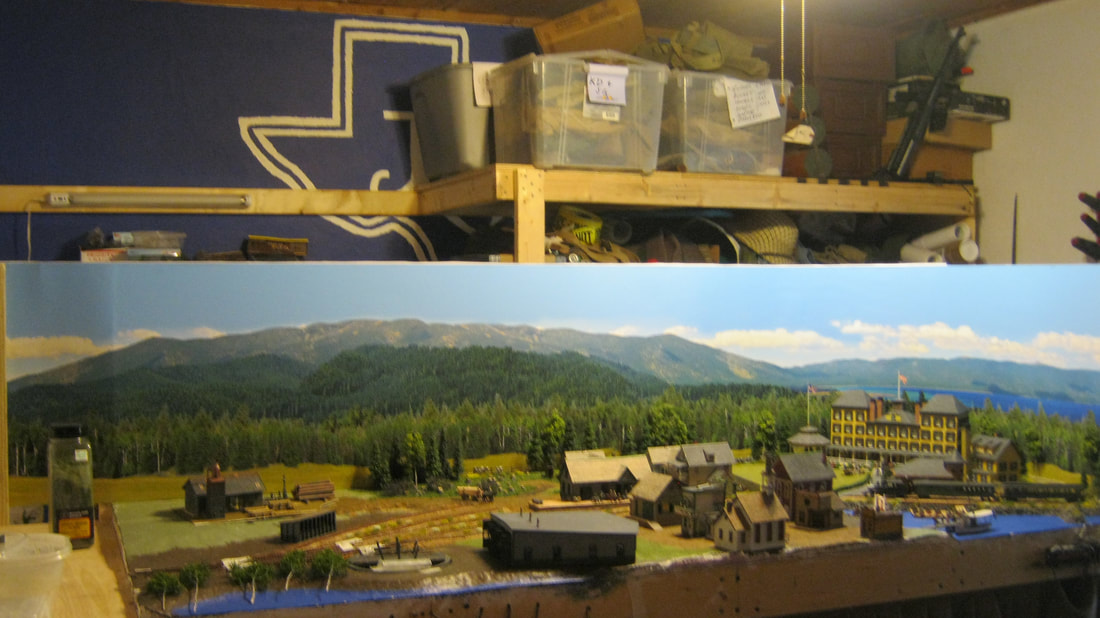
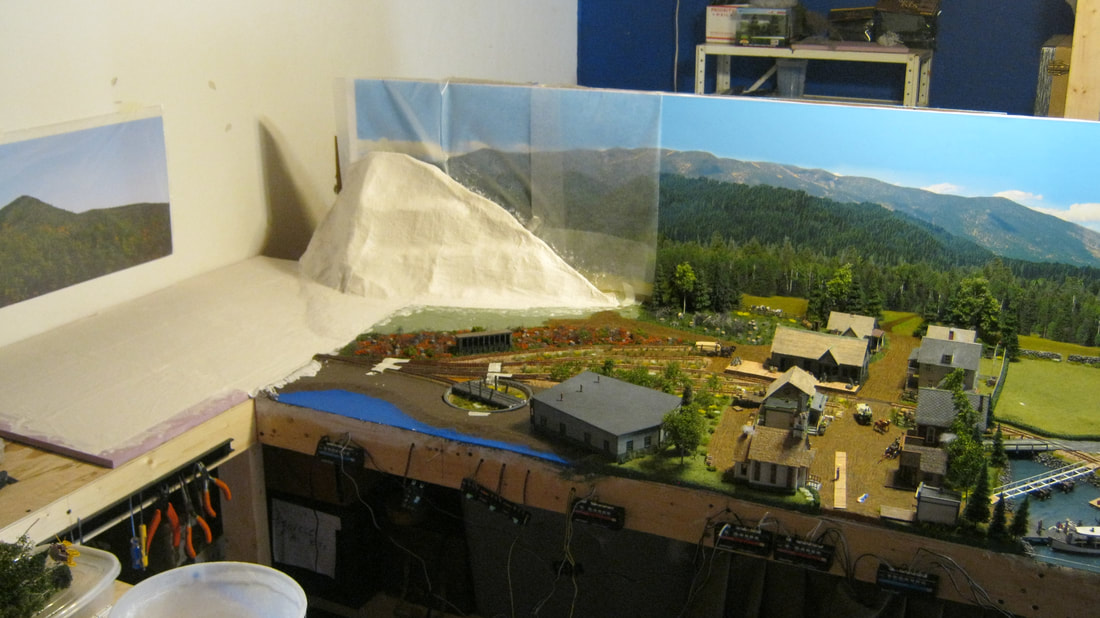
The first thing, after laying out the track, turnouts and turntable on a 24"x72" sheet of foam board to make sure everything would fit, was to add another 6"x72" strip of foam board, because what I wanted to do wouldn't fit on a 24" width. After widening, then all the trackwork was traced with a Sharpie. The track was removed, and then tracing paper was laid on the foam board, and the track outlines were copied.
|
|
|
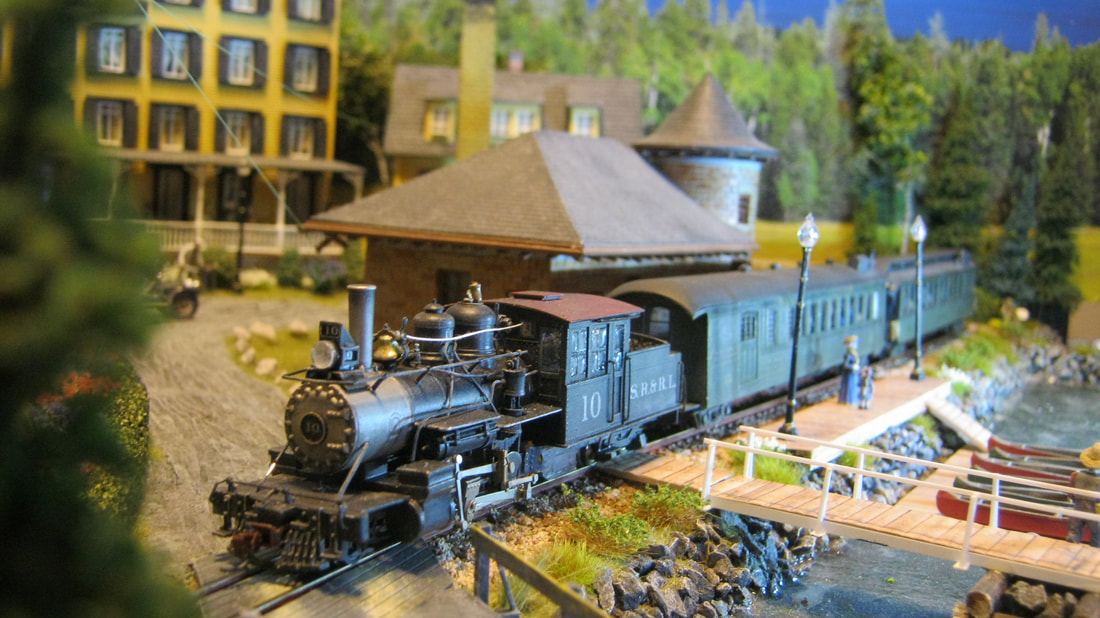
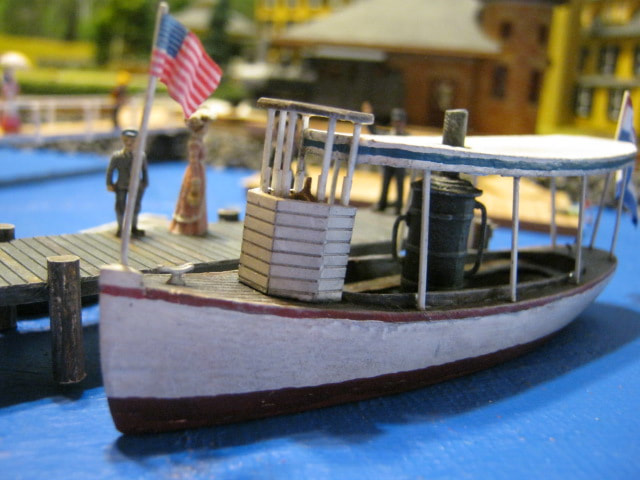
Some of the critical structures and whatnot were laid out as well when the track plan was made, which also influenced adjustments I made. I initially planned on making a model of the Olivette, a Rangely Lake passenger steamer, but there just wasn't enough room in town cove, so I decided to convert the small steam launch I got cheap to the Molly-Chunkamunk.
|
|
|
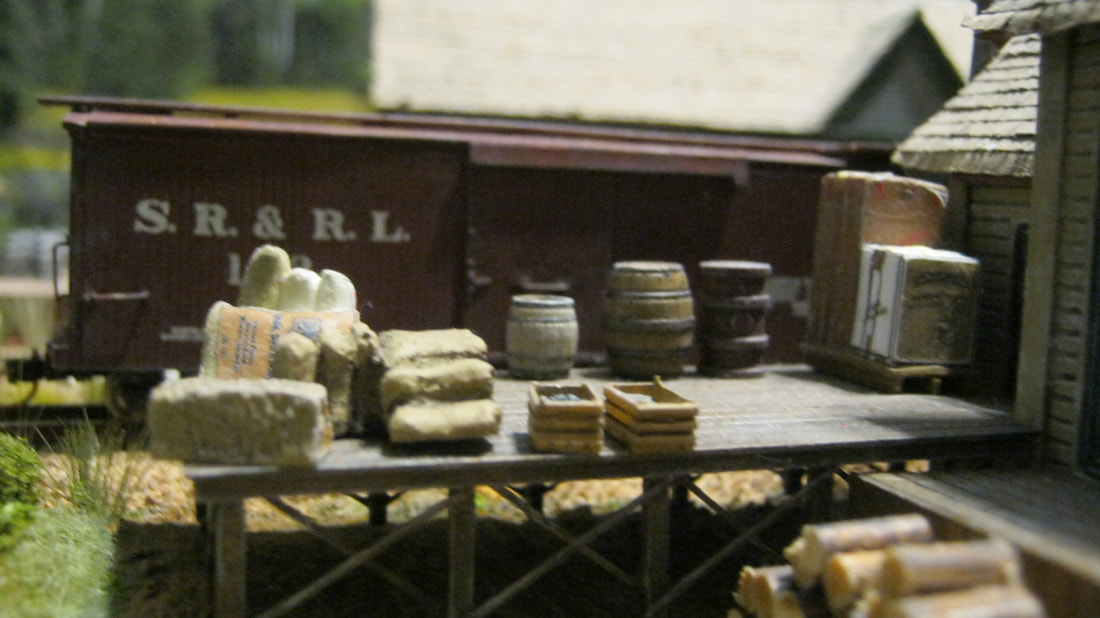
I also realized that the stream that connects Haley pond (near the turntable pit) to Town Cove on Rangeley Lake wasn't going to work out, so I filled that in with foam scrap and covered it with Celluclay. Celluclay also filled out the contour of the land. The buildings for Main Street had been traced onto the foam as well, but I rearranged and swapped out buildings as the module developed.
|
|
|
The track template made with the tracing paper was laid back out after the ground was covered with plaster cloth and a couple of coats of old latex paint from the garage. After putting down the rough lines, the track was laid back down and adjusted a bit, with the main structures in place to again make sure everything fit and I liked how it was coming together. I also like painting water areas blue to help visualize the final scene as I work.
|

|
|
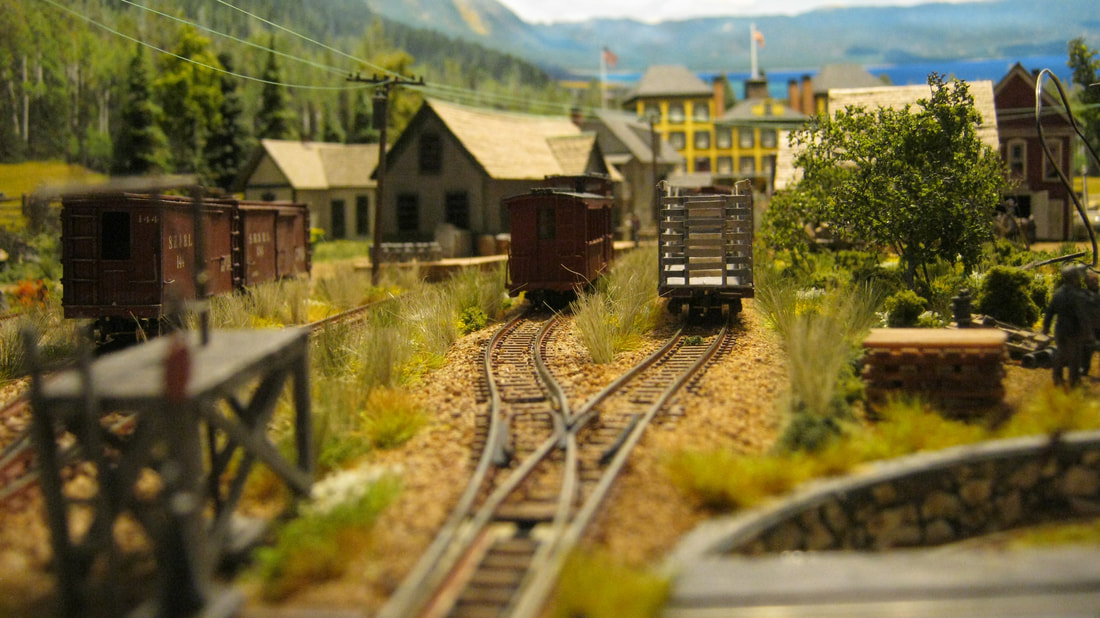
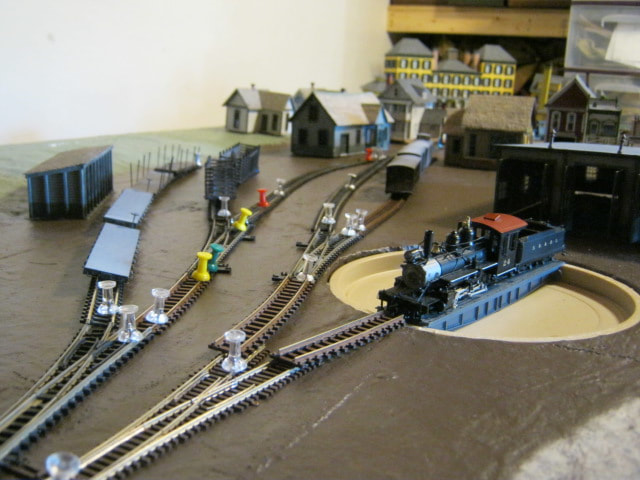
A few more adjustments were made with rolling stock in place on the tracks to make sure I had enough track in the yard for the operations I plan to do, and space for handling the cars, while still sticking to the actual layout of the original yard at Rangeley.
Once that was done, the track was again traced, and removed to put down the cork roadbed. |
|
|
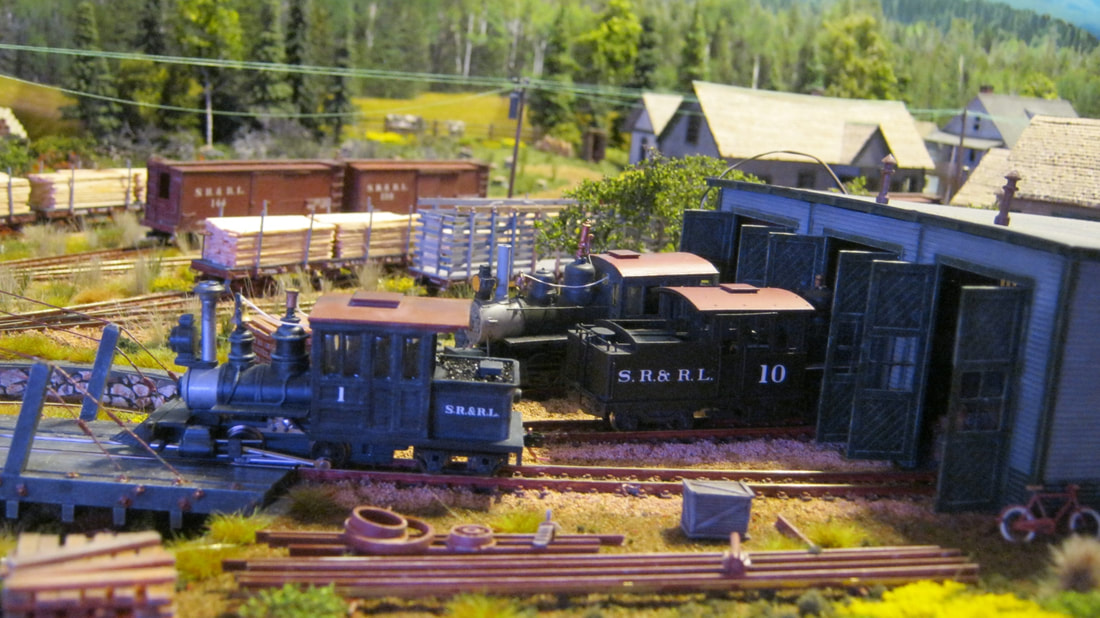
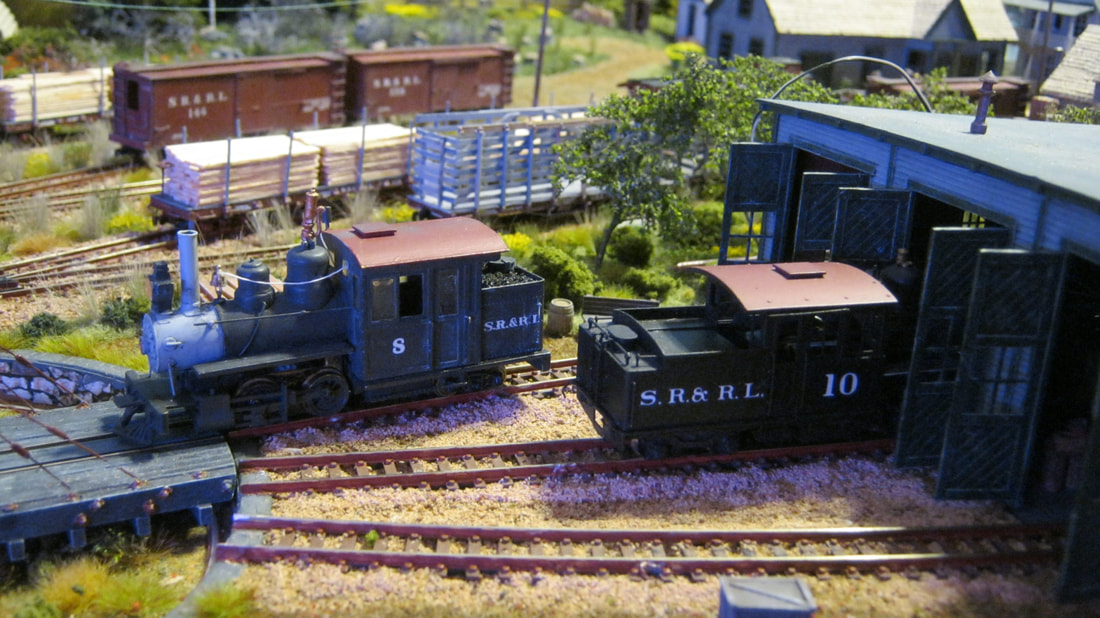
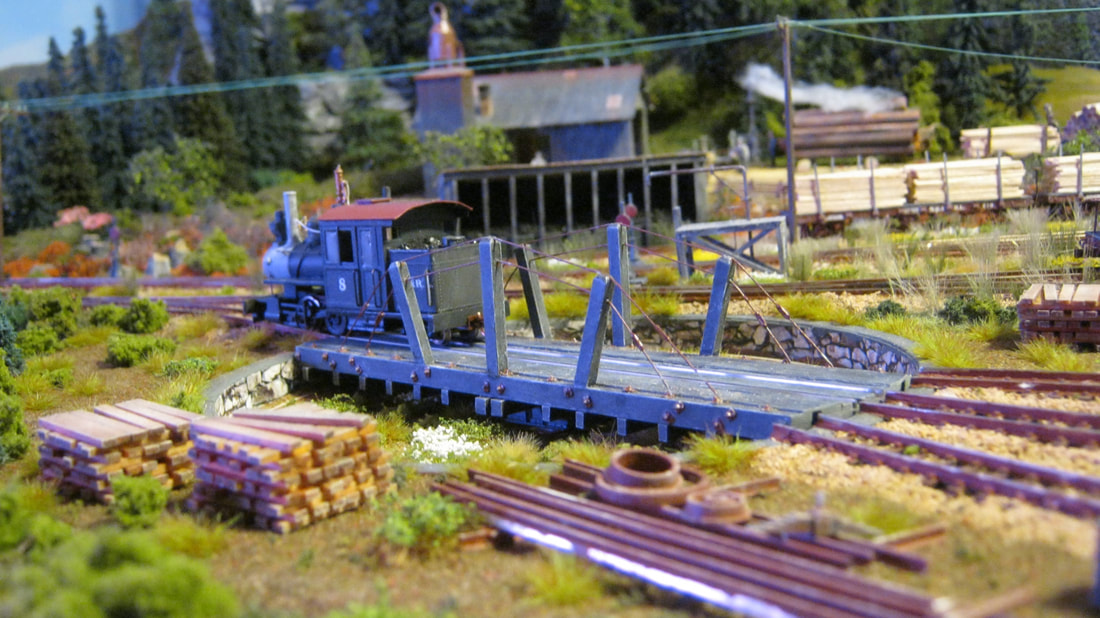
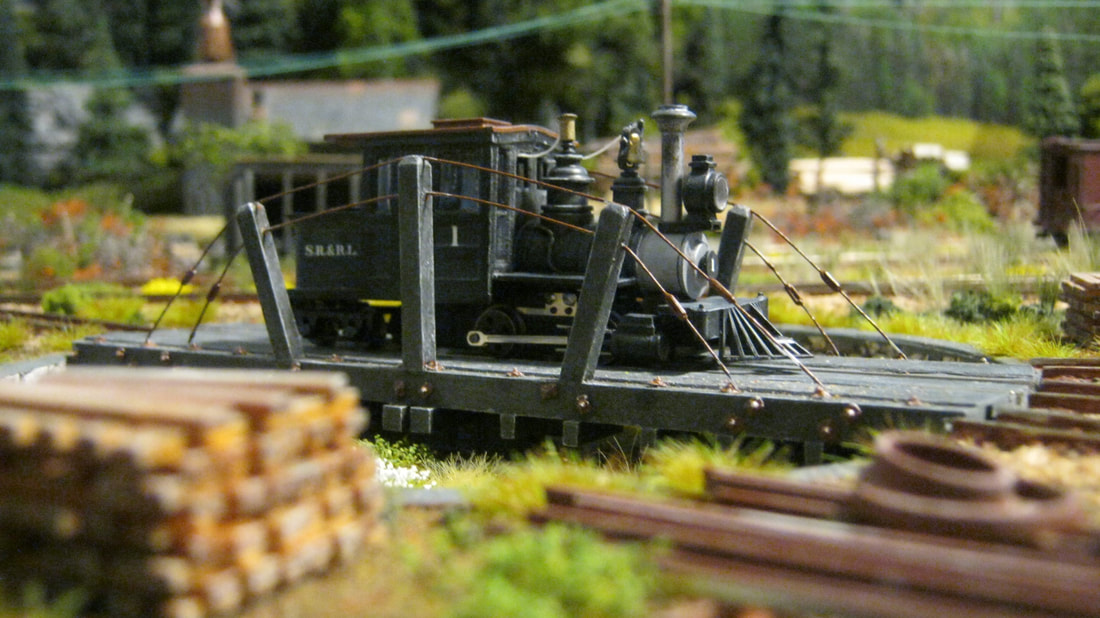
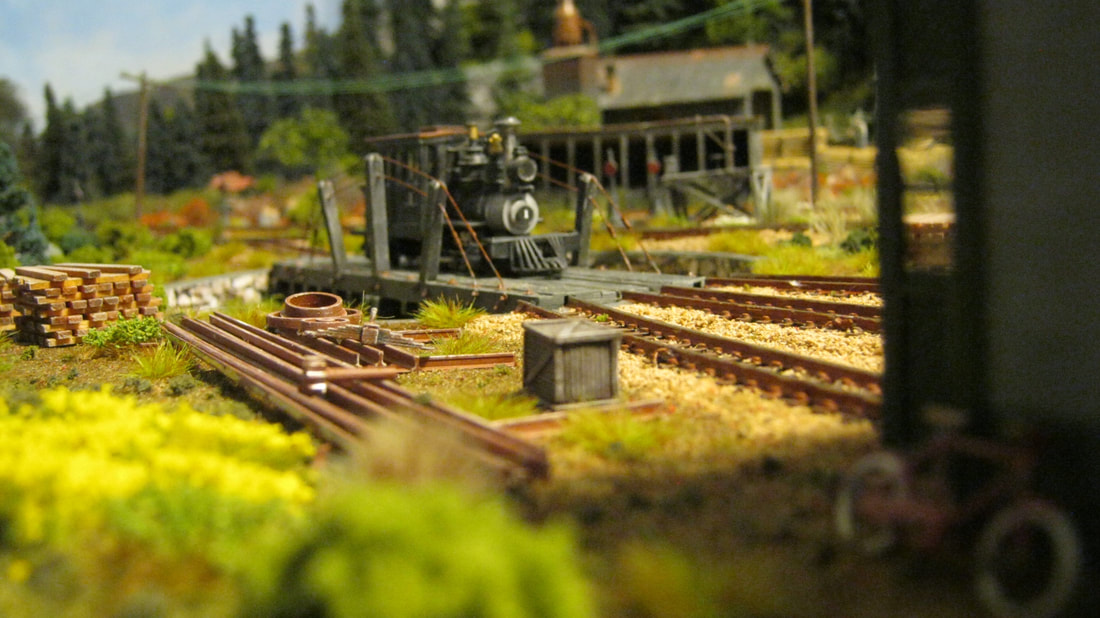
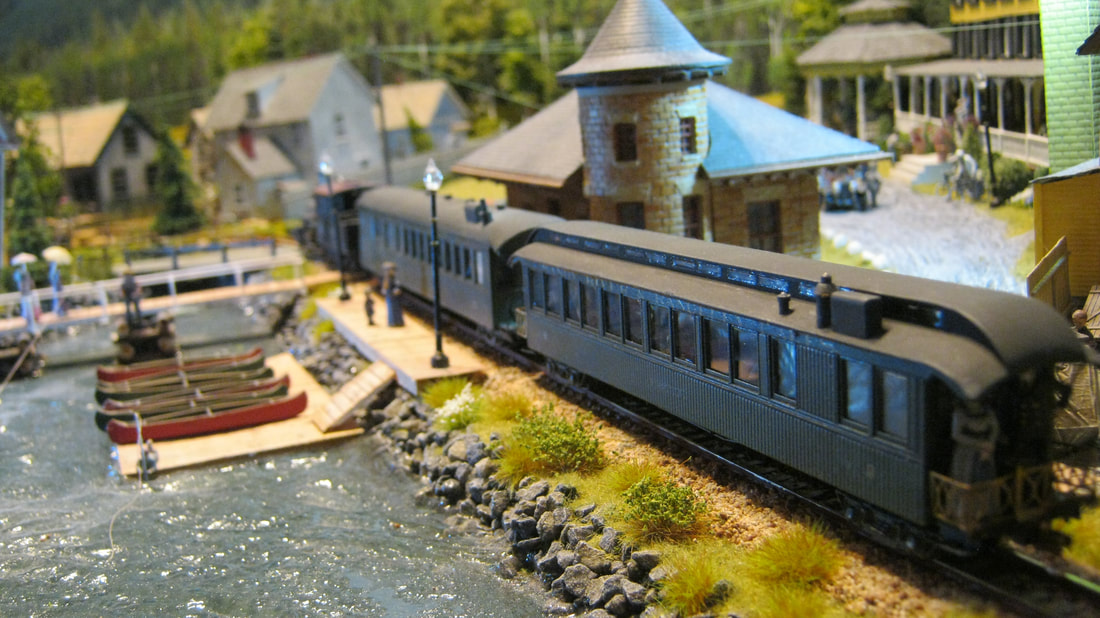
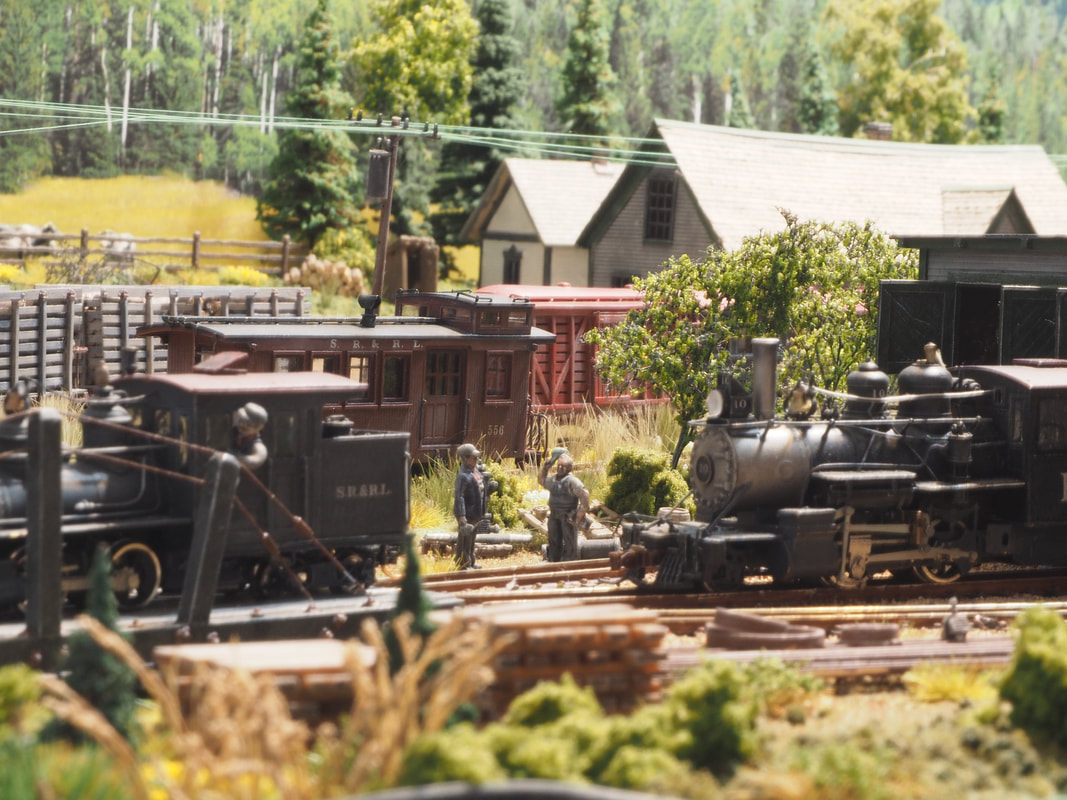
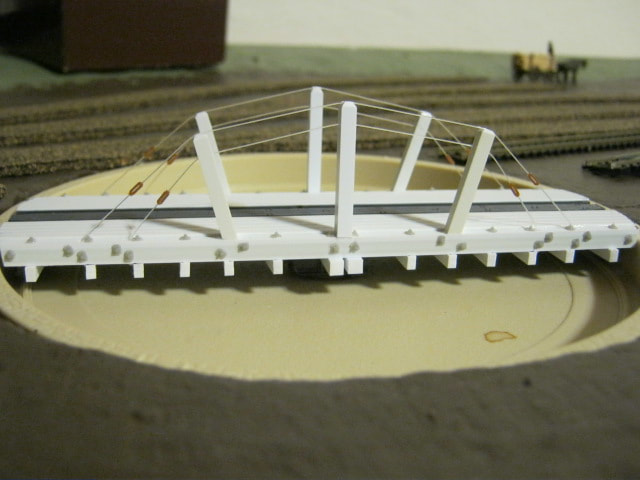
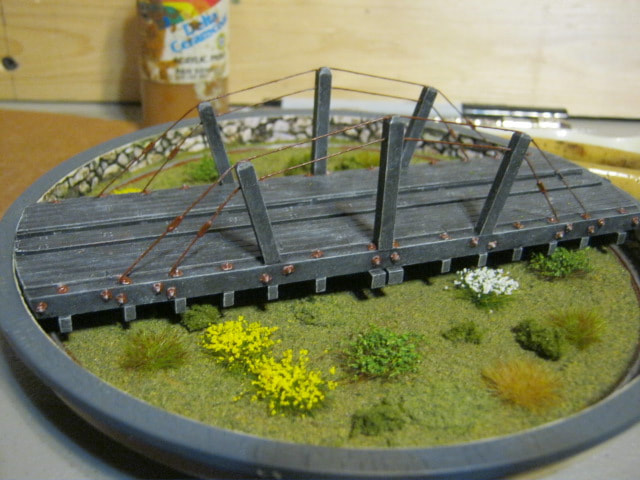
I took time out for a diversion, and converted an N scale Peco steel turntable into a Sandy River and Rangeley Lakes Railroad gallows-type wooden turntable. I lined the pit with Faller stone wall paper, trimmed the ends of the turntable bridge to ensure it cleared the stone paper, and let the bottom of the pit grow over a bit with vegetation.
|
|

|
I thank my brother Tim for this idea, although he didn't know he gave it to me. He had one of those hockey game tables when we were kids, that had flat metal hockey placers that moved in slots and turned to slap the puck. While trying to decide what kind of control to use for the turntable, I remembered that hockey table, and found a bundle of a dozen of those control rods cheap on Ebay. They work great!
|
|
|
I wasn't happy with my very old soldering iron, and had by this time found a couple of vintage brass SR&RL HOn30 locomotive kits on ebay. So while talking train stuff to a new friend on Facebook, he told me about his resistance soldering equipment. I did some homework, found a complete resistance soldering starter kit at Micro-Mark, and after my first use soldering track joints, fell in love with it.
|
|
|
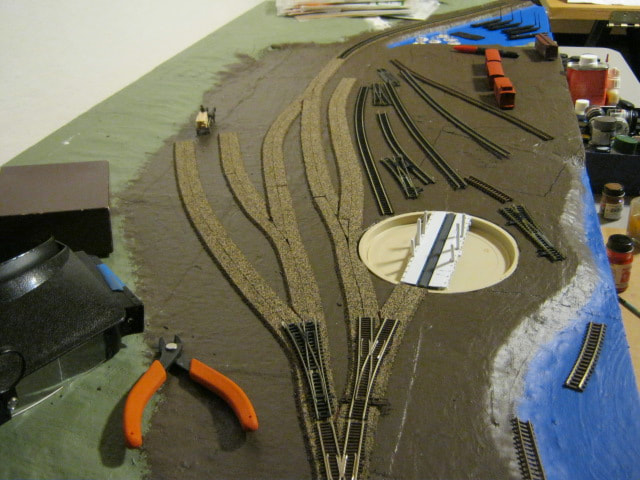
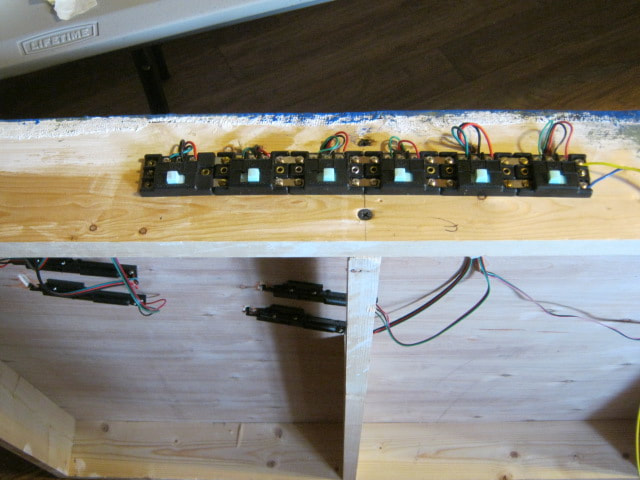
I learned the hard way about making sure turnouts are fine-tuned on my Reeds Station module, so I did it this time before laying the track. I checked the function of all the turnouts and control switches, fixed flaws, AND THEN lay everything in place before gluing down any of the track. Once it was all down and dry, everything was gauged and fine-tuned again.
|
|
|
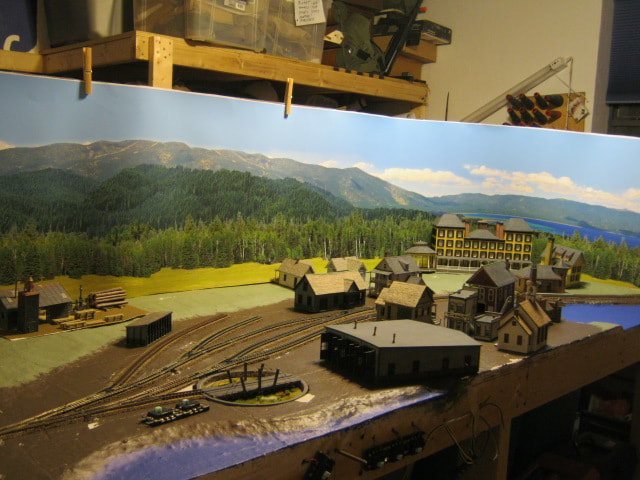
With all the electrical work done and the controls temporarily in place on the frame, the backdrop from Train Junkies was rolled out and temporarily held to the masonite backdrop backing with clothes pins. It was shifted to best represent Rangeley Lake behind the Rangeley Lake House hotel, and then the end trimmed off. That's my son, not me!
|
|
|
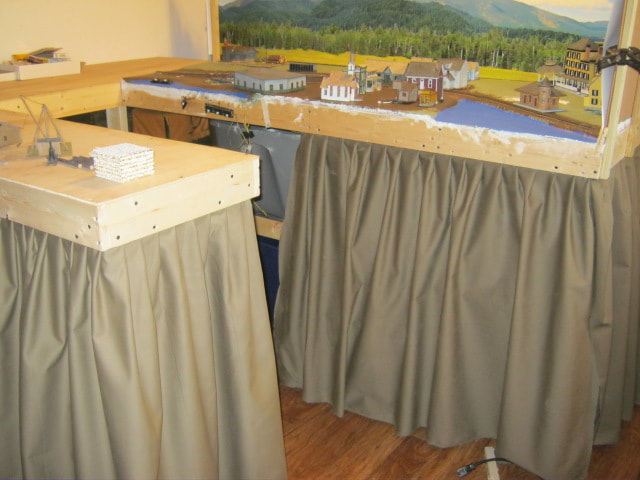
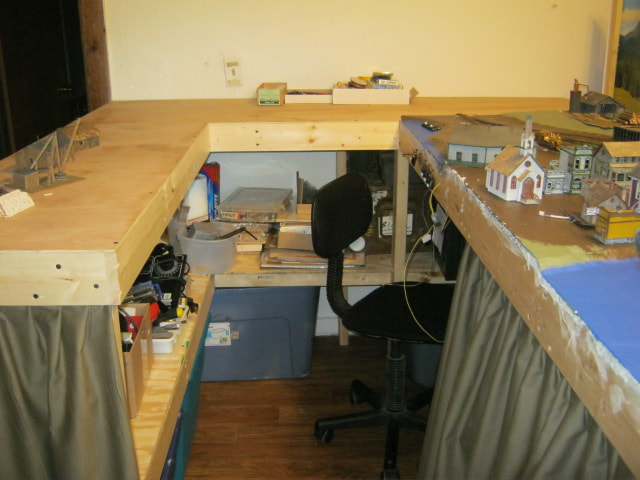
Just before the backdrop work, I installed the permanent mounting for the Rangeley and (future) Langtown and Eustis Junction modules, with shelving for storage underneath. I've got a few hundred yards of military olive twill left over from a business I used to run, so it came in handy for skirting, and will complement the Maine woods theme well.
|
|
|
Starting from the back of the module and working my way towards the front, I began the scenery work.
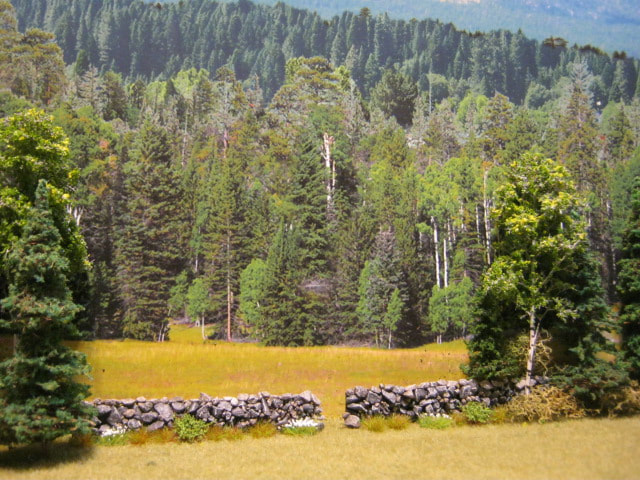
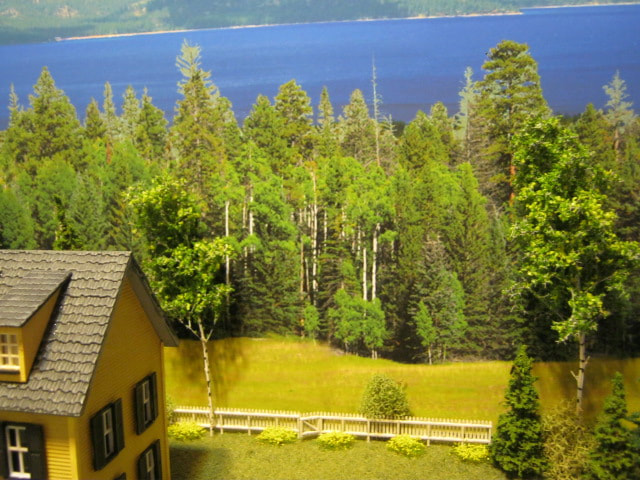
After gluing the backdrop photo to the backdrop masonite with a lot of glue stick, I put a lot of thought into how to blend the 3-D scenery into the photo backdrop. In the photo above I think I did a pretty good job, with stone walls and fences spaced an inch in front of the photo, and careful color blending of static grass and other foliage colors. The photo at right, with the backdrop blended behind the Rangeley Lake House by a fence and some more careful blending of 3-D colors with the photo colors is another good one. One problem I've learned since building this module is glue stick was a bad idea, as there are now visible 'bubbles' in areas of the sky where there is no glue. Next time I'll go with spray glue or adhesive-backed photo backdrops. |
|
|
I decided to start at the RLH (Rangeley Lake House) end of the line and work my way toward the rail yard, and then work my way "south" along the layout. I've collected several antique hand-colored post cards of the RLH and Town Cove, and have plenty of photos of this area in my various books. I used all of those for reference to make the scene as accurate as I could.
|
|
|
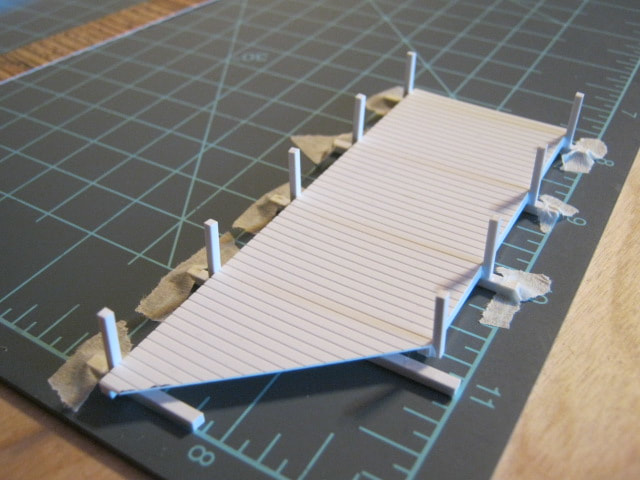
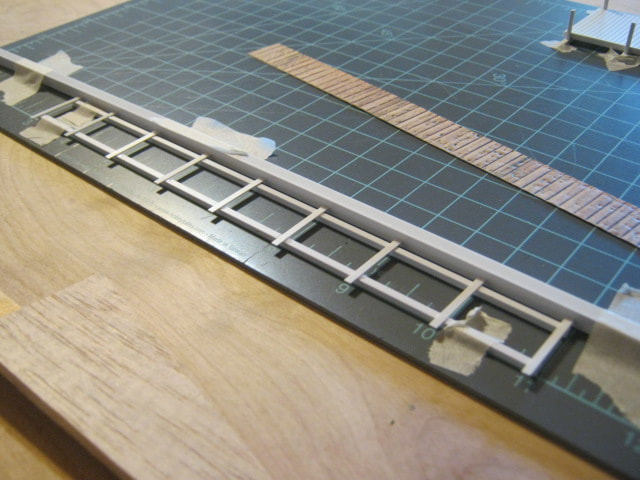
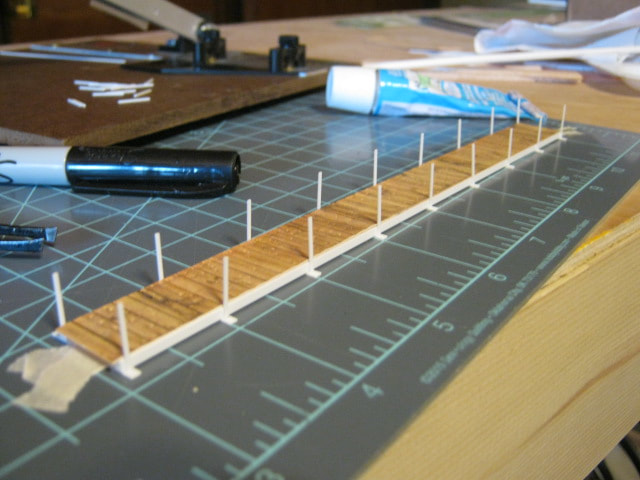
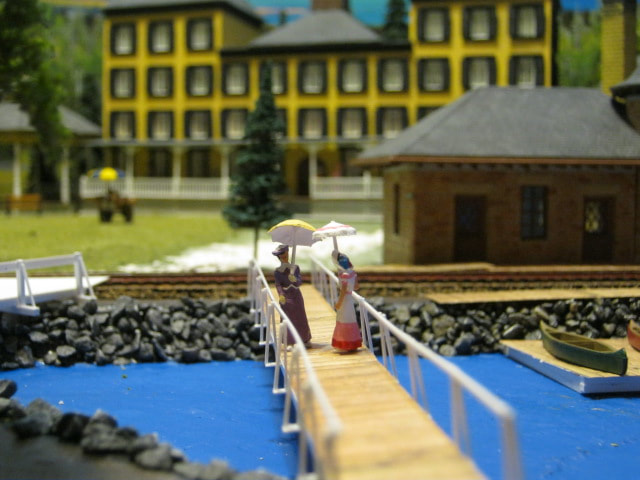
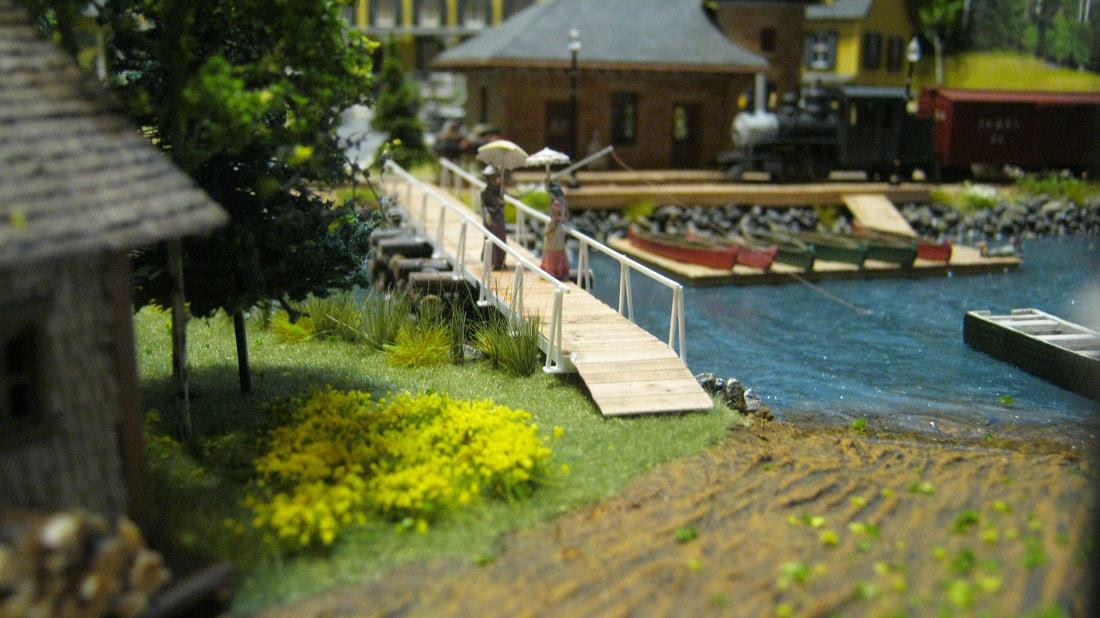
The road and foot bridges were scratchbuilt using Evergreen plastic and Faller "board" paper. I discovered using one of those rubberized mats that they sell in the sewing department of Hobby Lobby works great as a template for making structures. Between that and my Northwest Short Line Chopper, work like this goes quickly.
|
|
|
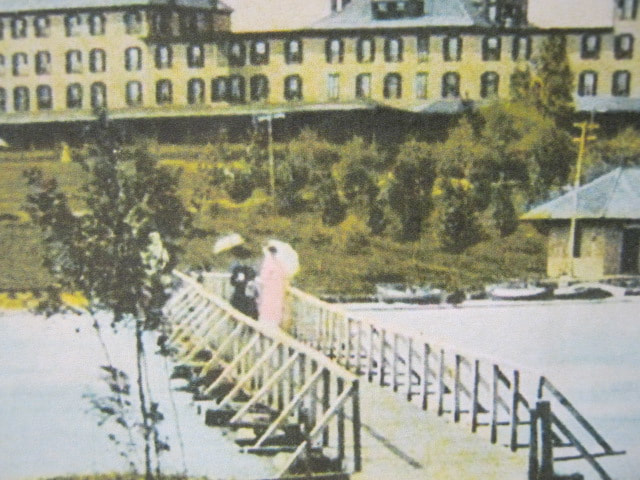
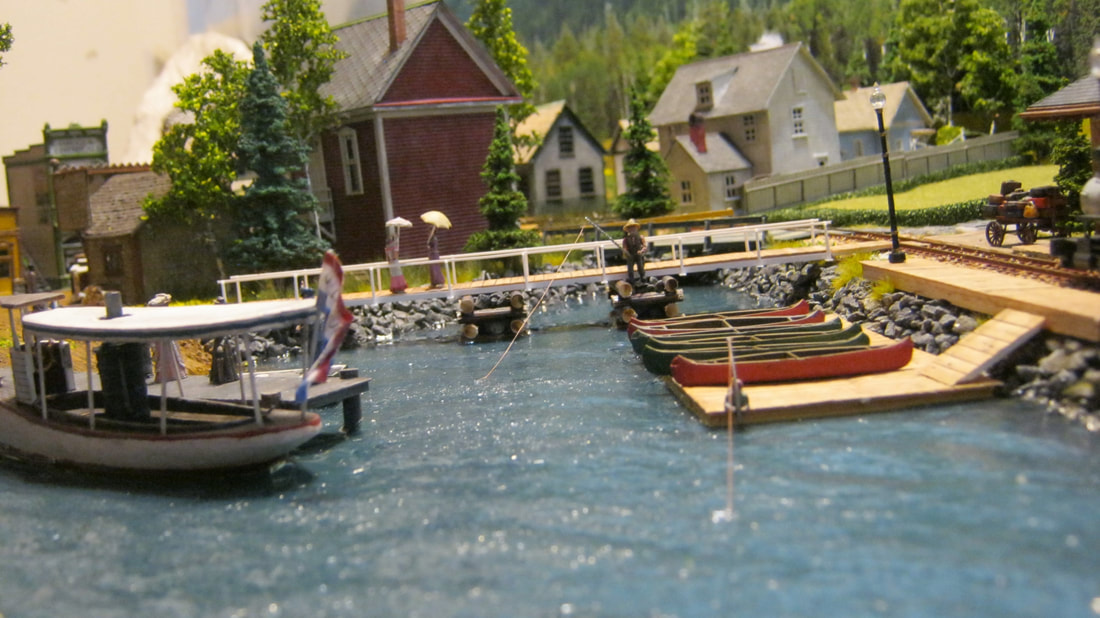
As you can see from the photo of a colorized antique postcard view looking down the footbridge toward the RLH on the left, and my effort to duplicate it on the right, I try the best I can to "get it right". I like to think anyone who is a history buff for the SR&RL Railroad will immediately recognize scenes built into my layout.
|
|
|
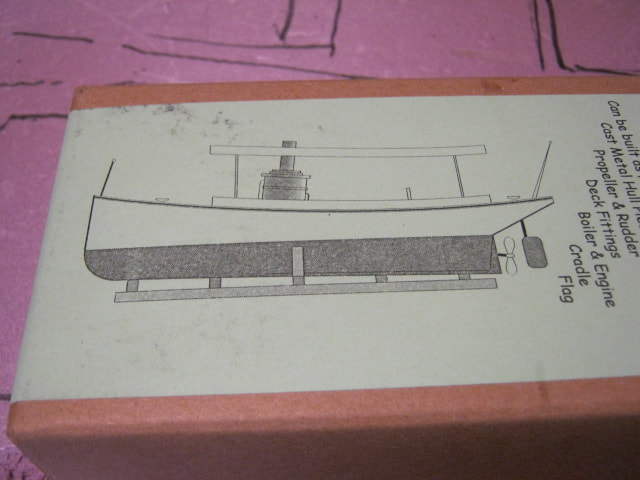
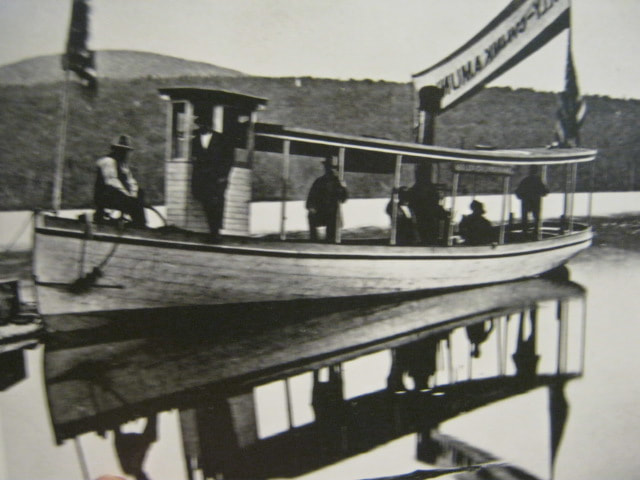
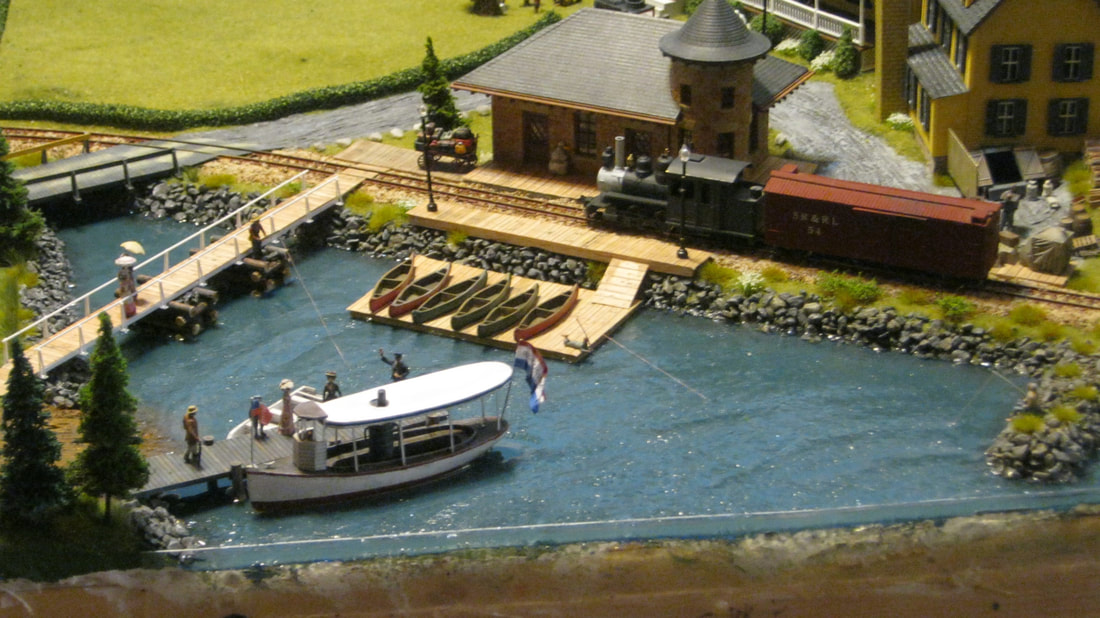
As mentioned, I originally wanted to scratch build the steamer Olivette. Since it would have taken up almost the whole cove in the space I have available for it, I decided to model the much smaller steamer Molly-Chunkamunk. So here's a photo of the original to the left, and my conversion of the model seen above in the planning stages to represent it.
|
|
|
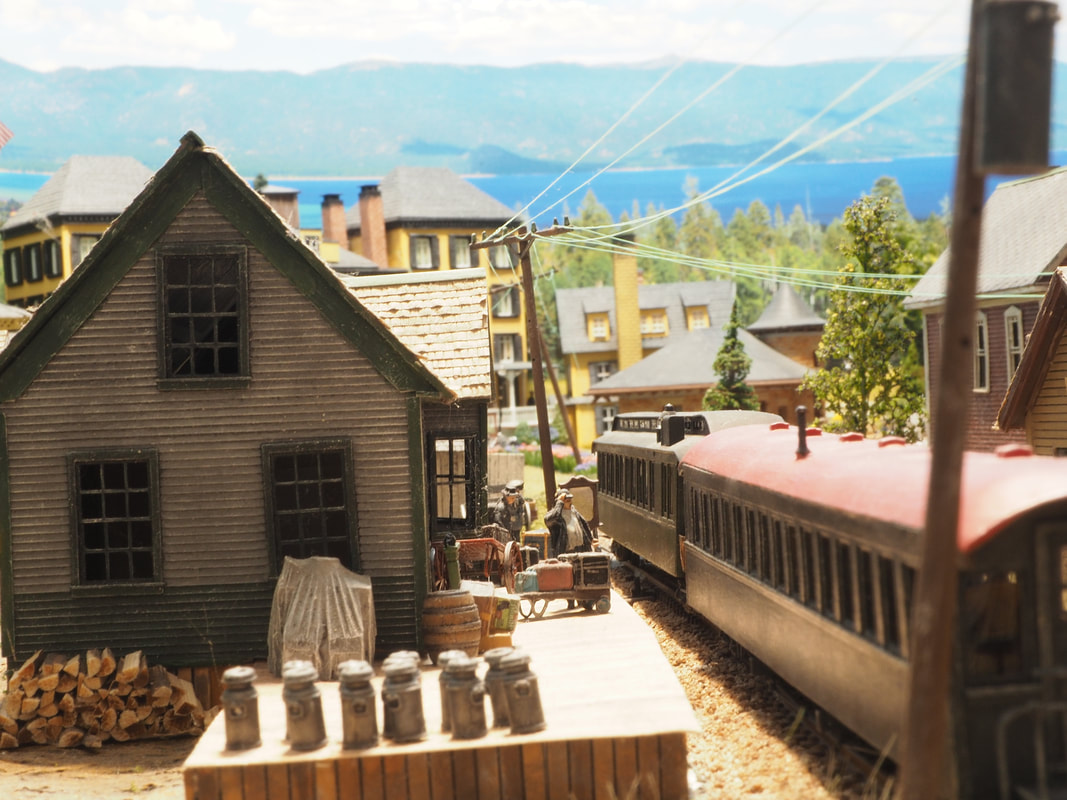
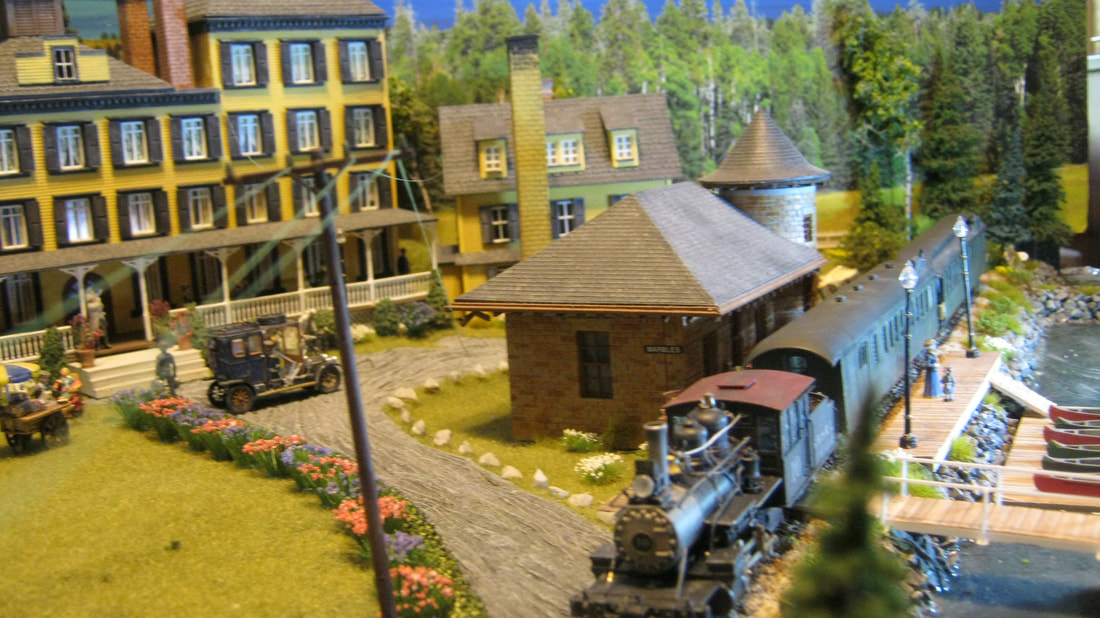
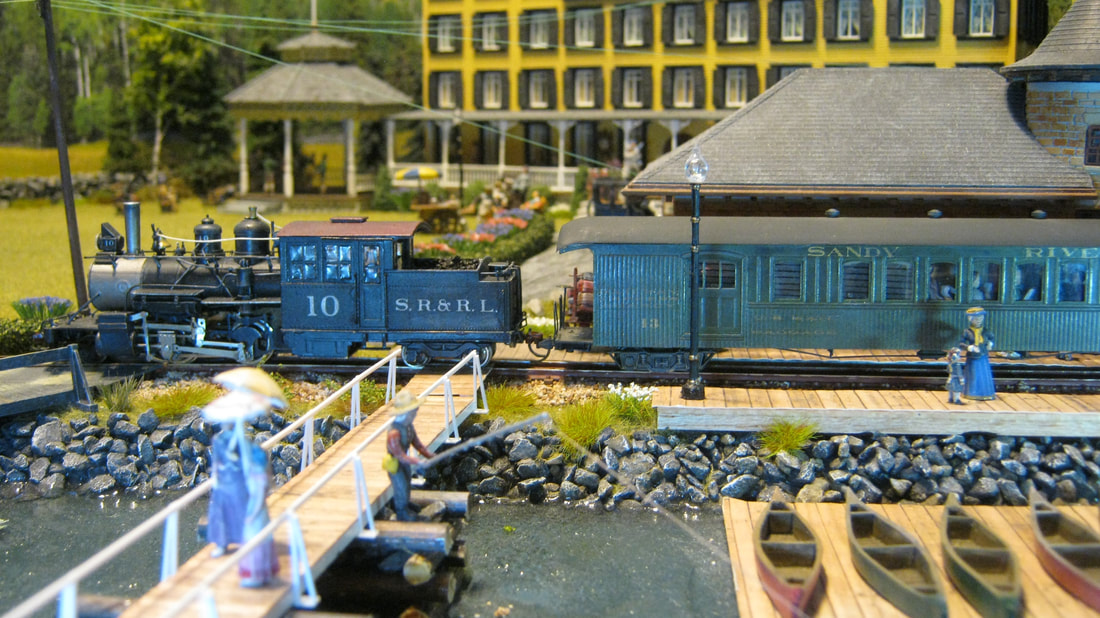
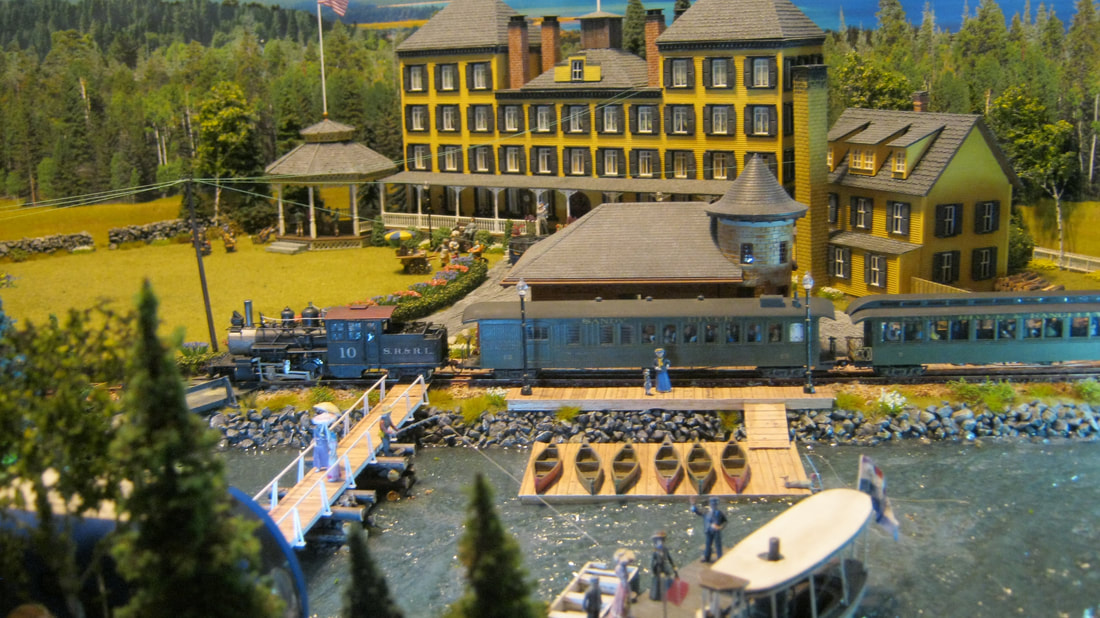
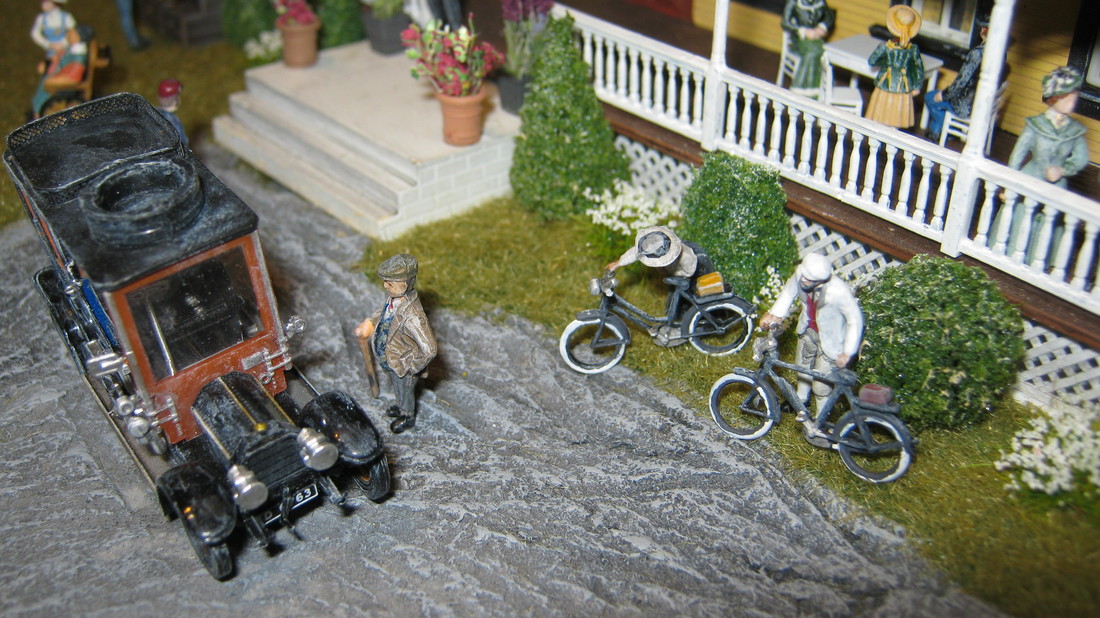
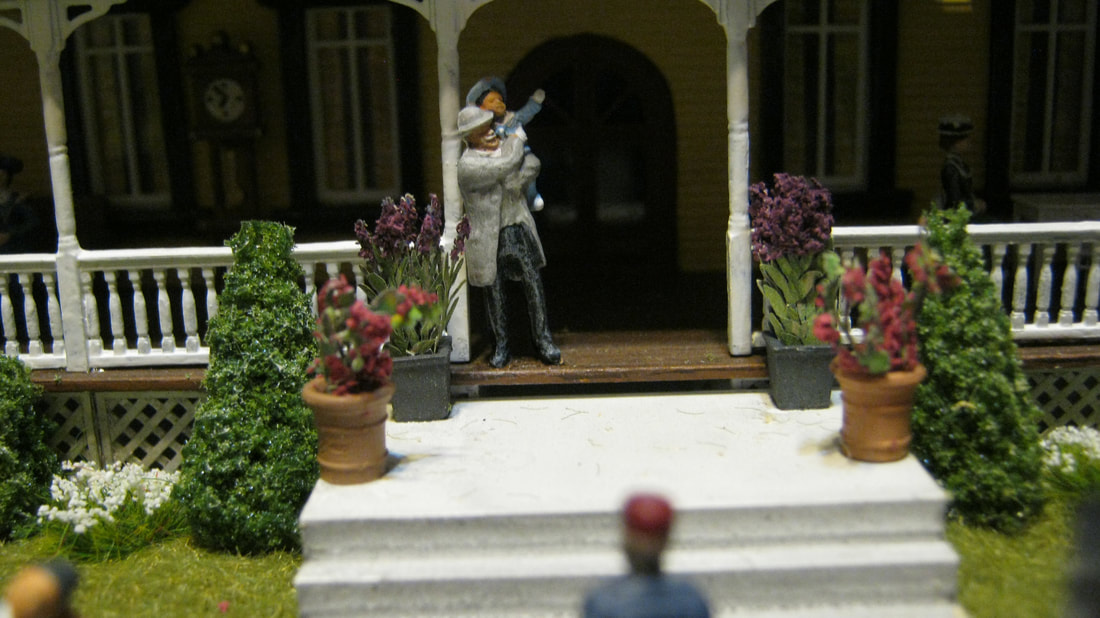
The RLH hotel was one of the wonders of its day. It had all the amenities of the Titanic, and drew the wealthy of Boston and New York to stay for long vacations in the Summer months. It even had its own rail extension to cater to its guests and keep the hotel and guests supplied with all their needs.
|
|
|
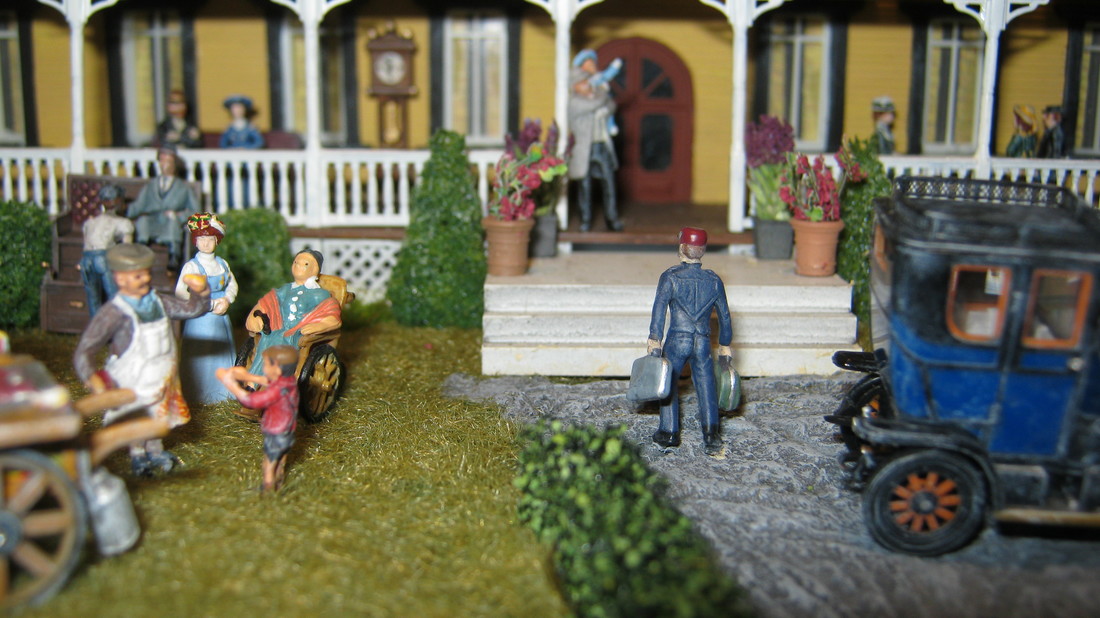
On my layout, the RLH is a major industry, with two regular express trains per day, and several carloads of LCL freight as well as coal to keep the central steam heating system and kitchen stoves operating day and night.
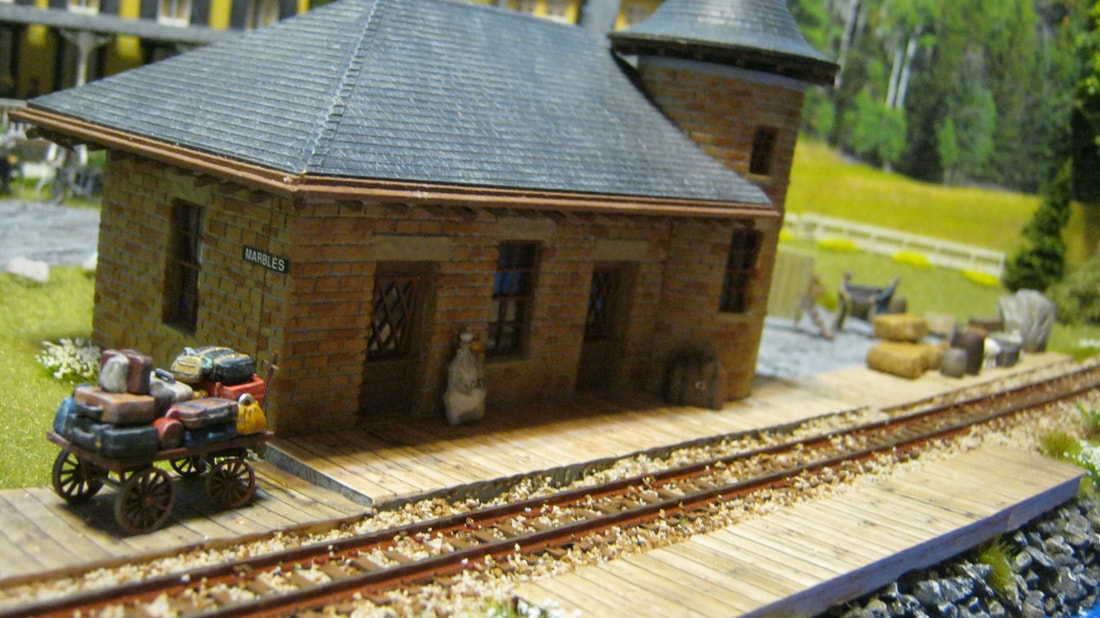
At right is Marbles Station, built to serve the RLH guests, and named after the Hotel's owner. Marbles Station still exists, and has been converted into a privately owned house. |
|
|
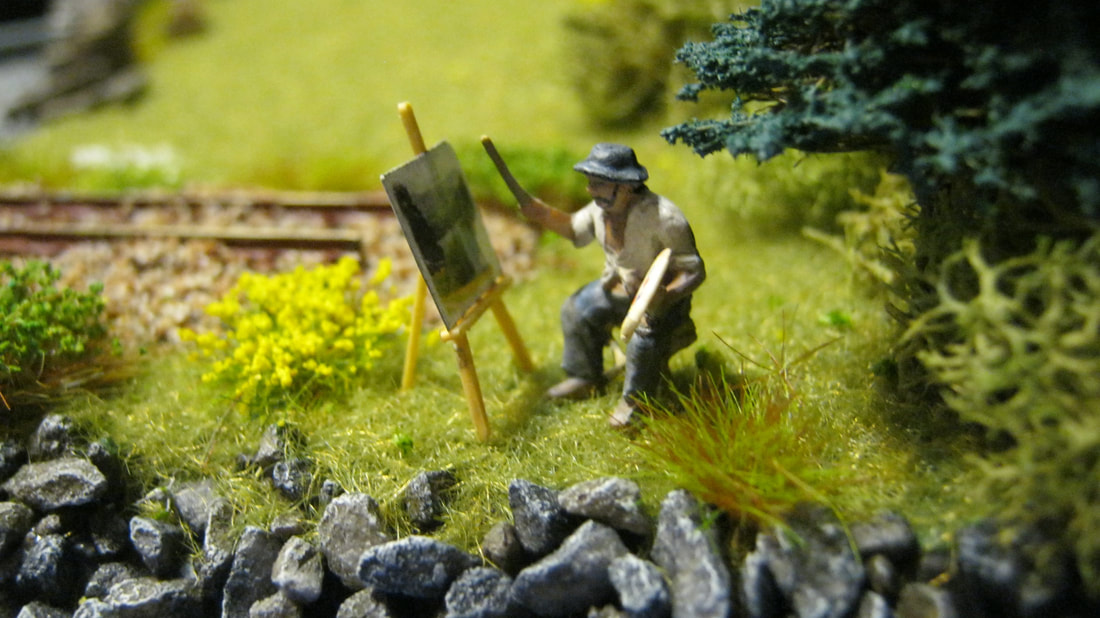
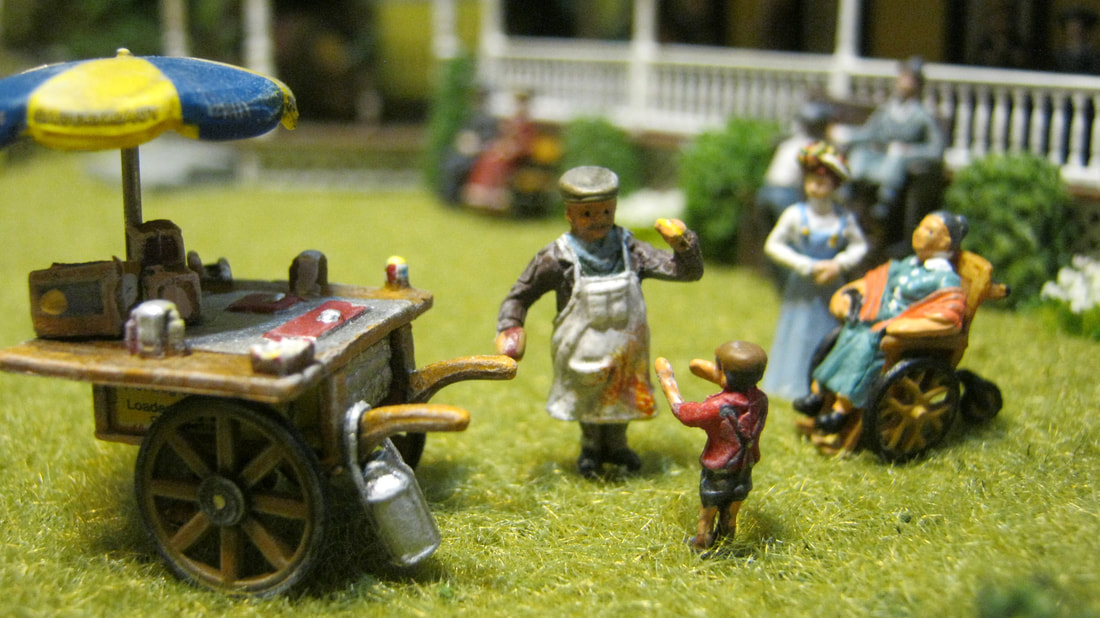
The artist at the end of the spur, painting Town Cove is a Preiser figure, and I call him Van Gogh. In the early 20th Century, cars were often toys for the rich. Bicycling had also become a craze, and cycists soon filled the streets across the U.S.
|
|
|
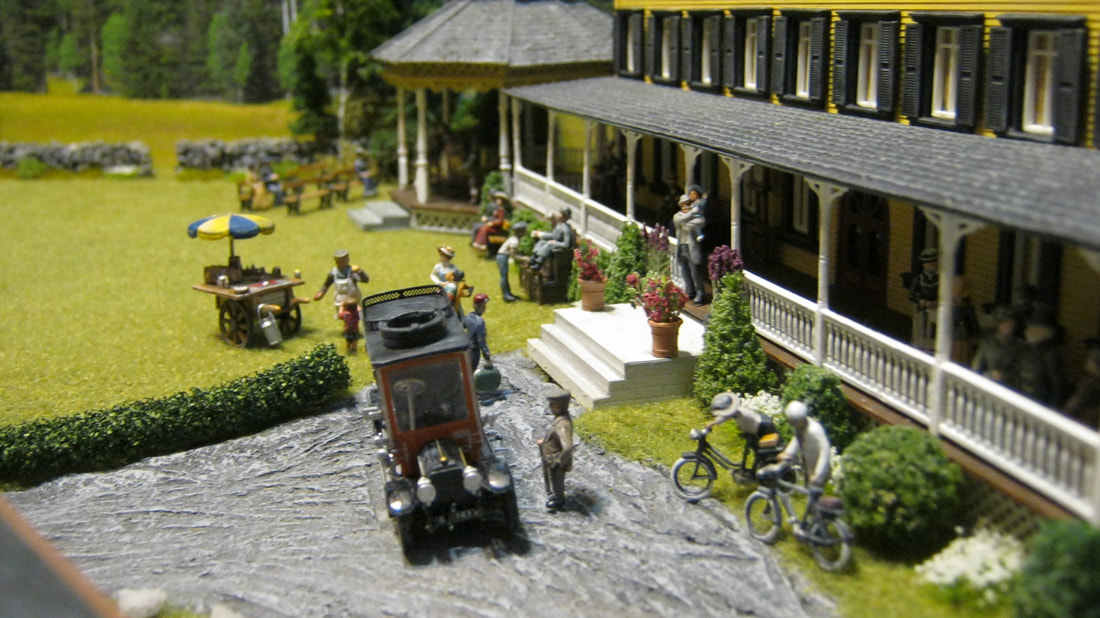
The RLH had hot and cold running water, indoor bathrooms, electric lights, telegraph and telephone service, and even an elevator, which at the time were only found in the larger cities. Everyone in the town of Rangeley knew when the elevator at the RLH was in operation, as the whole town's lights would dim because of it.
|
|
|
The RLH also had the day's major papers, such as the New York Times, by 7 a.m., in time for breakfast. A person could leave Boston on the night train, and arrive at the RLH in time for breakfast. The status of Rangeley as a playground for the rich was such that guests could see the latest Charlie Chaplin film there before it was released in New York City.
|
|
|
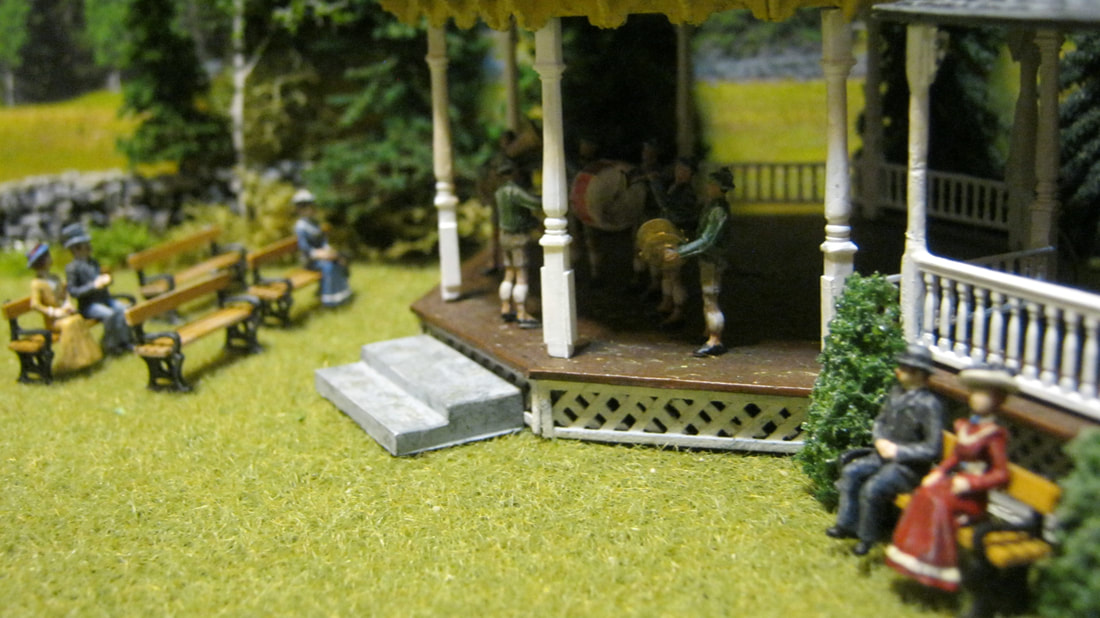
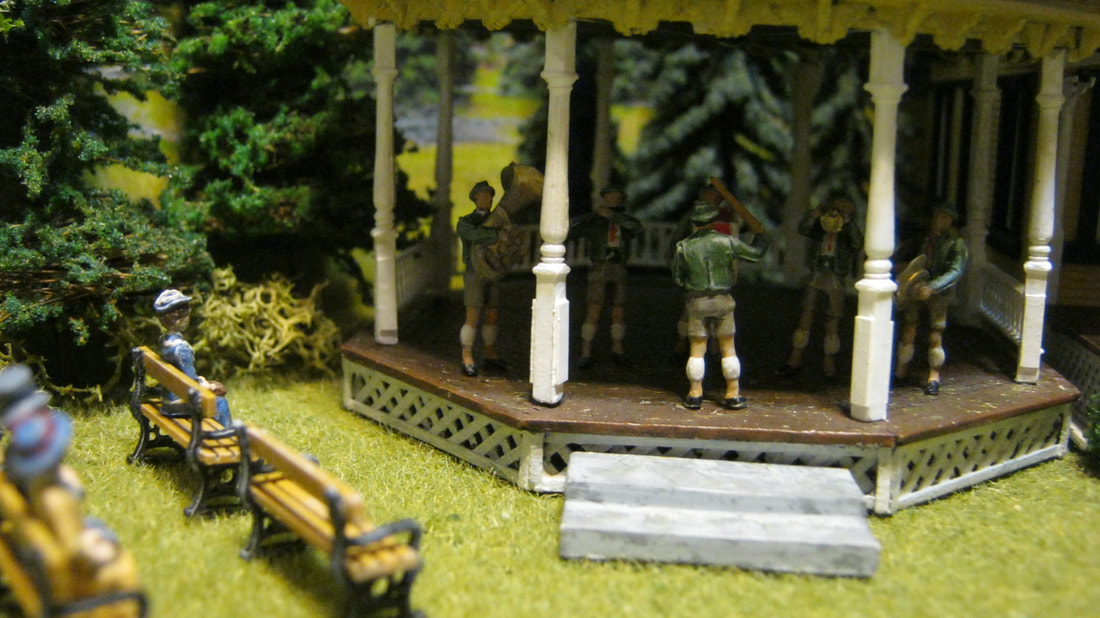
Along with all the creature comforts, the RLH had its own golf course, casino, complimentary canoes and boats, tennis courts, post office, live entertainment, and baseball and other games for the guests to enjoy. Hunting, fishing and hiking excursions were all included as well. It also had its own steam boat dock and a long promenade boardwalk along the shore on the west side of the hotel.
|
|
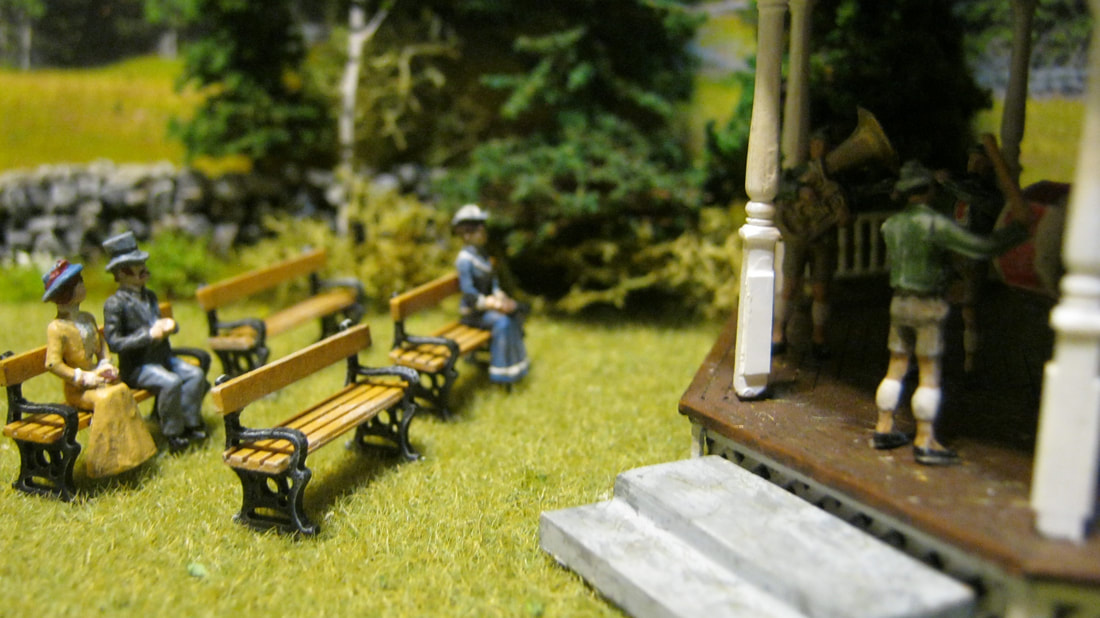
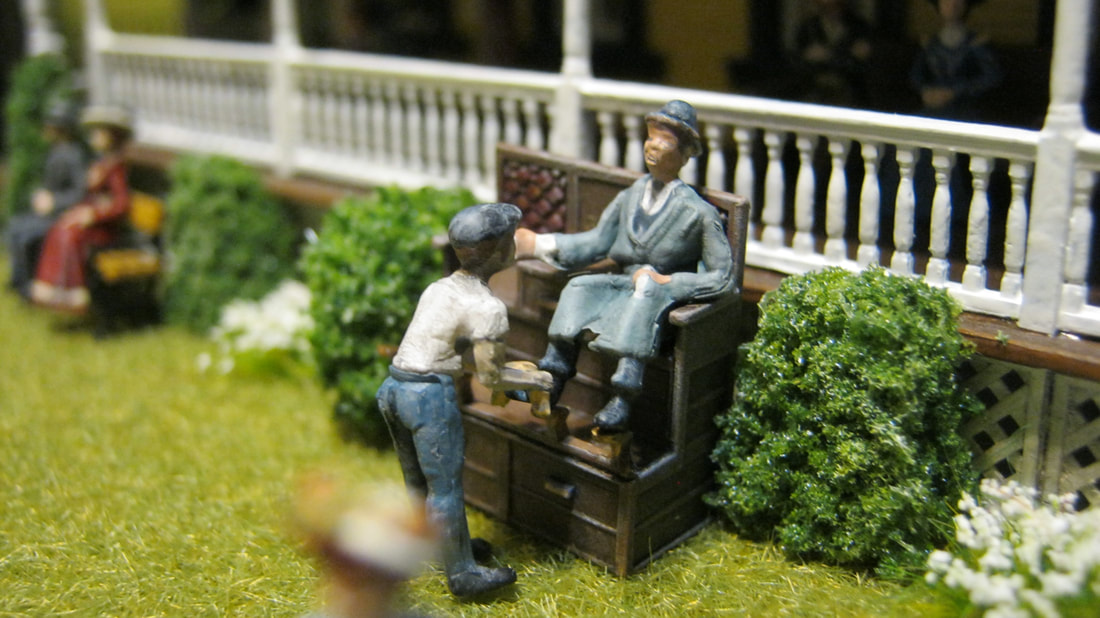
My RLH is scratch built, and is condensed by a technique called 'selective compression. All the critical features are modeled, but the number of windows, doors, etc. are reduced and the overall size compressed to fit in the space available. The band stand is a Campbell kit, and the service building is kitbashed from another kit to resemble the actual service building.
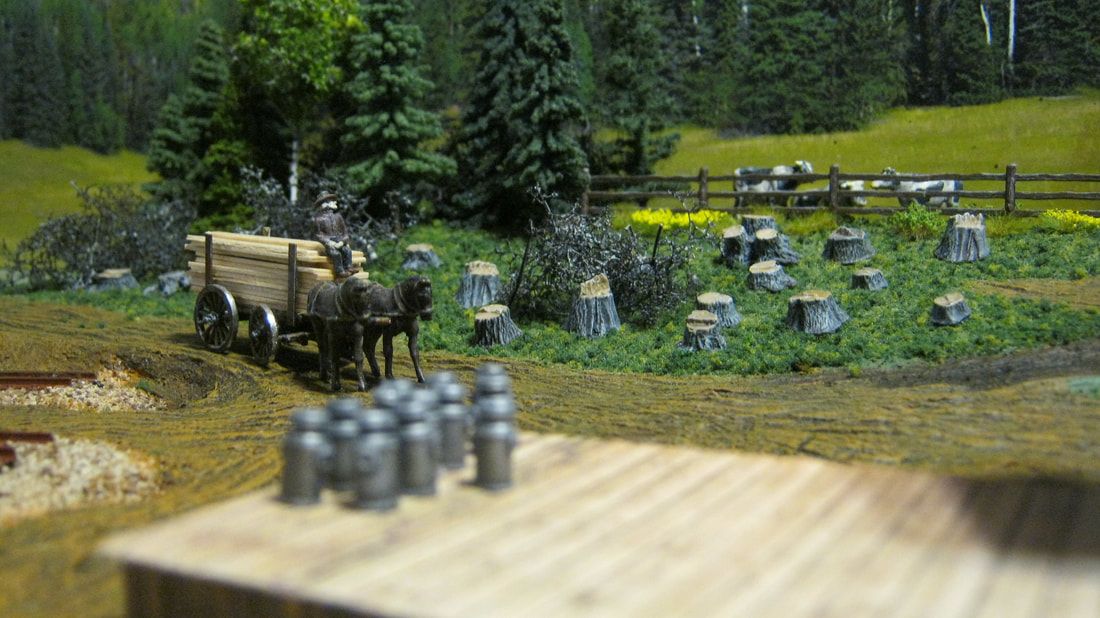
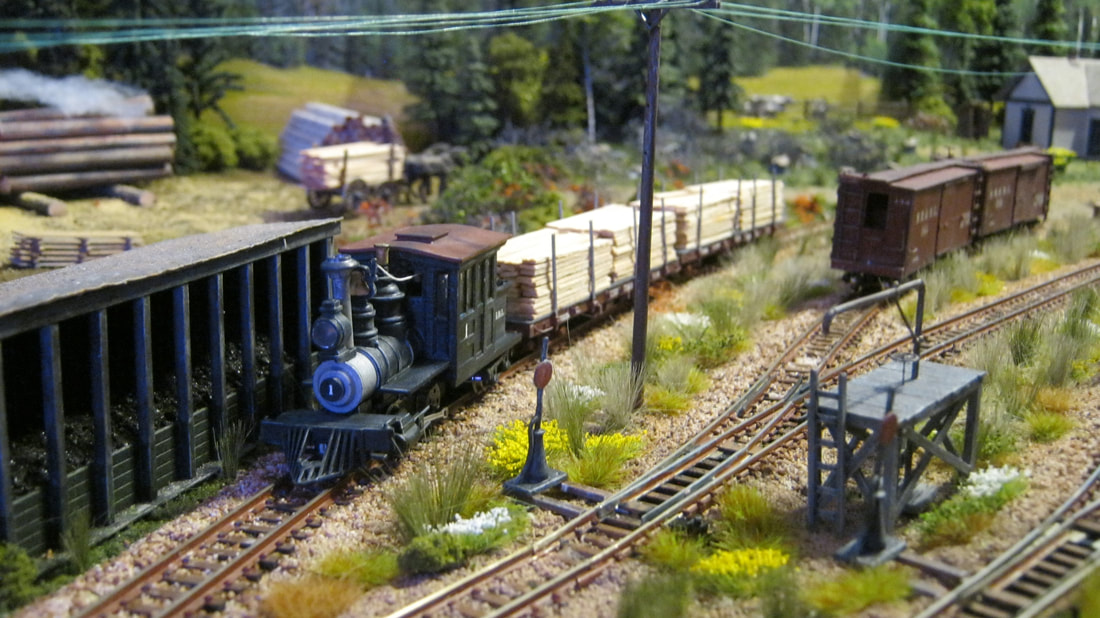
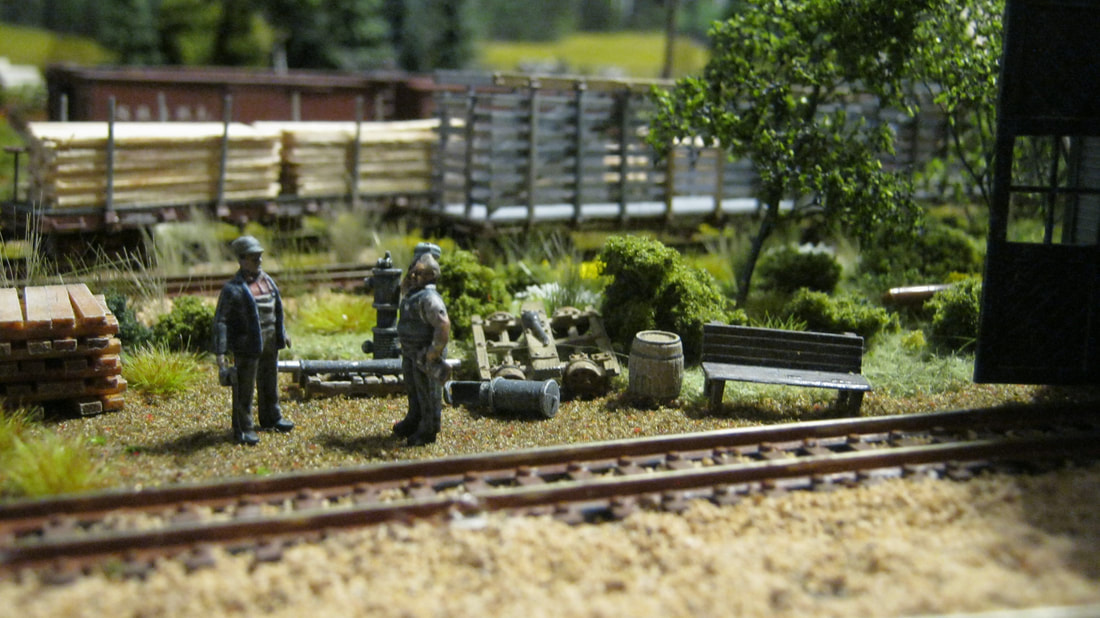
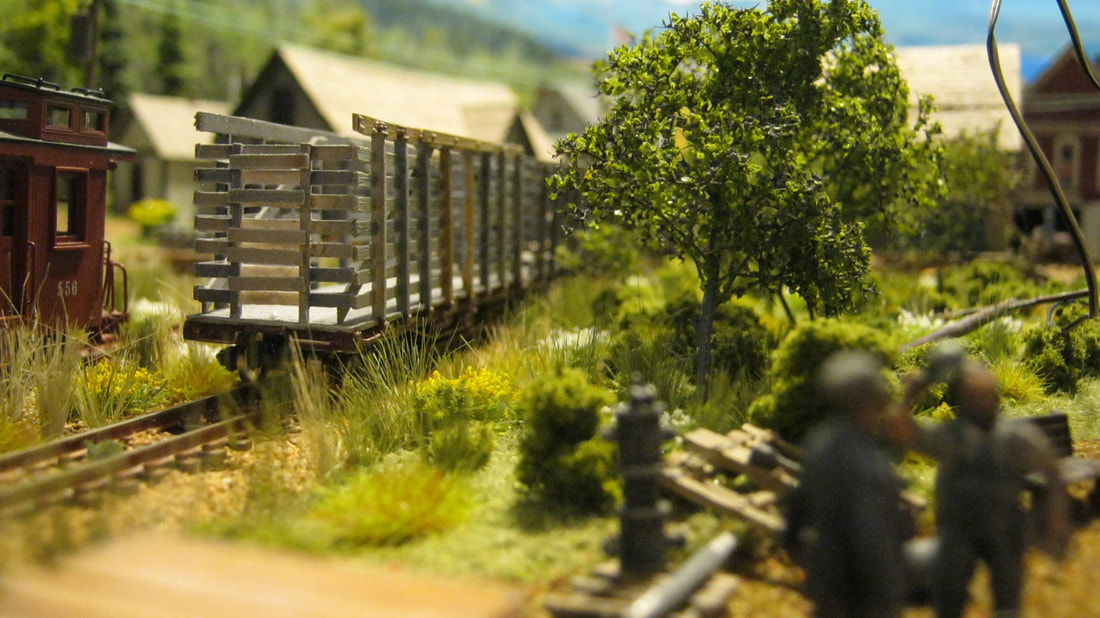
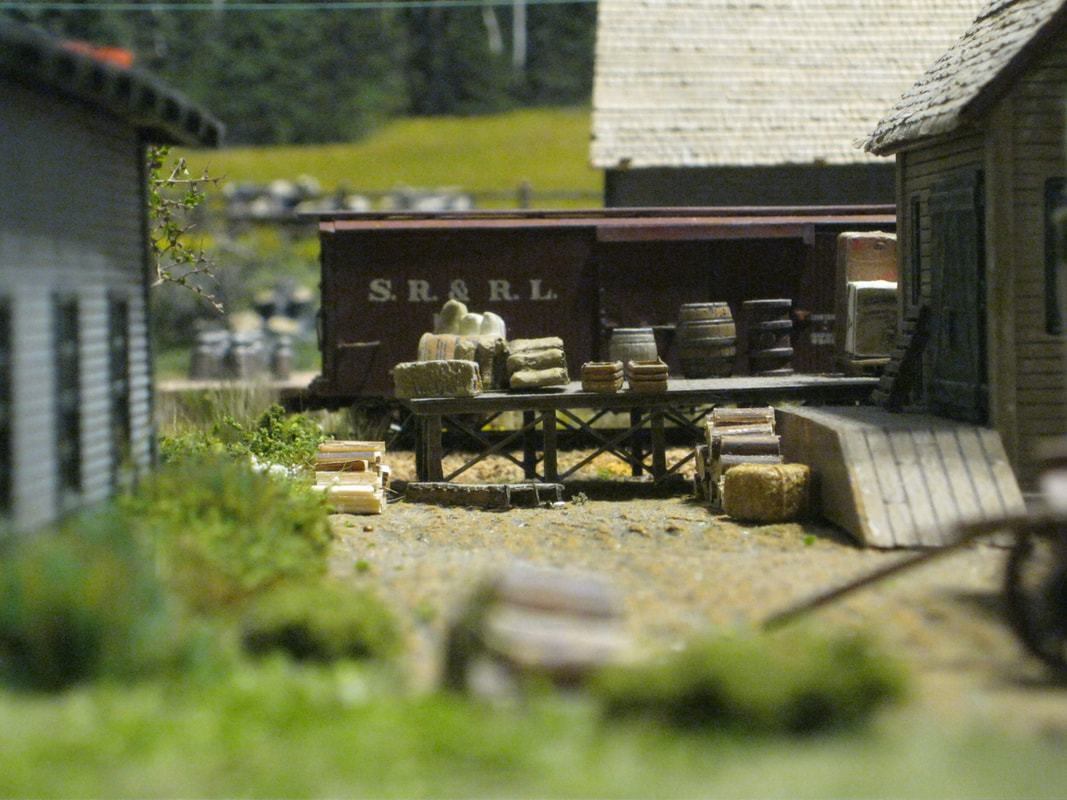
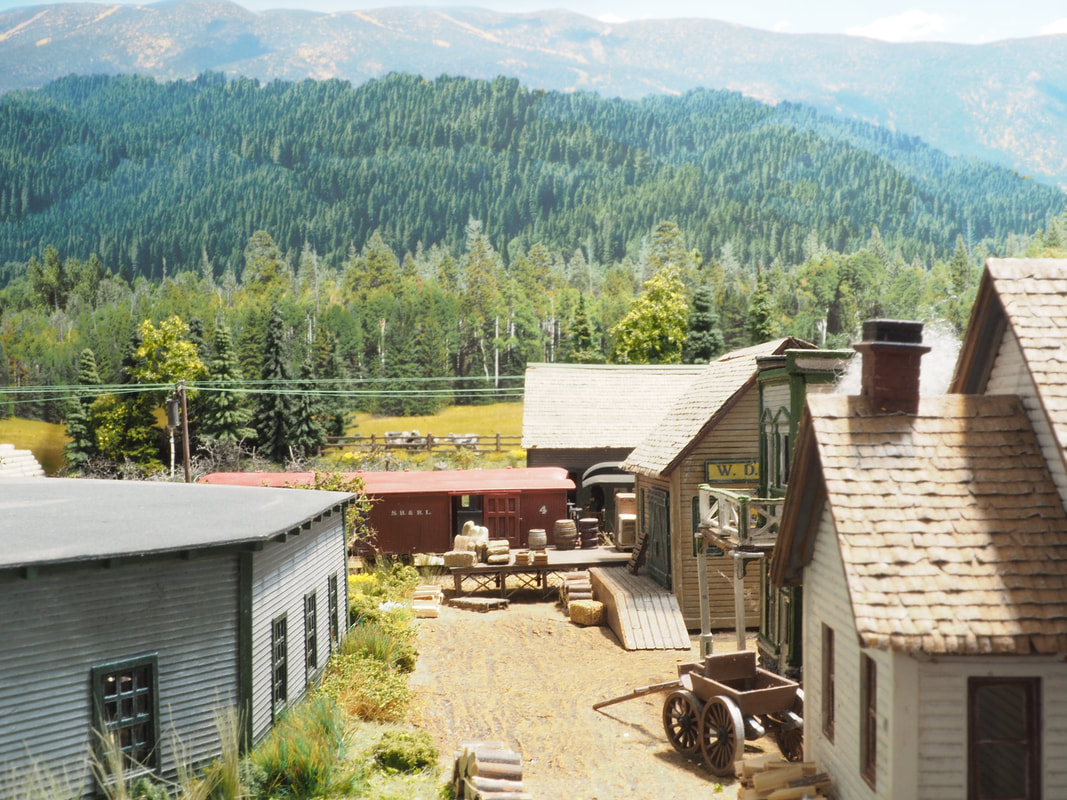
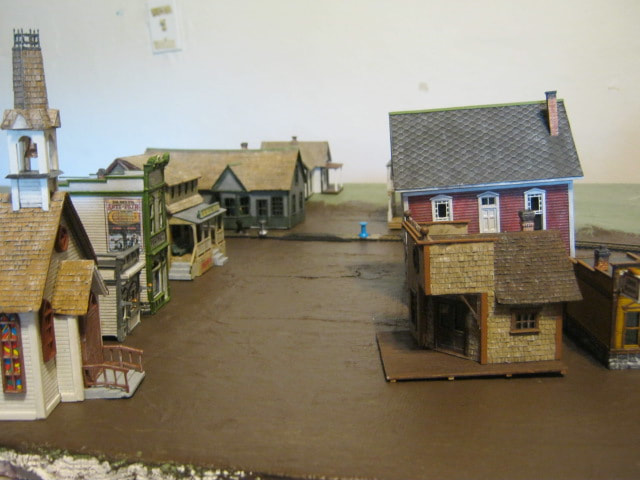
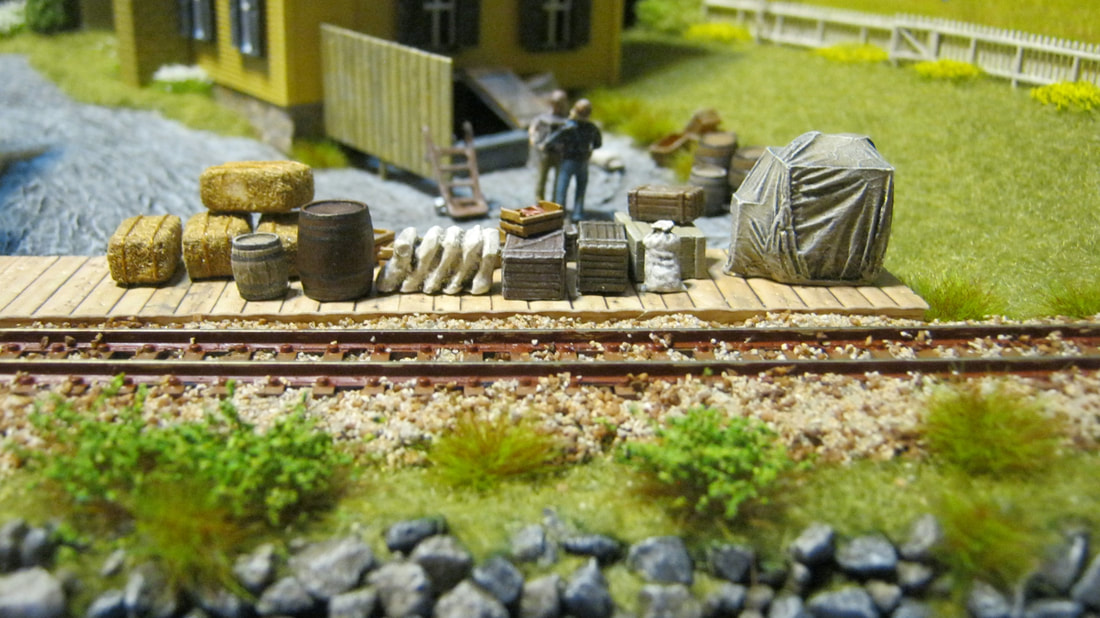
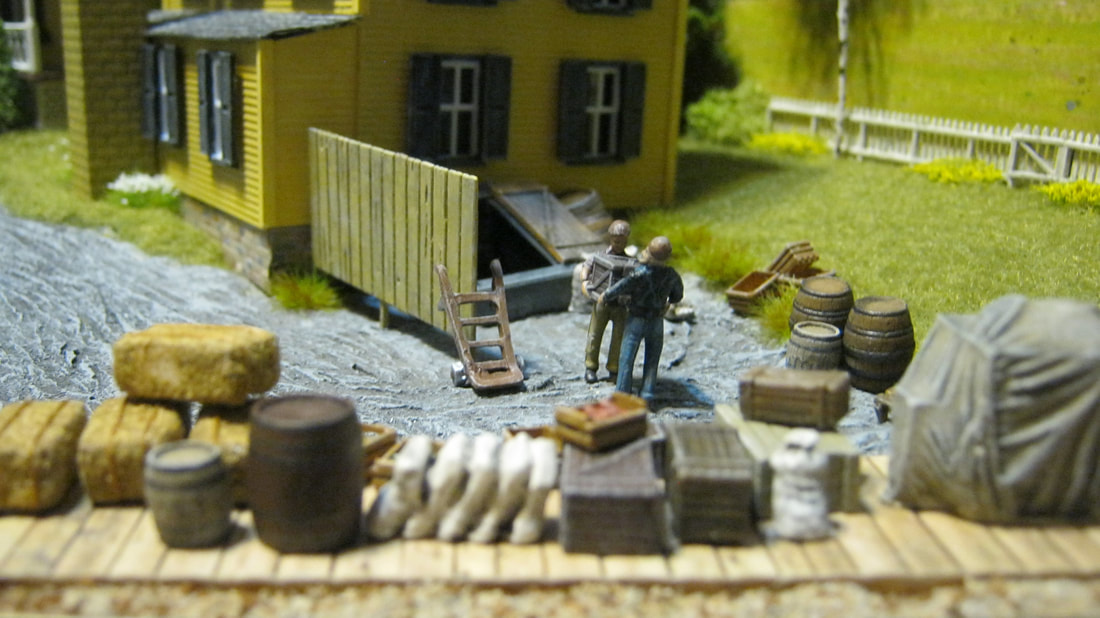
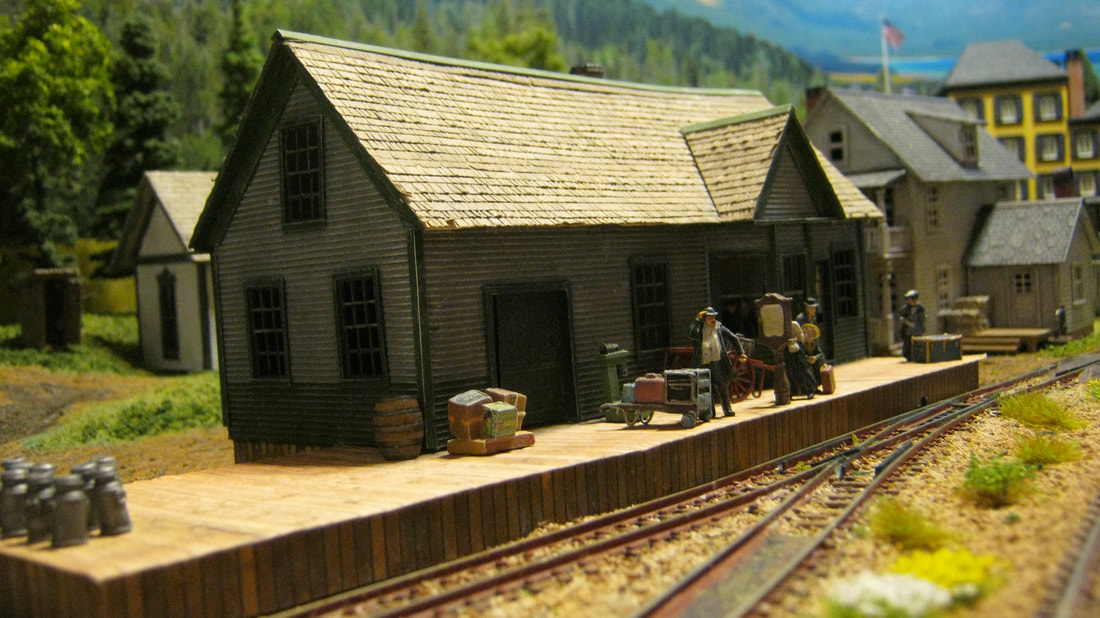
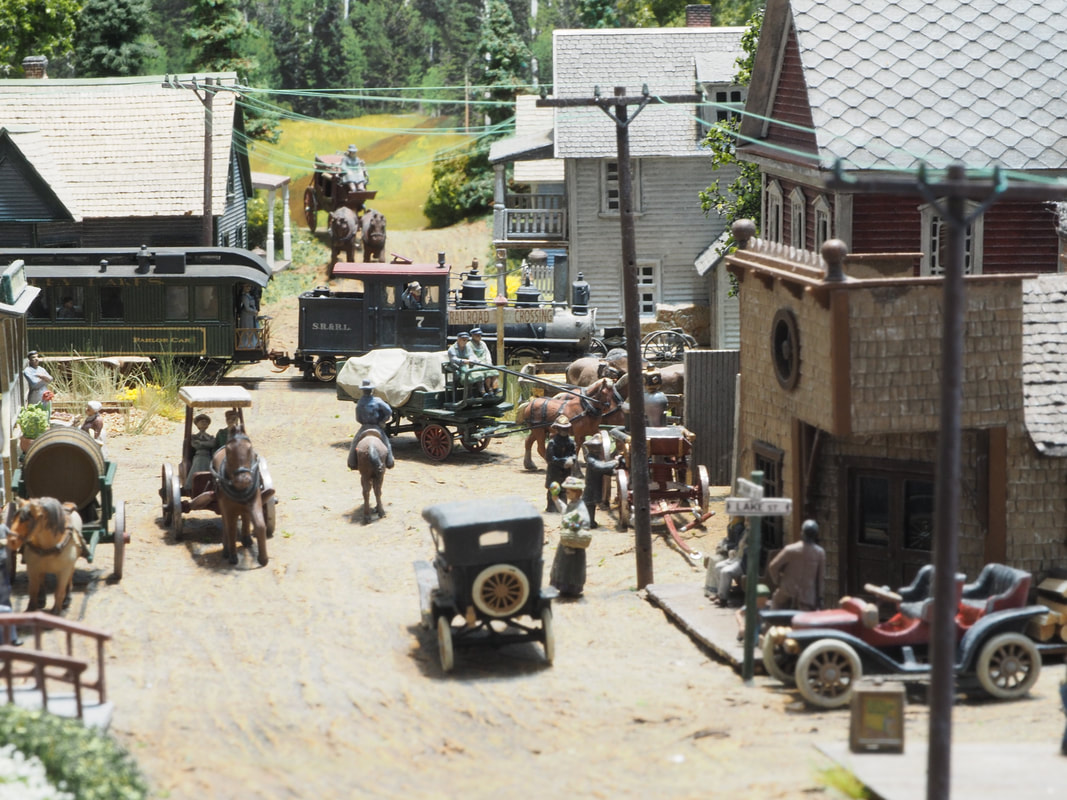
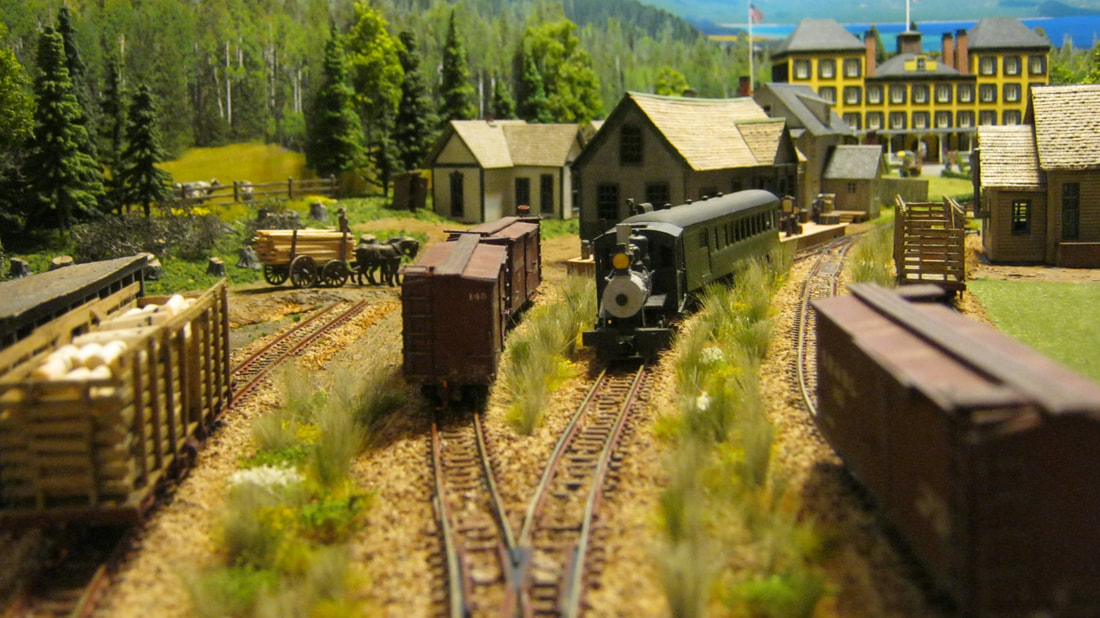
Moving to the town of Rangeley, above, you see a wagon of lumber approaching the team track at the depot, and the backdrop is blended with a wooden rail fence into a cow pasture. Below is the original Rangeley Station, scratch built using what little photo evidence I have of how it was built. It's pretty close.
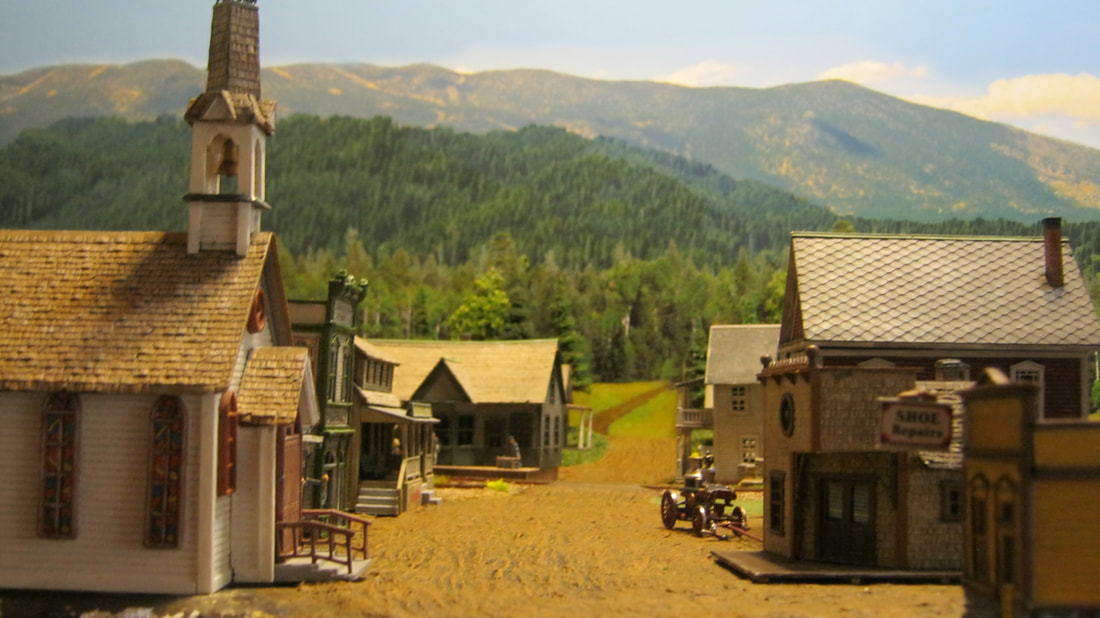
|
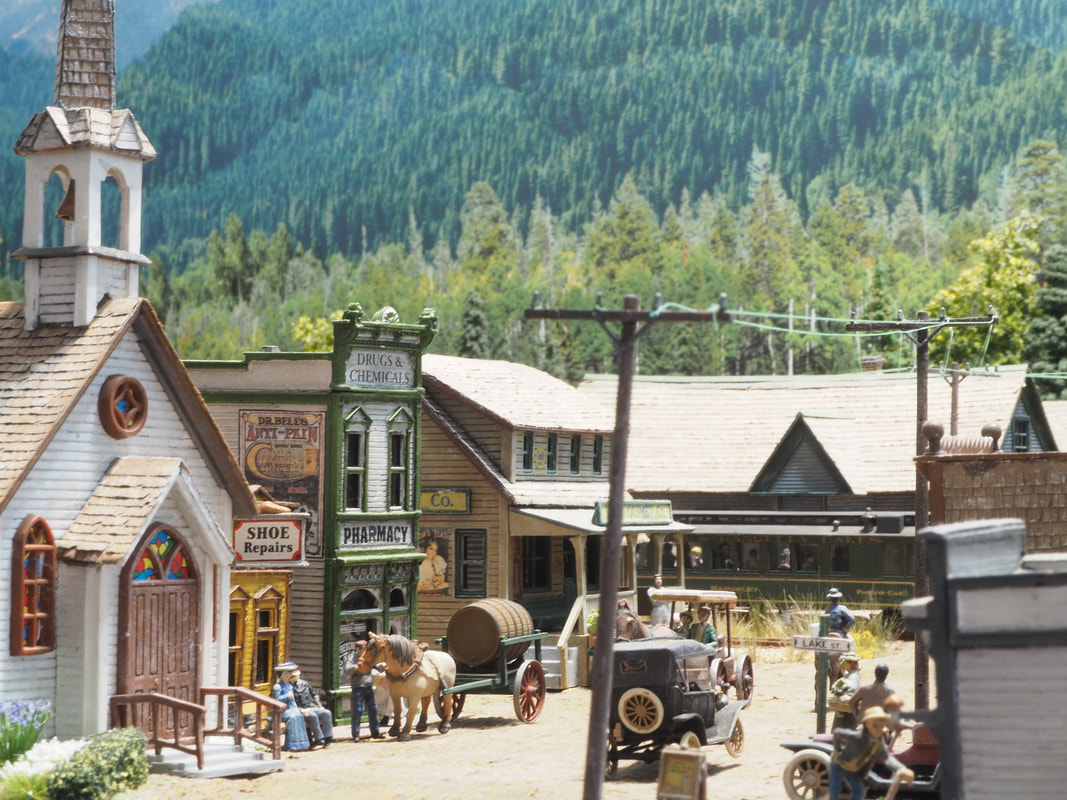
Main Street in Rangeley is to the left, looking south from the intersection of Lake Street. All the structures are out of the box kits or kitbashed to better resemble actual buildings from photos. I use a mix of Celluclay, sawdust, wood glue and acrylic paint to model the roads, running an HO scale wagon over them many times while wet to model the wheel tracks. There were no paved roads at the time.
|
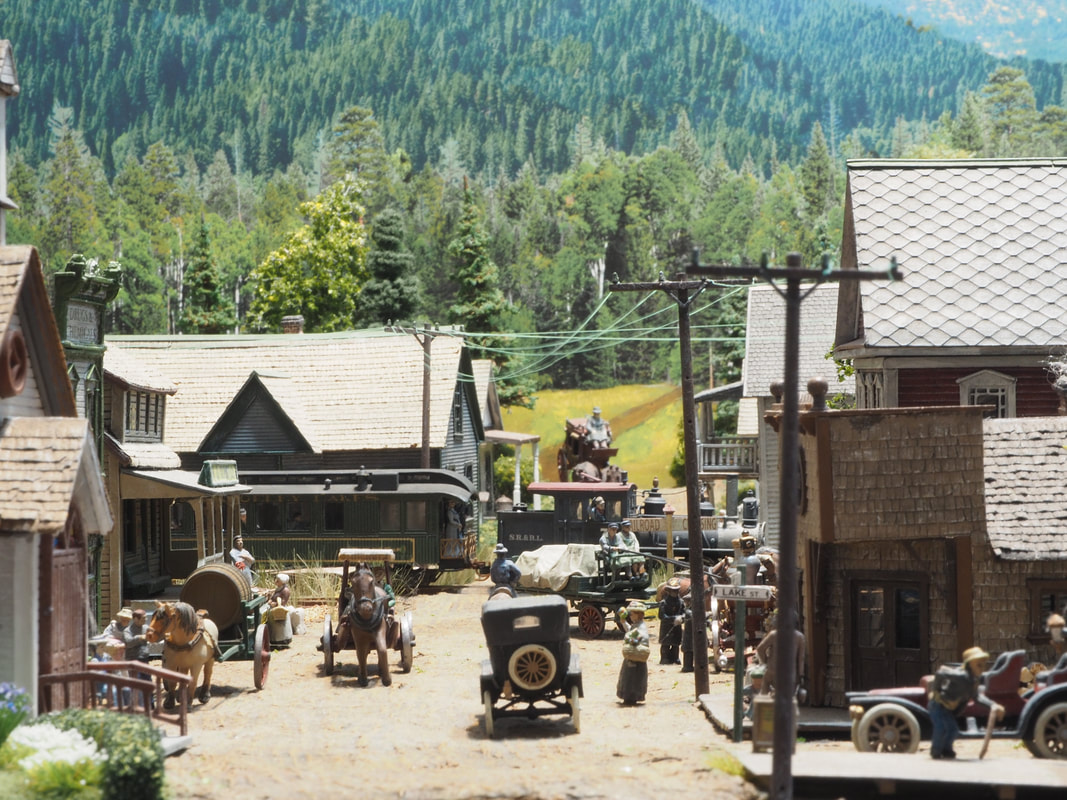
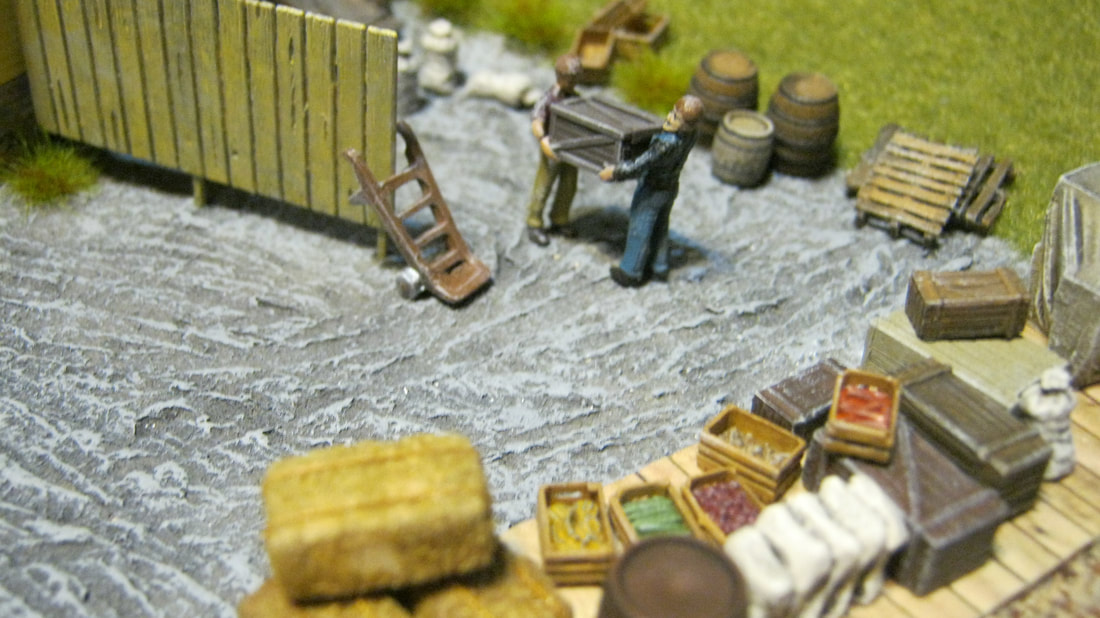
These three shots show a busy summer morning on Main Street, with the Rangeley Express at the crossing heading for the Rangeley Lake House off to the right. A stagecoach enters town on route 4 in the distance, and horse transport still outnumbers automobiles, although a Model T and a Stanley Steamer have found their way into town.
|
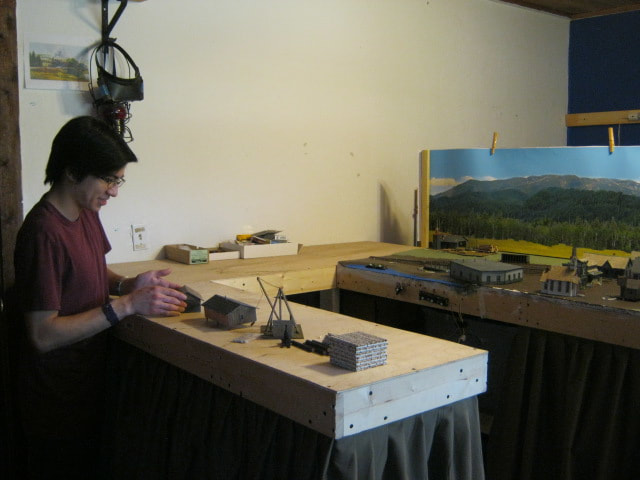
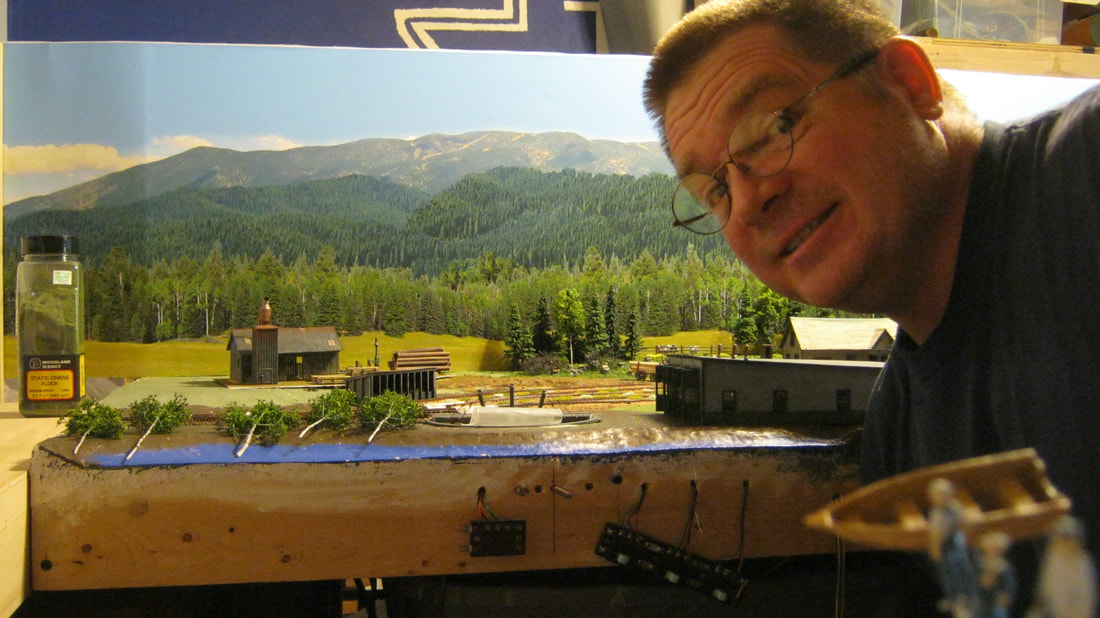
That's me showing my Mom I was actually making this and not just posting pictures of some layout from the internet. Makes me smile every time I think of it!
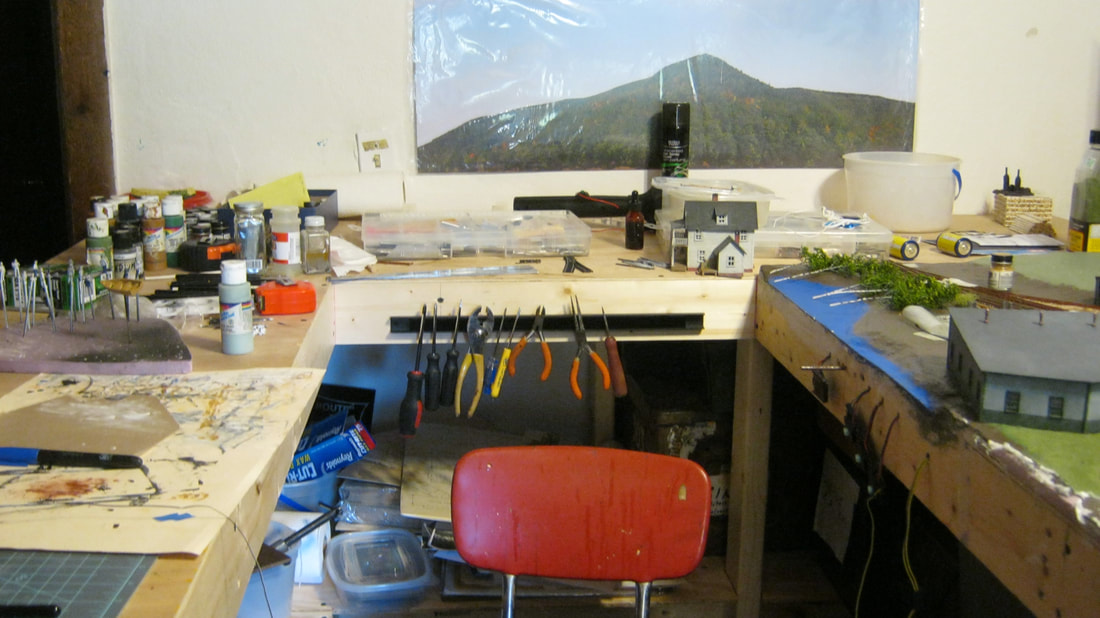
Something I already miss now that I'm working on Langtown is the convenience of using that peninsula as my work bench to work on Rangeley. |
|
|
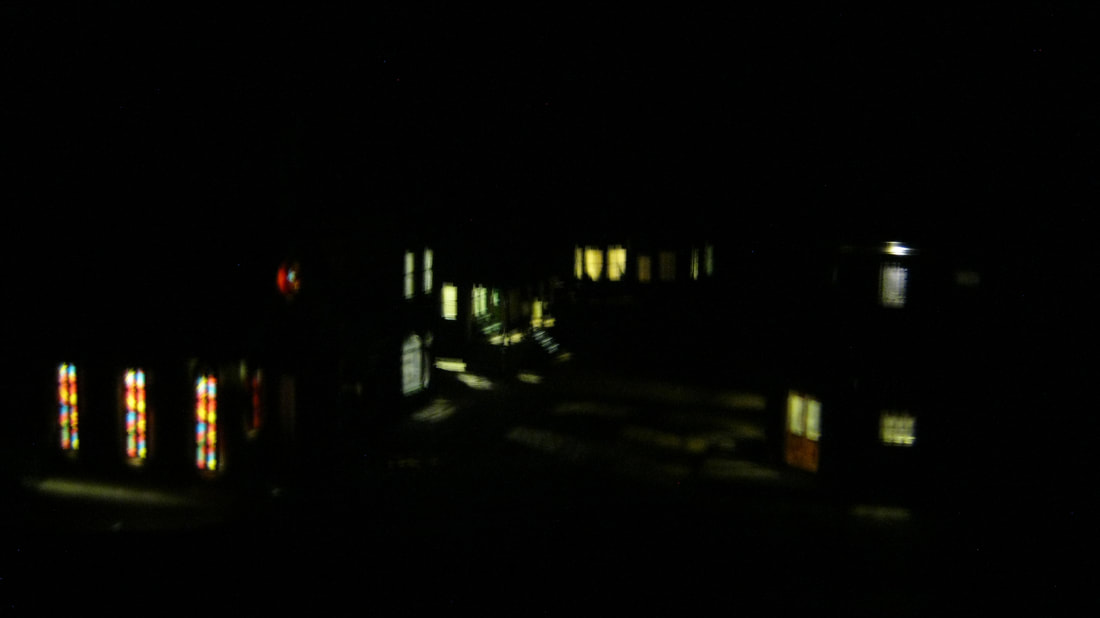
At left is a test run of the lighting for Rangeley. Electronics is one of my weak areas, so I'm delighted that Woodland Scenics came out with its Just Plug system of lighting.
To the right is the beginning of the transmogrification of my 'layout room' into my 'train room', displaying artifacts as well as the layout. |
|
|
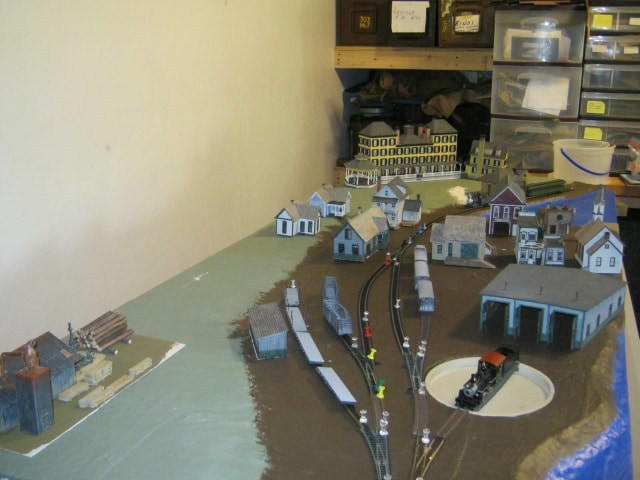
The yard at Rangeley above has really started taking shape at this point. I had to trim down the grasses three times to get them down below the level of looking like elephant grass.
To the right is the first pour of Realistic Water into Town Cove. |
|
|
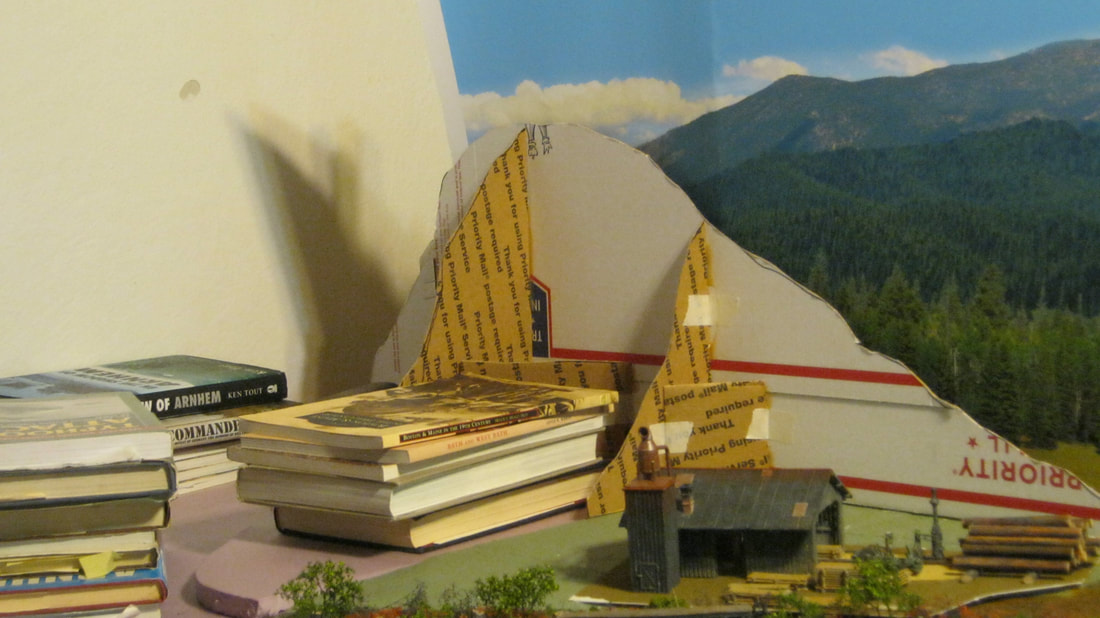
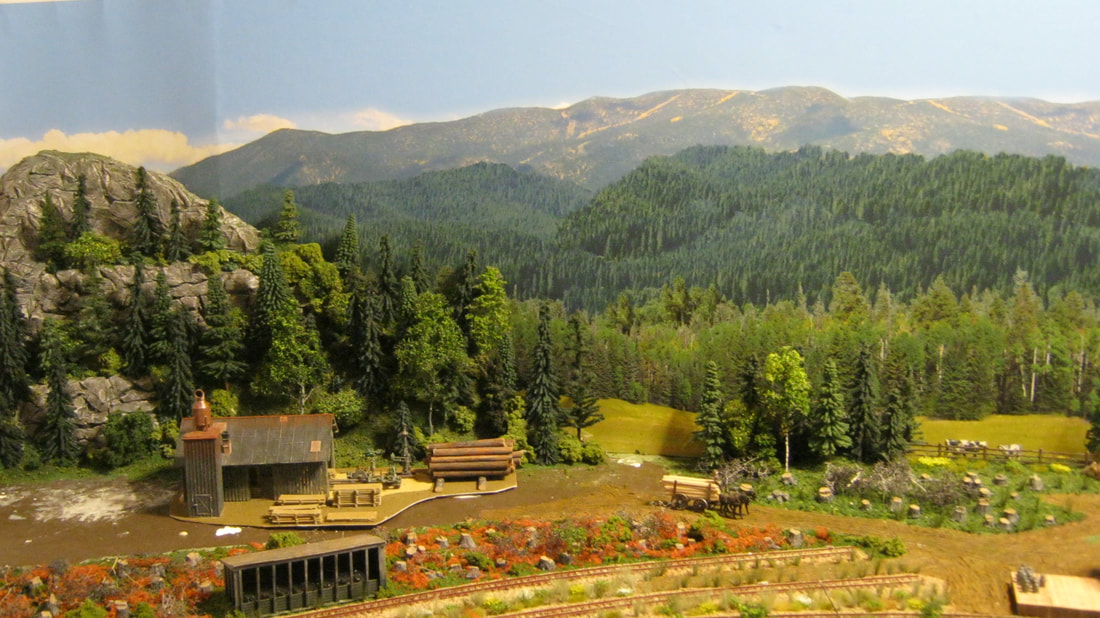
At the left is a big moment, the extension of the scenery beyond the edge of the Rangeley module onto the Eustis Junction module. Cardboard former for the hill, books weighting down foam while the glue dries. To the right is the beginning of Eustis Junction. I used Woodland Scenics Shape Sheet for the first time on the hill.
|
|
|
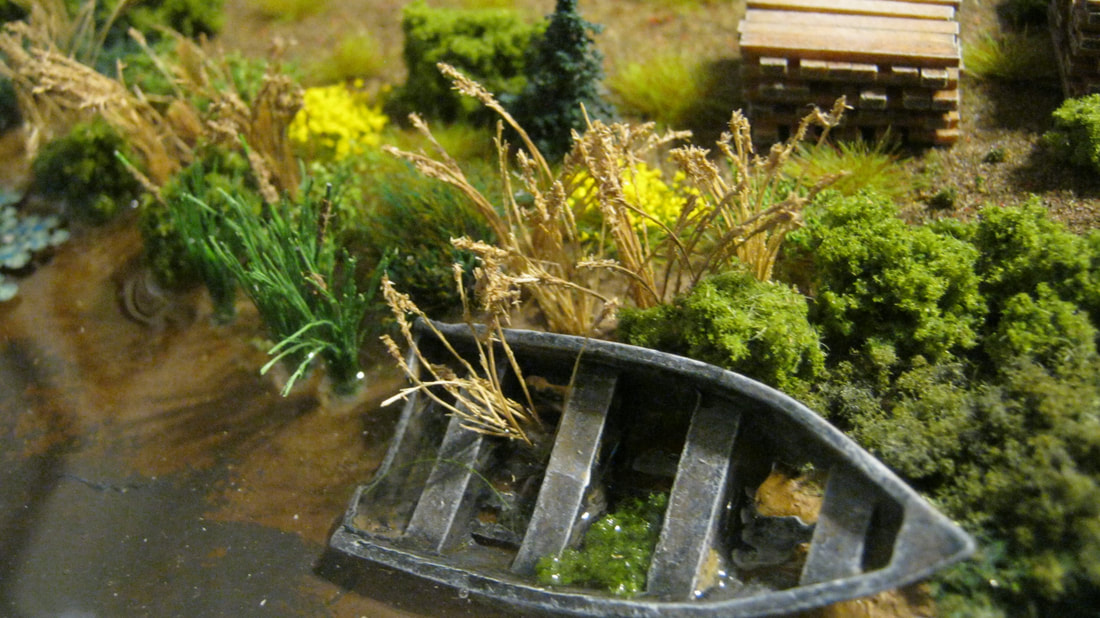
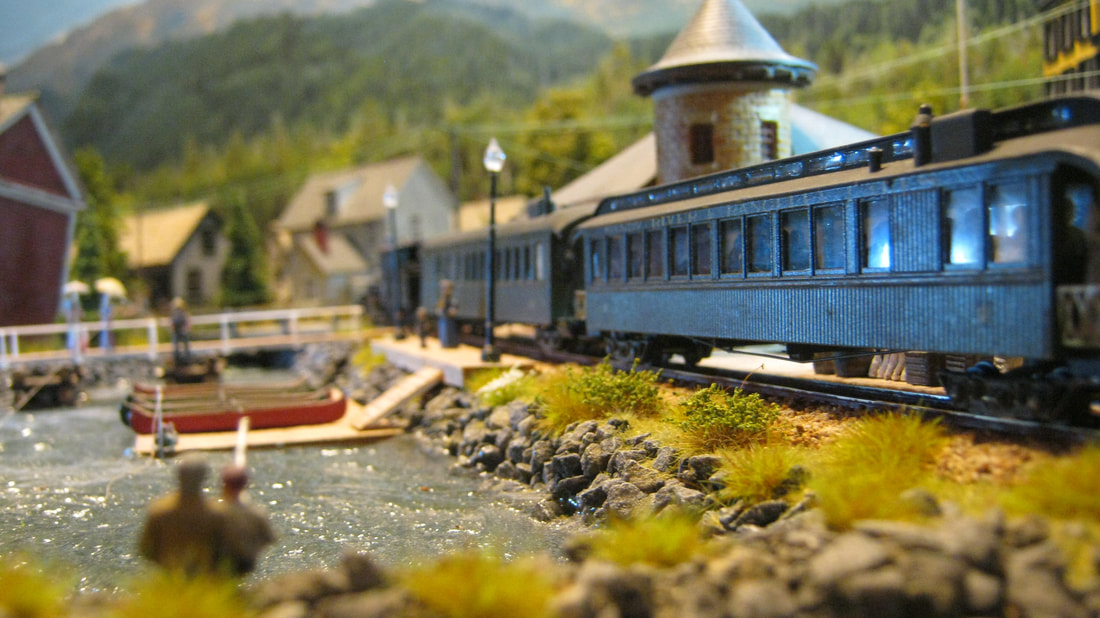
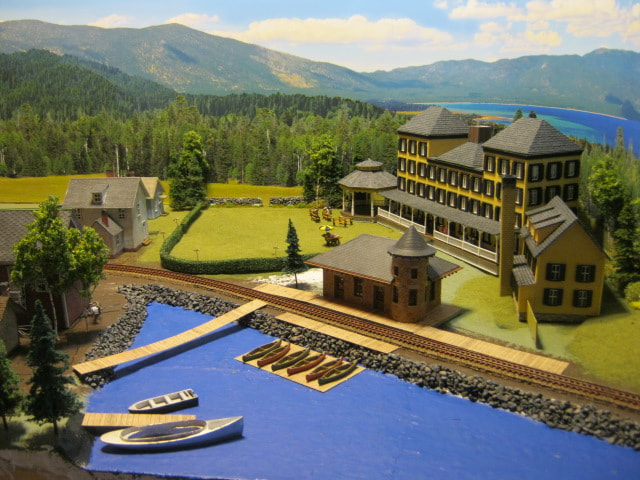
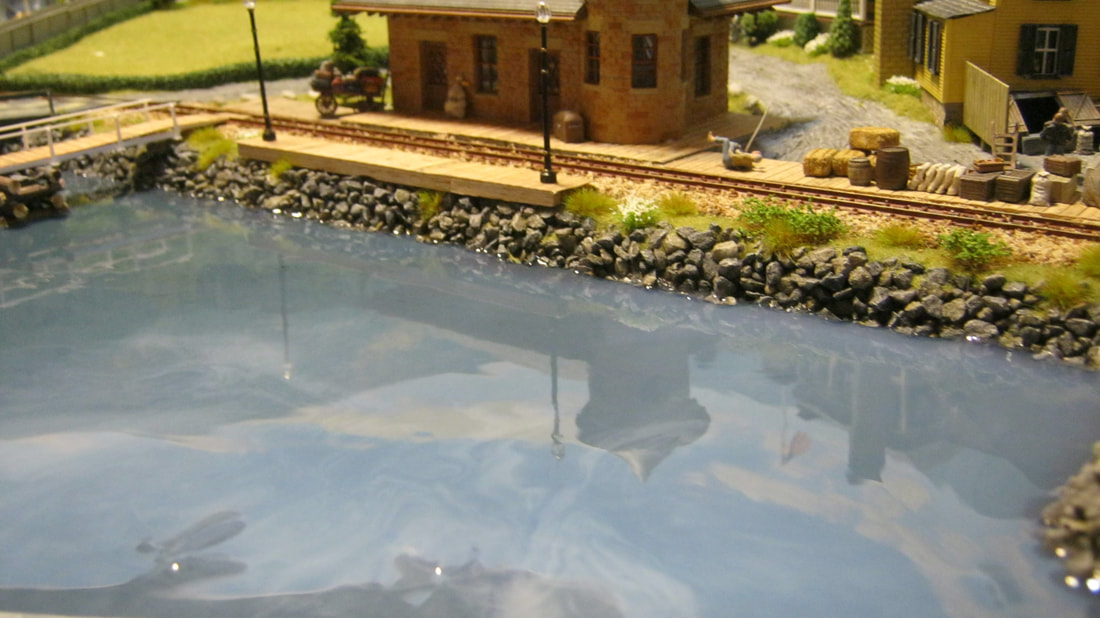
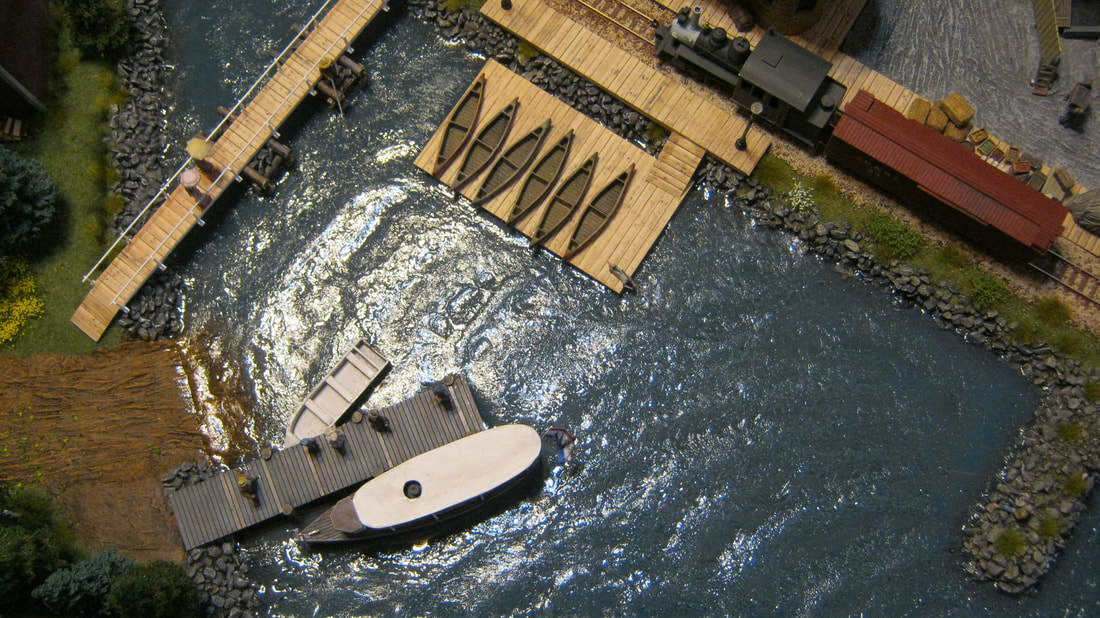
Town Cove is now, for the most part, finished, with three layers of Realistic Water and waves and ripples applied using Woodland Scenics Water Ripples.
The float for the canoes, the rowboat, and the Molly-Chunkamunk were put in place after the first pour of Realistic Water, so that they appear to be 'in' the water. |
|
The fishing lines of the fishermen are Berkshire Junction EZ line, held to the fishing poles with a dot of super glue, and then gently stretched and 'glued' to the water surface with a dot of Water Ripples. I'm very happy with how the water came out. Getting better! Practice, practice, practice.
|
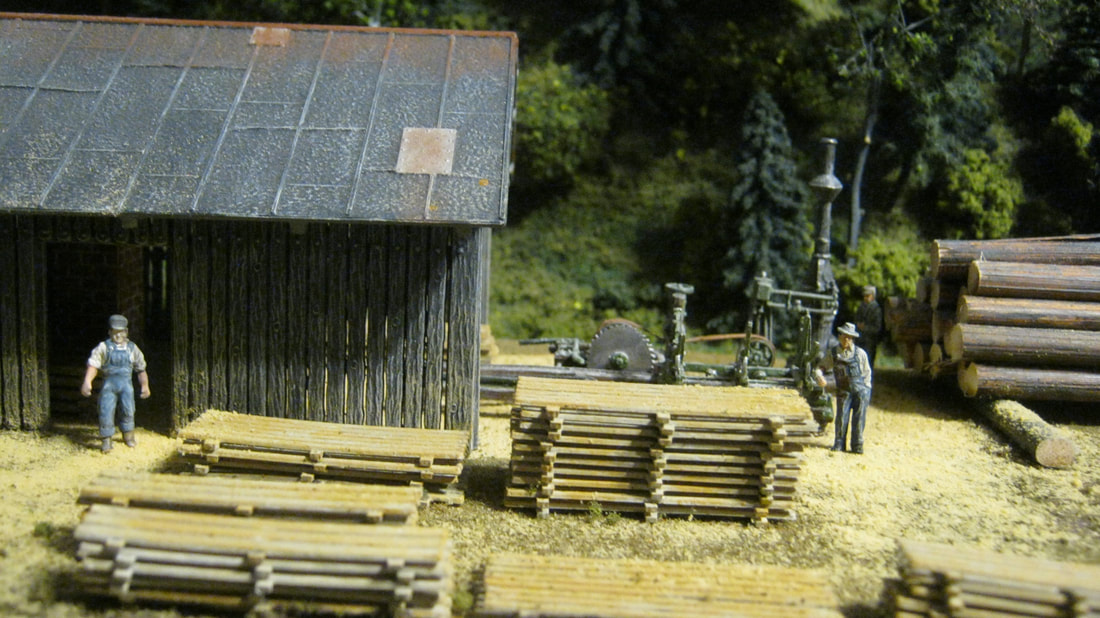
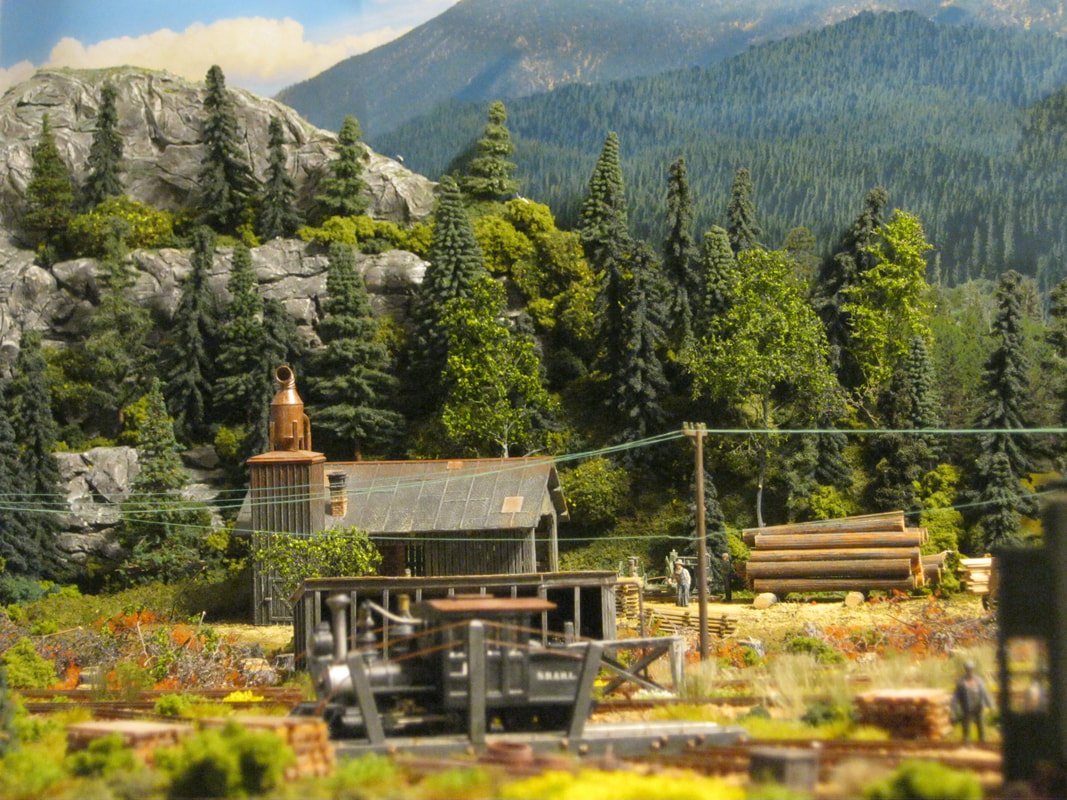
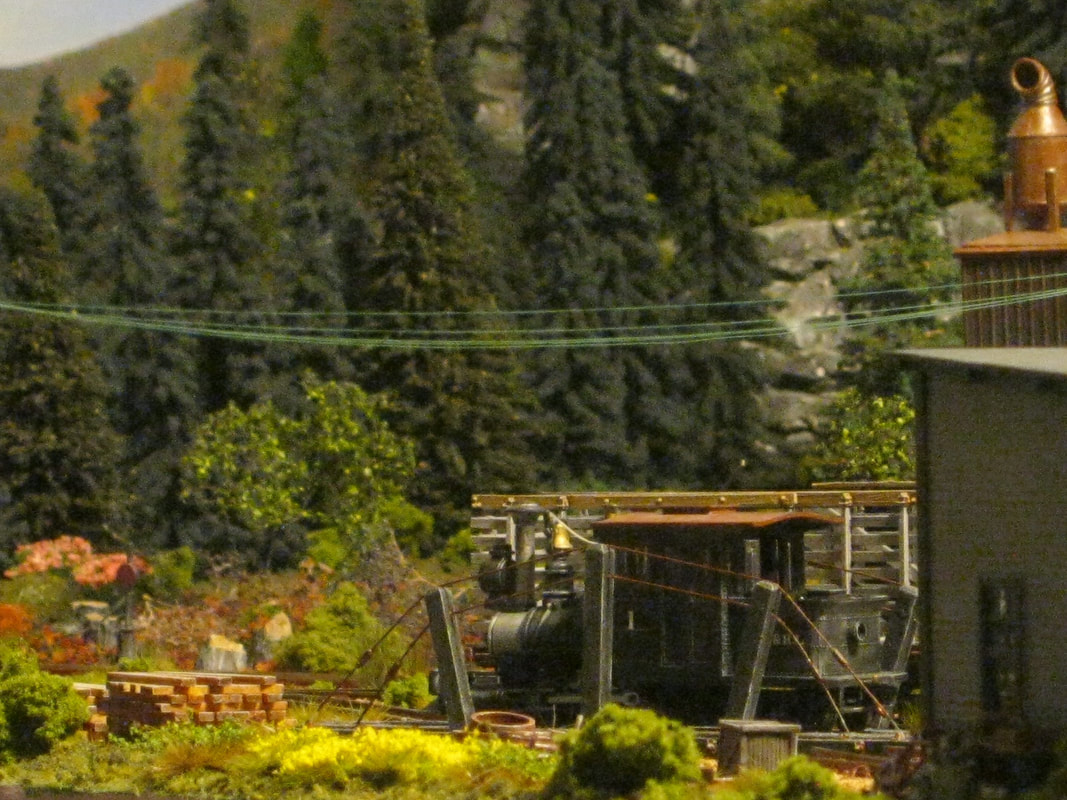
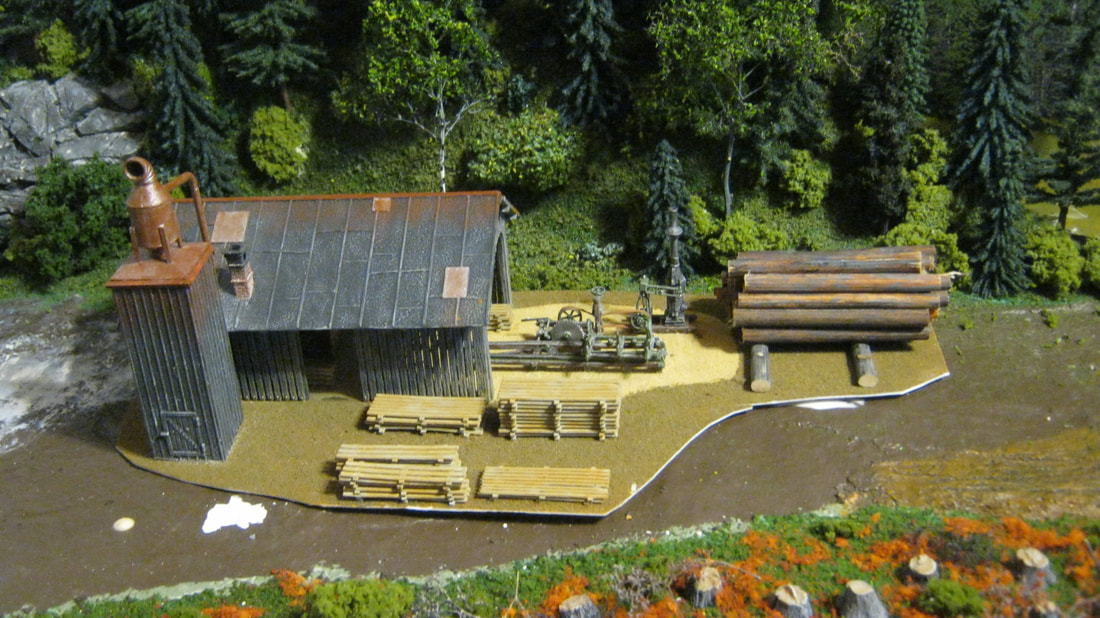
The hill behind the sawmill is Shaper Sheet, covered with plaster cloth, then hydrocal plaster to build up the depth to carve in the granite base. Again, I took my time to carefully choose colors and textures to blend the 3-D hill to the photo background. The mill complex is on sheet styrene for the build, and then will be blended into the surroundings.
|
|
|
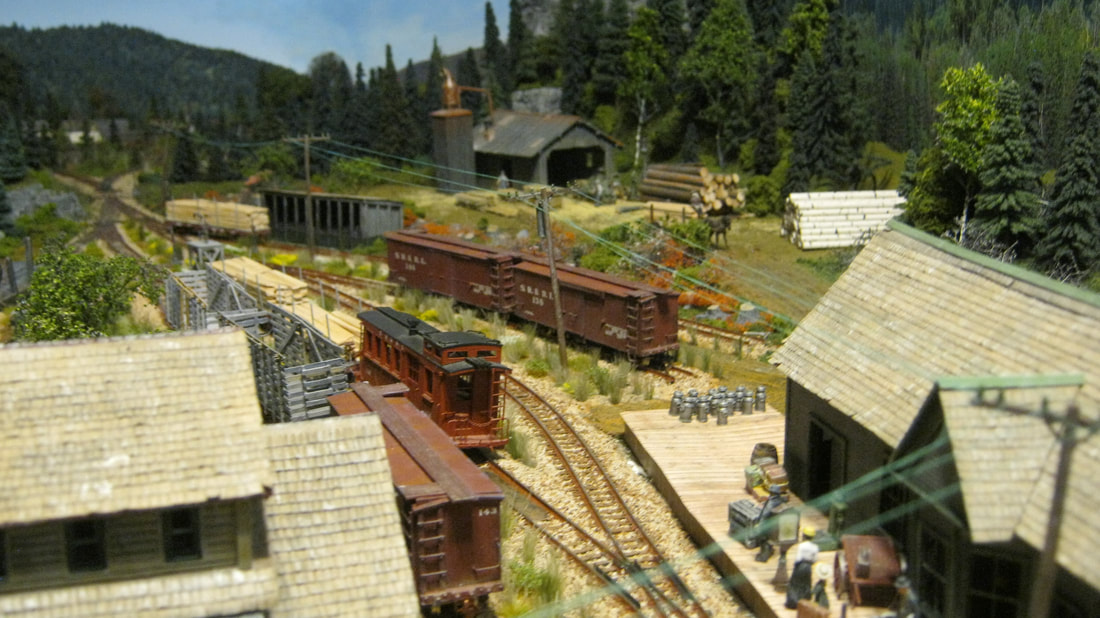
The large outcropping from the left side of the hill is a plaster rock casting, glued in place on the hill and then built up above the outcropping with foam before covering with plaster cloth and then scenery texture. This is where Rangeley ends and Eustis Junction begins.
|